Kessler crane - kc-8 instructions p4.pdf – Kessler Crane: KC-8 User Manual
Page 4
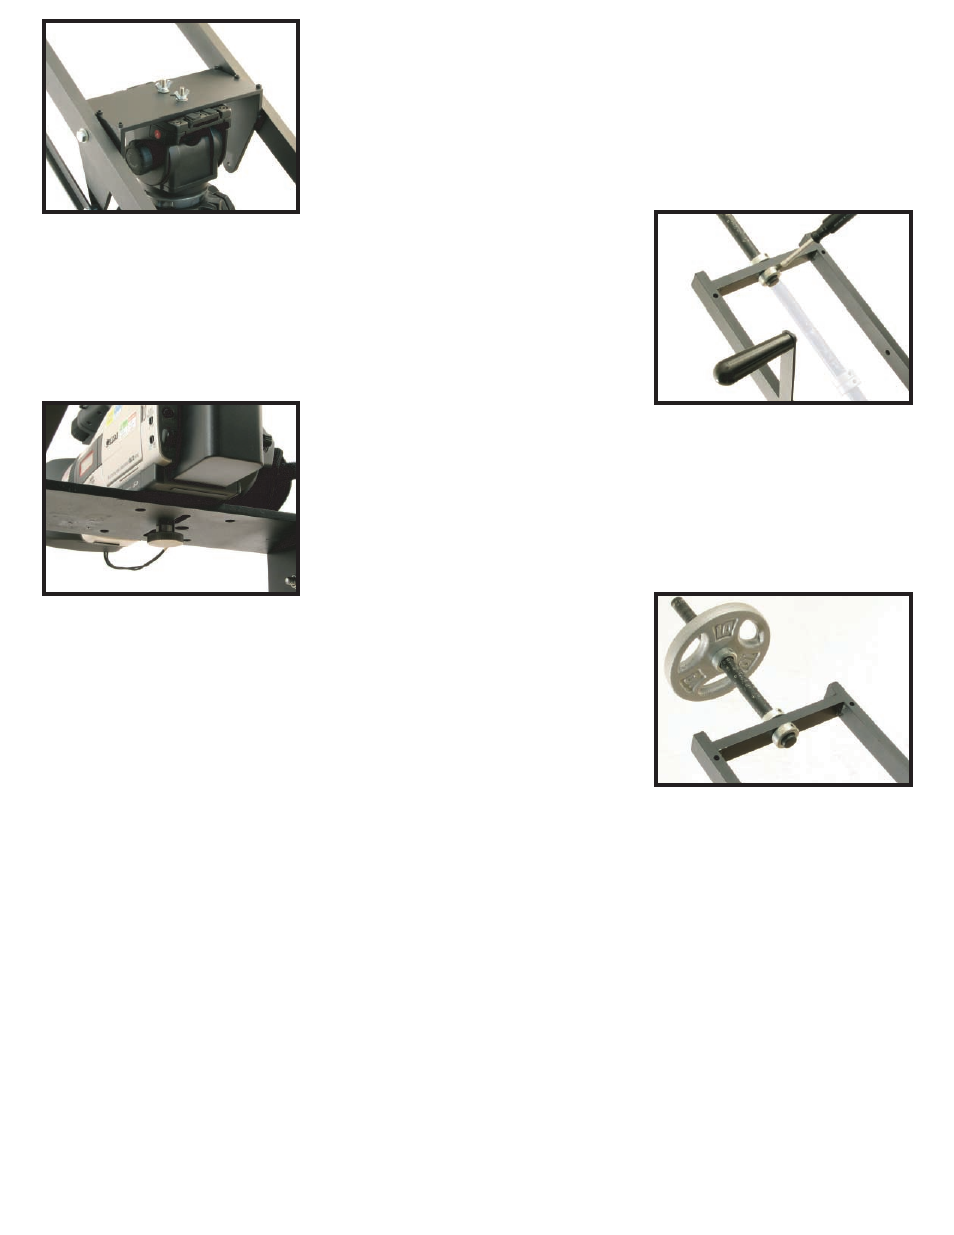
STEP 10
Using a 5/32” Allen wrench, remove the outside weight
bar collar, flip the weight bar 180 degrees so that it
extends beyond the end of the crane’s frame, and reat-
tach the collar.
STEP 11
Mount your camera to the camera basket using the sup-
plied thumb knob.
STEP 9
Pick up the crane and place it on your tripod so that the
pivot plate’s two outer holes line up with the (2) mounting
screws and tighten with the wing nuts.
STEP 12
After the camera is securely mounted, begin adding your
counter balance weights (not included but can be pur-
chased at any sporting goods store – standard weights
with 1” hole). Weights should be applied so that they are
sandwiched by two of the collars anywhere on the weight
bar.
NOTE
You will want to balance the crane PERFECTLY for best results. This can be achieved by
getting the amount of weight as close as possible and then changing the weights positions
on the weight bar. Balance may also be achieved by sliding the bar inside the frame and
positioning the weights there. NEVER exceed 45lbs on the weight bar on either side of
the crane's frame.
To use the crane in automatic mode, simply lock the tripod’s fluid head tilt at any angle. The
angle of the head will reflect the angle of the camera so if you lock the fluid head level, the
camera will remain level as you operate the crane.
To put the crane in manual mode simply leave the tilt lock on the fluid head loose. This will
allow you to tilt the head/camera independently from the travel of the boom.
If your camera weights more than 10lbs, it is advisable to put the camera basket in the under
slung configuration. This will allow easier manual operation of the tilt lever, as the camera
basket will not be so top heavy.
Page 4