E-flite Piper L-4 Grasshopper 250 ARF User Manual
Page 16
16
E-flite Piper L-4 Grasshopper ARF Assembly Manual
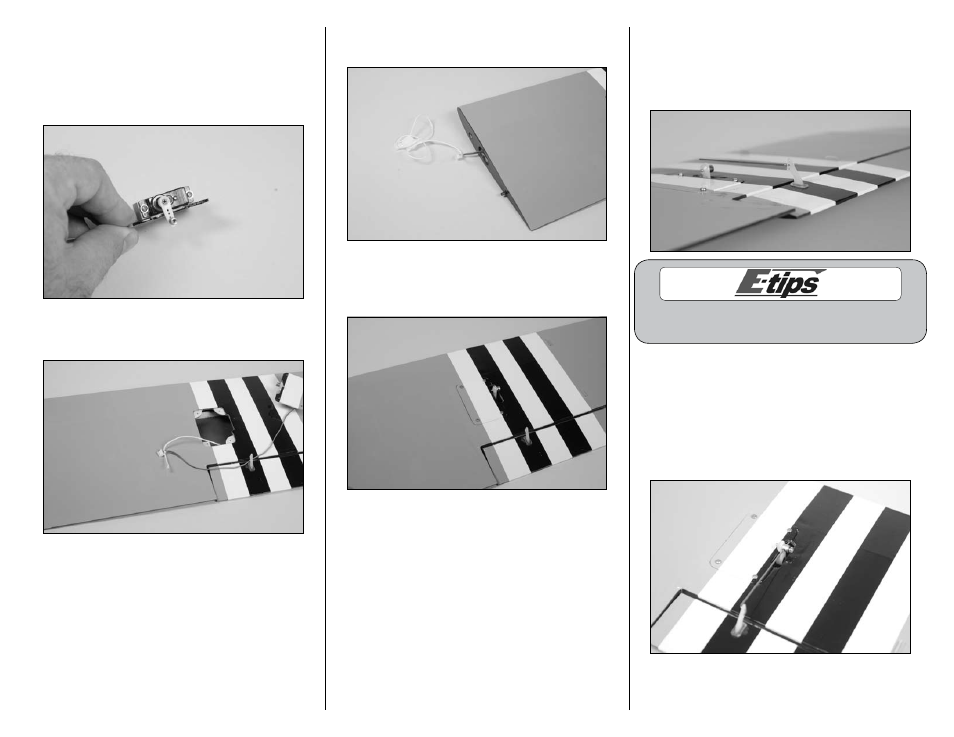
11. Turn the radio system on and check the
operation of the aileron servo. Make sure the
stick and trim for the aileron are centered. Use a
#00 Phillips screwdriver and the screw that was
removed from the servo to attach the servo horn
perpendicular to the servo centerline as shown.
12. Tie the string located in the wing around the
end of the servo lead.
13. Carefully pull the string to pull the servo lead
through the wing.
14. Place the aileron servo cover in position. Use
four 1.5mm x 5mm sheet metal screws and a #00
Phillips screwdriver to secure the cover in the wing.
15. Insert the Z-bend on the 2
3
/
8
-inch (61mm)
aileron pushrod wire through the center hole of the
aileron control horn. The wire should be inserted
through the inside or wing root end of the horn
first.
Always use threadlock on metal-to-metal fasteners
to prevent them from vibrating loose.
16. Turn the radio system on and check the
operation of the aileron servo. Make sure the
stick and trim for the aileron is centered. Slide the
pushrod wire through the brass connector. Center
the aileron so it is aligned with the trailing edge
of the wing. Secure the pushrod wire to the brass
connector using a 2mm x 4mm machine screw and
a #0 Phillips screwdriver.
17. Repeat Steps 1 through 16 to install the
remaining aileron servo and linkage.