Electrical safety warning, Electrical requirements, Electrical connection – Watts 596816 User Manual
Page 5: Timer control technical data, Timer technical application, Sensor valve operation, Correct installation incorrect installation
ELECTRICAL
SAFETY WARNING
WARNING
- Risk of electrical shock - This pump is supplied with a grounding
conductor. To reduce the risk of electric shock, be certain that it is connected only
to a properly grounded grounding type receptacle. The safe operation of this
pump requires that it be grounded in accordance with the National Electrical Code
and local governing codes and regulations.
Electrical Requirements
The operating voltage and other electrical data are marked on the motor label. Make sure
that the motor is suitable for the electrical supply on which it will be used.
Electrical Connection
Insert the 115V plug on the line cord from the pump into a properly grounded 115V outlet.
TIMER CONTROL TECHNICAL DATA
Supply Voltage:
120 VAC, 60Hz
Shortest Switching Interval: 15 minute increment
Switch Modes:
“Timer”, “ON” Override, “OFF” Override
Protection:
Clear plastic cover for dust and moisture protection
of the clock face.
Timer Technical Application
The timer control is designed only for use with the specified
WATTS INSTANT HOT WATER
RECIRCULATING SYSTEM
. Installed indoors on hot water service systems.
The timer control is designed to turn the circulator on and off at preset times, allowing the
user to select operation of the circulator during high use periods of the day.
Page 5
SENSOR VALVE OPERATION
If there is no hot water at the faucet or there
appears to be too much hot water on the cold water
side the following steps will determine if the valve is
operating correctly:
1. Close the cold water stop valve below the sink.
2. Open the cold water faucet.
3. Water should slowly flow from the faucet until
hot water reaches the valve. The flow should
gradually decrease until no water is coming from
the faucet at which time the valve is closed.
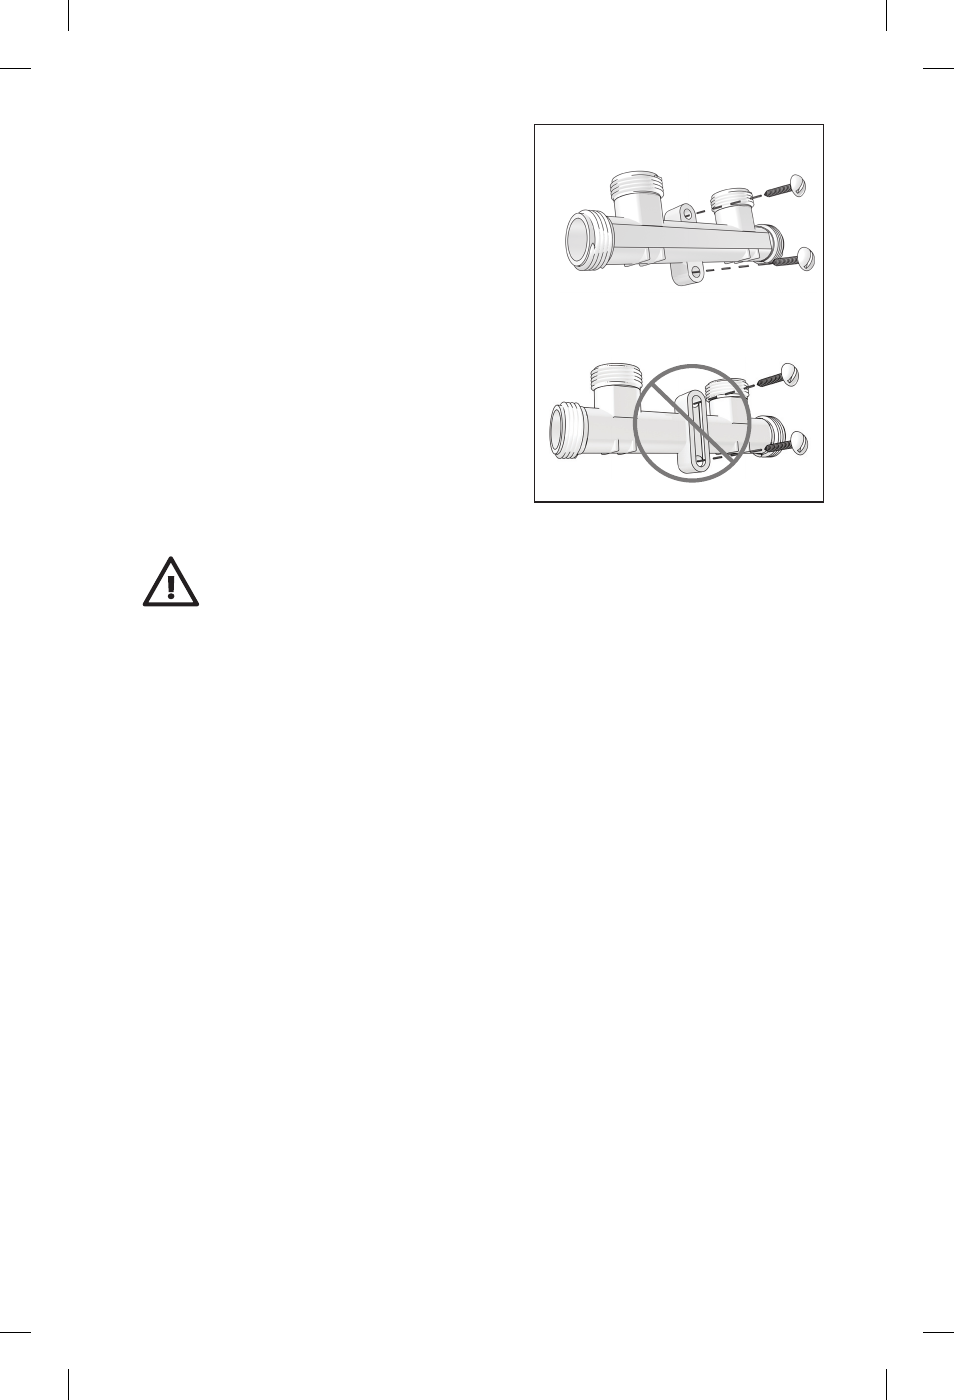
Correct Installation
Incorrect Installation
Hot
Out
Cold
Out
Hot In
Cold In
Figure 1