Hinkley Lighting MERIDIAN 3872SK User Manual
Start here, Assembly instructions
assembly instructions
Family: Meridian Item No. 3872
1. Find a clear area in which you can work.
2. Unpack fixture and glass from carton.
3. Carefully review instructions prior to assembly.
*** The construction of this fixture will be accomplished by first assembling the
fixture’s ring and glass, assembling the main body, hanging the fixture, and then
installing the lens.
start here
3872
SAFETY WARNING: READ WIRING AND GROUNDING INSTRUCTIONS (I.S. 18)
AND ANY ADDITIONAL DIRECTIONS. TURN POWER SUPPLY OFF DURING
INSTALLATION. IF NEW WIRING IS REQUIRED, CONSULT A QUALIFIED
ELECTRICIAN OR LOCAL AUTHORITIES FOR CODE REQUIREMENTS.
1. To assemble main body, attach arms (B) to top plate (T) located at the top of the
of the fixtures center column, using phillips flat head screws (S) - see Drawing 2.
.
2. Remove ball knob studs (5) for cluster plate (C), located just above the sockets.
.
3. Attach perforated diffuser (6) to cluster plate (C) using ball knob studs (5)
removed earlier.
4. Attach previously assembled ring (3) to end of arm (B) using screws (7) and barrel
nuts (8) - see Drawing 1 and 3.
5. Thread center tube (9) into coupler (D) approximately 3/8”. Thread hex nut (E) up
against coupler (D) to secure center stem (9).
8. Please refer to the hanging instruction sheet (I.S. 19-90) provided to hang fixture.
Then refer back to this sheet to install glass.
1. Fixture can now be lamped accordingly.
Drawing 2 .
2. Slip lens (10) onto center tube (9) and hold in position - see
3. Slip washer (11) onto center stem (9) and hold in position.
4. Thread knurl nut (12) onto center stem (9) and tighten to secure glass to fixture.
5. Slip cap (13) onto center stem (9).
6. Thread finial (14) onto center stem (9) and tighten to complete assembly.
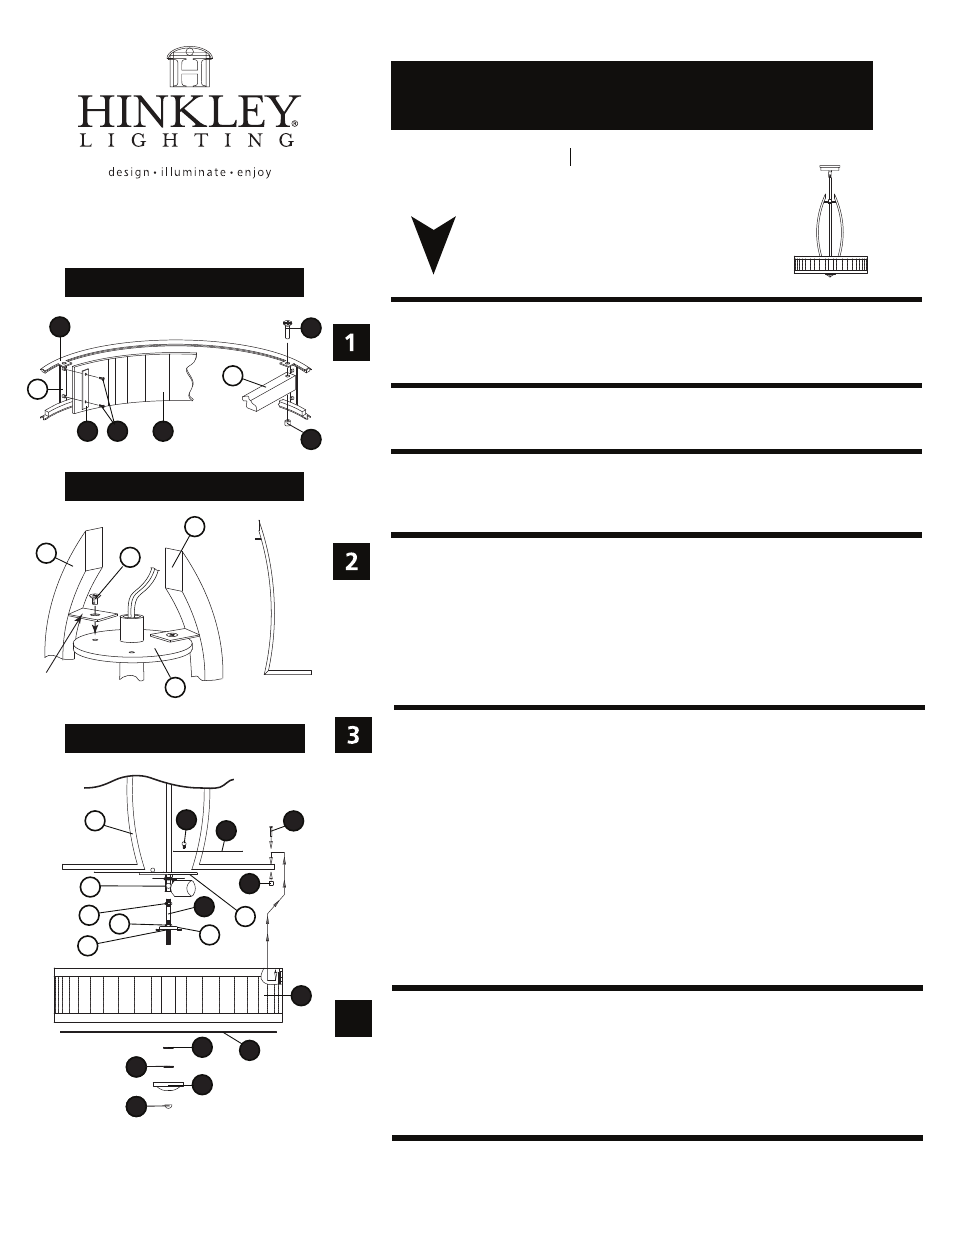
1. To install glass in ring, remove screws (1) and mounting plate (2) from ring assembly (3)
- see Drawing 1.
2. Take one section of glass (4) and place it between the uprights (A) of the ring
assembly (3).
3. Attach mounting plate (2) loosely to the upright (A) to hold glass in position.
4. Repeat steps 2-3 for remaining pieces of glass.
5. After all glass sections (4) have been placed in the cage assembly (3) and all
mounting plates (2) are in place. Screws (1) can be tightened to secure glass.
Drawing 1 - Ring Assembly
Drawing 2 - Fixture Assembly
3
7
A
1
4
2
9.30.09
B
C
8
7
3
8
10
6
9
5
B
D
E
11
13
12
12
12
14
4
Drawing 3 - Fixture Assembly
B
B
T
S
ARM B
PROFILE
TAB
F
G
H
6. Now adjust hex nut (F) located just above the glass support (G) until the top of the
hex nut is 1-1/2” from the bottom of hex nut (E) tightened earlier.
7. Now thread hex nut (H) below glass support (G) up against the glass support to lock
part in place.