Hinkley Lighting BROADWAY FR41431PAL User Manual
Broadway
FR41431PAL
BROADWAY
ASSEMBLY INSTRUCTIONS
Assembly of this fixture will be accomplished by first installing the mounting hardware
to the junction box, making all necessary electrical connections,mounting the
backplate to the wall and then lamping the fixture.
SAFETY WARNING:
Read wiring and grounding instructions [FRIS 18]
and any additional directions. Turn power supply off during installation. If new wiring
is required, consult a qualified electrician or local authorities for code requirements.
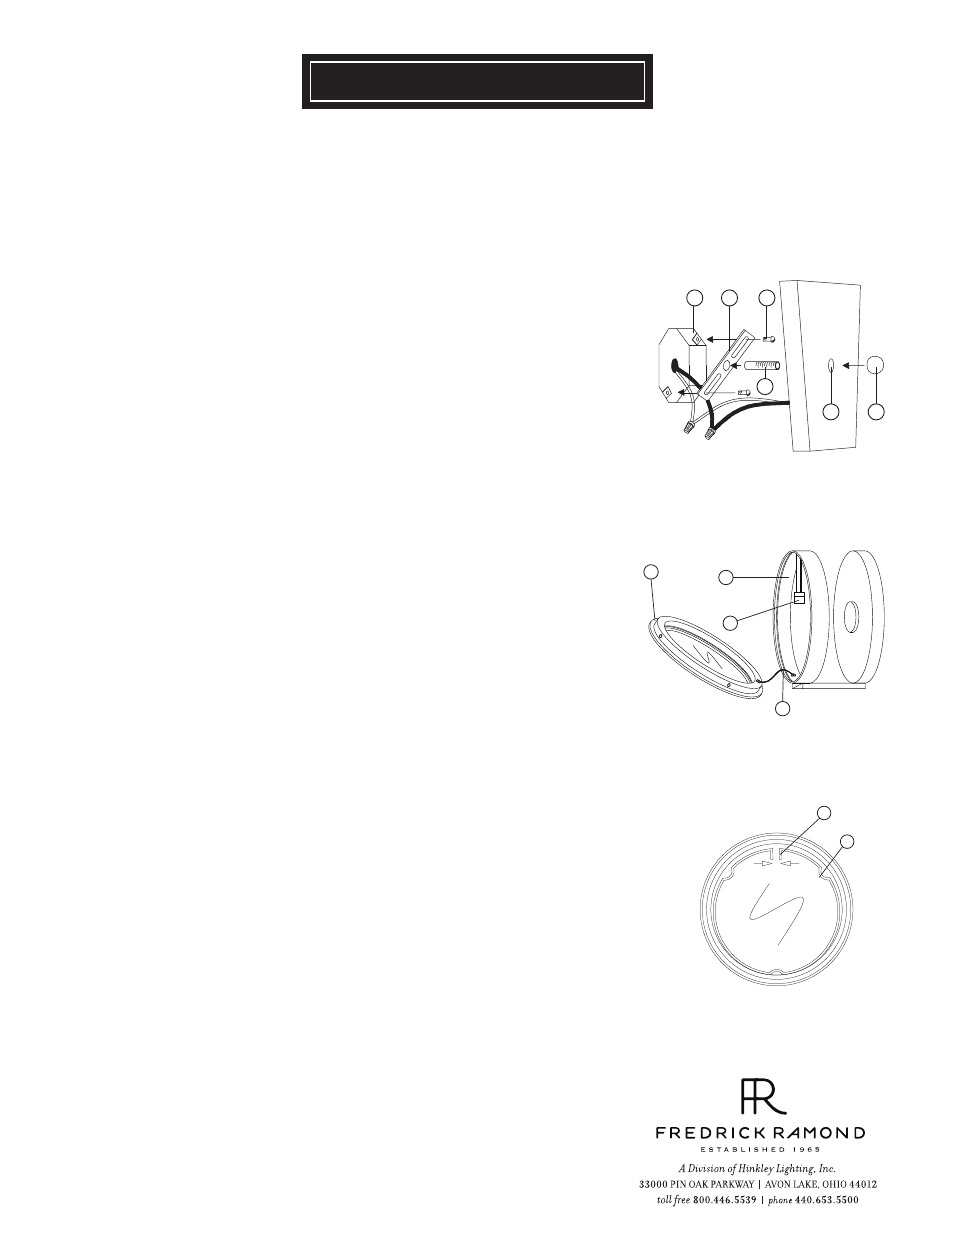
STEP 1
1
Prepare mounting strap (a) by threading nipple into the center hole of
the mounting strap (a), approximately 1/4“- see Drawing 2.
2
Attach mounting strap (a) to junction box (j) using two screws (b) provided.
STEP 2
Make electrical connections from supply wire to fixture lead wires.
Refer to instruction sheet (I.S. 18) and follow all instructions to make all necessary
wiring connections. Then refer back to this sheet to continue installation of this fixture.
STEP 3
1
To mount backplate to wall, slip center hole of backplate (e) over nipple (c) and
hold fixture in position - see Drawing 2.
2
Thread decorative knob (d) onto end of nipple (c) and tighten to secure fixture.
3
Fixture can now be lamped accordingly.
STEP 4
[DRAWING 1]
[DRAWING 2]
Bulbs:
60W G9
Replacement Parts:
GLASS:
R41430gl
4.6.09
d
a
j
e
c
b
1
3
4
2
1
To lamp fixture remove glass retainer ring (2) from main body (1). NOTE: the glass
retainer ring is held in position by spring tension and can be easily removed by pulling
firmly on the edge at the split line. Retainer ring is attached to the fixture by a wire
cable (3) and will not fall when released - See Drawing 2.
2
Lamp fixture with bulbs provided and replace retainer ring by snapping in back in place.
1 Glass is held in glass retainer ring by a “C” shape spring ring (r). To remove, replace, or install glass
it is necessary to pinch the two short tabs (t) of the ring together, after glass is installed ring
can be replaced in same manner -see Drawing 3.
STEP 5
[DRAWING 3]
r
t
3 NOTE: This fixture can also be mounted on the ceiling. The installation
procedure as the same as mounting the fixture to the wall.