Hinkley Lighting ARIA 2302 User Manual
Start he re, Assembly instructions
assembly instructions
Item No. 2302
1. Find a clear area in which you can work.
2. Unpack fixture and glass from carton.
3. Carefully review instructions prior to assembl
y.
start he re
230
2
*** The construction of this fixture will be accomplished by first assembling the
main body, hanging the fixture, and then installing the fixture glass.
2
3
SAFETY WARNING: READ WIRING AND GROUNDING INSTRUCTIONS (I.S. 18)
AND ANY ADDITIONAL DIRECTIONS. TURN POWER SUPPLY OFF DURING
INS TALL ATION. IF NEW WIRING IS REQUIRED, CONSULT A QUALIFIED
ELECTRICIAN OR LOCAL AUTHORITIES FOR CODE REQUIREMENTS.
6.1.12
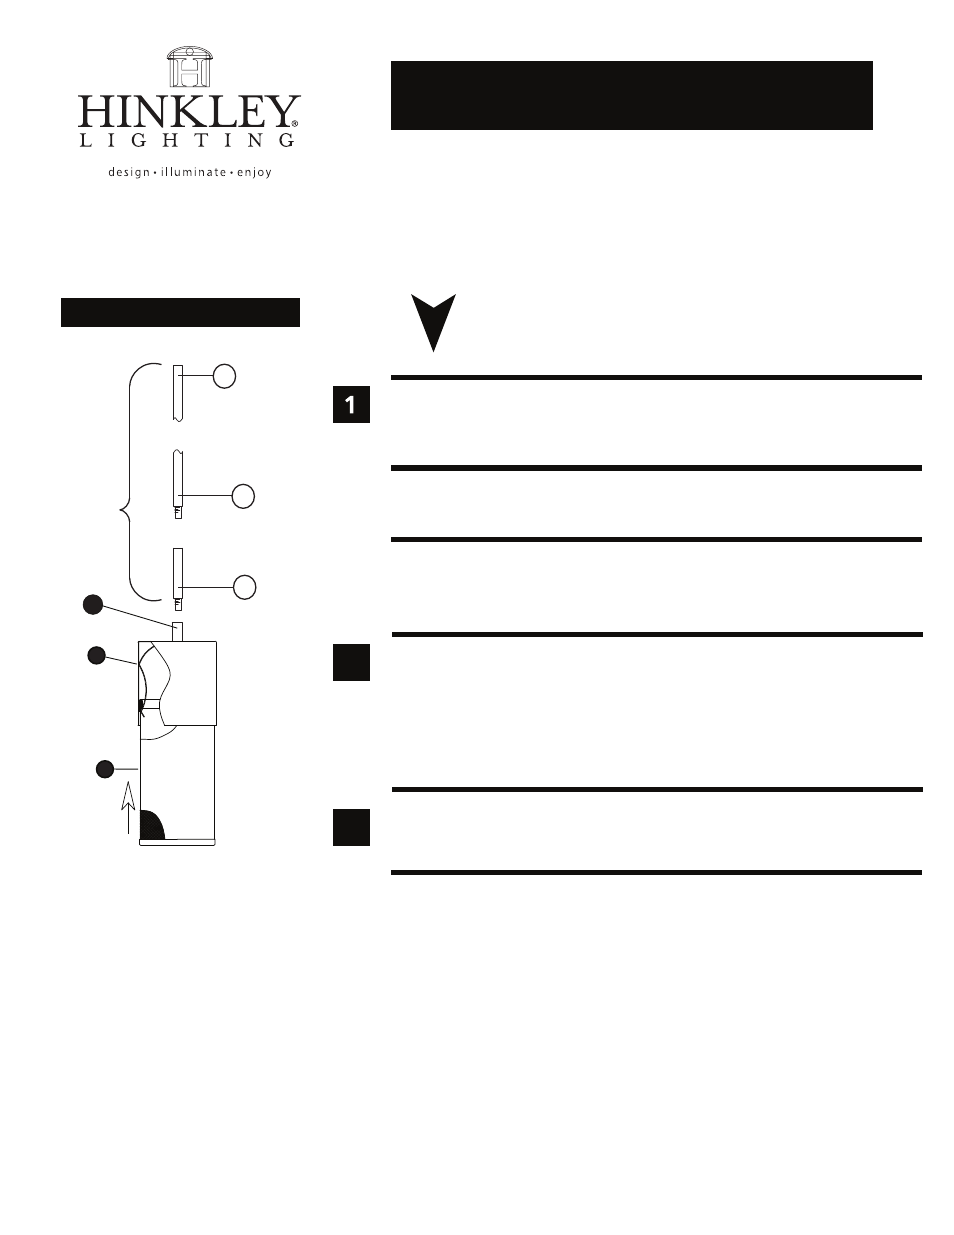
Drawing 1 - Fixtu
re Assembly
1. It will be necessary to determine the total lenght of rods (R) you will require to
hang your fixture at the desired height. Fixture is supplied with 1 - 6” and 2 - 12” rods.
2. After determining the rod lenghts needed, slip the first rod along the wire and
thread into coupler (1). Continue to add rods as needed.
3. To finish installation of fixture please refer to instruction sheet (I.S. 2302MI)
provided. Then refer back to this sheet to install glass.
R
REQUIRED
LENGTHS
R
R
1
H I N K L E Y L I G H T I N G 33000 Pin Oak Parkway Avon Lake, Ohio 44012 800-446-5539 www.hinkleylighting.com
2
3
1. Slip mesh cylinder (3) into top of fixture making sure top edge engages
clip (2).
- see Drawing 2.
SHADE INSTALLATION: