Hinkley Lighting LUXE FR31557 User Manual
Luxe
fR31557 BNI/PCM/VBZ
Luxe
ASSEMBLY INSTRUCTIONS
Assembly of this fixture will be accomplished by first assembling the main body,
determining the rod lengths required, attaching the mounting hardware to the junction box,
making all necessary electrical commections, hanging the fixture, and then installing
the glass.
SAFETY WARNING:
Read wiring and grounding instructions [FRIS 18]
and any additional directions. Turn power supply off during installation. If new wiring
is required, consult a qualified electrician or local authorities for code requirements.
STEP 1
STEP 2
1
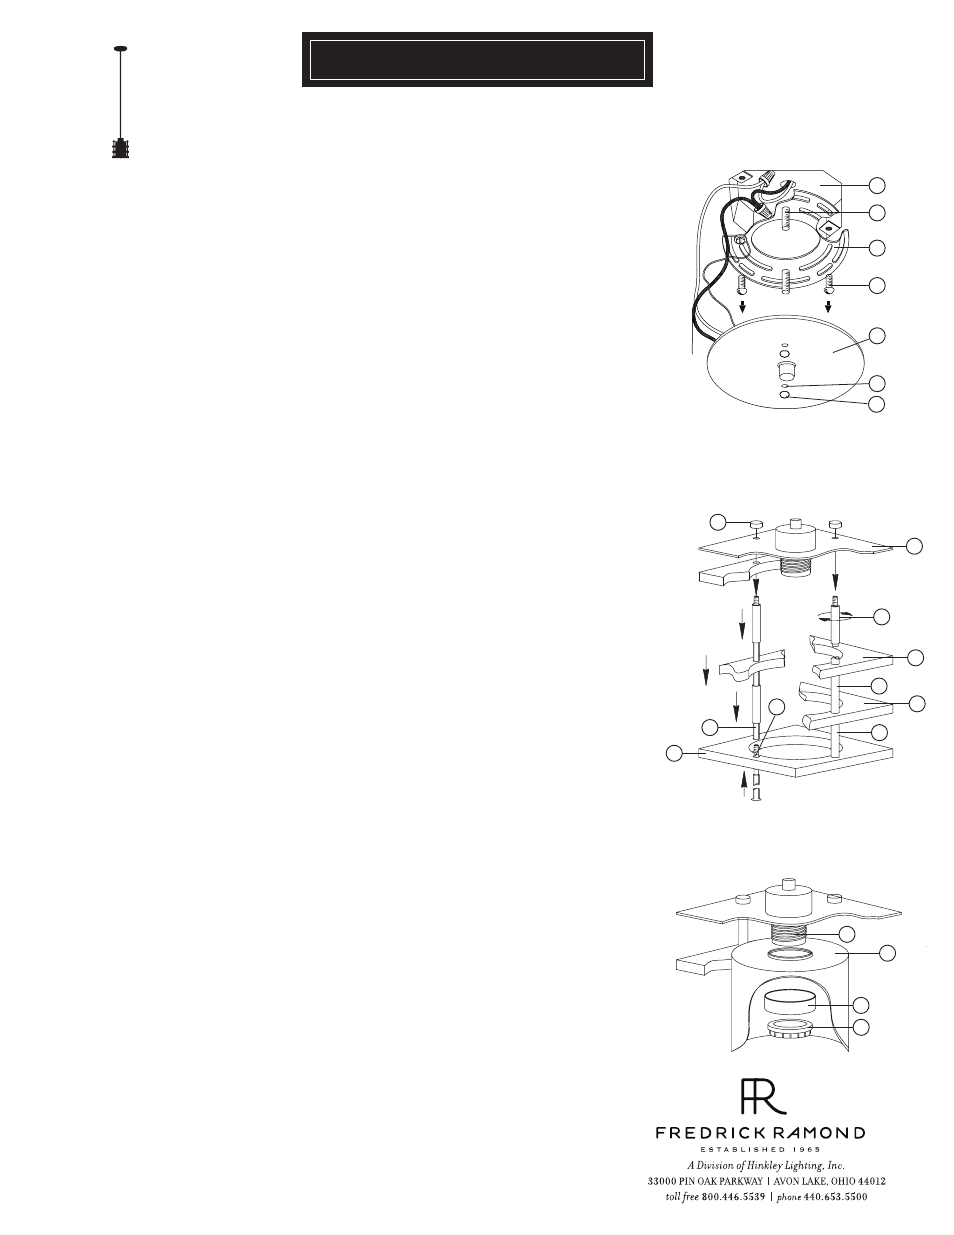
Prepare mounting strap (a) by threading the two longest screws (b) into the back
of the mounting strap (a), making sure the holes into which the screws are
threaded match the spacing of holes (d) in the backplate (e)
- See Drawing 2.
2
Attach mounting strap (a) to junction box (j) using two screws (c).
3
Make electrical connections from supply wire to fixture lead wires. Refer to
instruction sheet [FRIS18] and follow all instructions to make all necessary
wiring connections. Then refer back to this sheet to continue installation of
this fixture.
4
To mount fixture, slip the two mounting screws (b) through the two mounting
holes (d) in the canopy (e).
5
While holding fixture in place, thread the two ball knobs (f) on to the end of the
mounting screws (b), and tighten.
STEP 3
1
Remove ring (8) and spacer (9) from socket (10) - See Drawing 3.
2
Slip glass (11) over socket and hold in position.
3
Slip spacer (9) and thread ring (8) onto socket (10) and tighten.
4
Fixture can now be lamped accordingly.
[DRAWING 1]
[DRAWING 2]
Bulbs:
100W MED.
Replacement Parts:
GLASS: R31557OPAL
j
a
c
e
d
f
b
11.25.09
[DRAWING 3]
1 The main body is assembled using the 4 uprights and spacers. the uprights and
spacers must be disassembled before starting the assembly process. First remove the
large barrel knob (2) form the top of the upright (1) - See Drawing 2.
Unthread top spacer (3) from upright (1).
Slip off spacers (4) and (5) from upright (1).
Slip one upright (1) through each of the four small holes (a) in one of the clear
crystal pieces (6).
Slip one spacer (5) over each upright (1) slip another crystal piece (6) onto uprights (1).
Slip one spacer (4) over each upright (1) slip the final crystal piece (6) onto uprights (1).
Thread a top spacer (4) onto each of the uprights and tighten. HAND TIGHTEN ONLY.
DO NOT use pliers to tighten final spacer (3). Over tightening could cause the
crystal to chip.
Slip top cover (7) onto the uprights and thread barrel knob (2) onto end of uprights to
complete main body assembly.
2
3
4
5
6
7
8
1
6
2
3
4
5
a
7
6
6
11
9
8
10