Hinkley Lighting CAMERON FR42342PCM User Manual
Fredrick ramond
fR42342pCM
FREDRICK RAMOND
ASSEMBLY INSTRUCTIONS
Assembly of this fixture will be accomplished assemblying main body,
attaching the mounting strap to the
electrical connections, and then hanging the fixture from the ceiling.
SAFETY WARNING:
Read wiring and grounding instructions [FRIS 18]
and any additional directions. Turn power supply off during installation. If new wiring
is required, consult a qualified electrician or local authorities for code requirements.
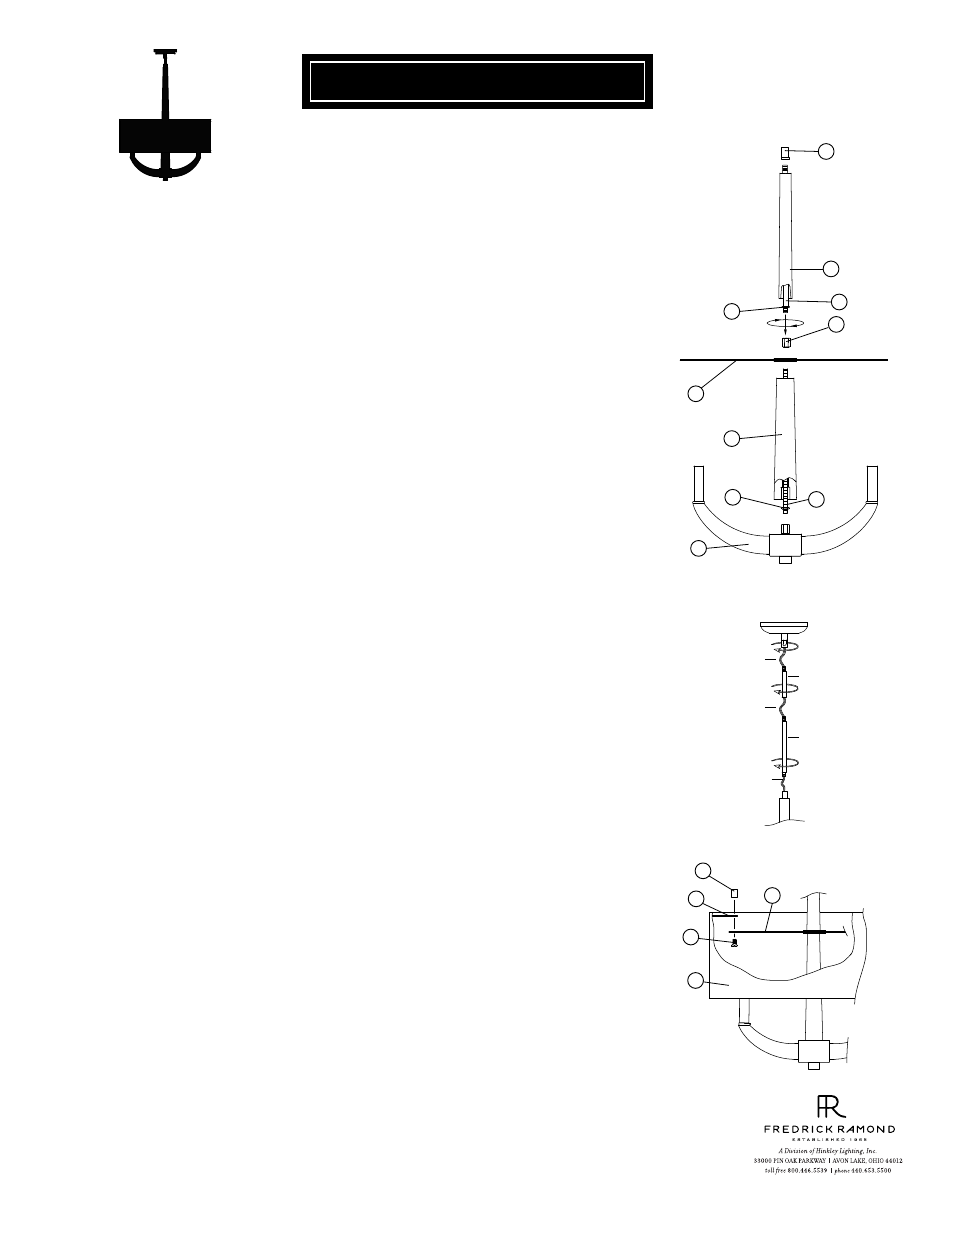
STEP 1
[DRAWING 1]
[DRAWING 2]
Replacement Parts:
SHADE: R 42342
S
H
01.01.13
junction box, then making all necessary
1
2
Slip stem (b) along wire and thread into coupler (b2) approximately 3/8”. Tighten
hex nut (c) against coupler (b2) to lock stem (b) in place - see Drawing 1.
Slip wood column (d) along wire and over stem (b), followed by shade bracket (e).
Thread hex coupler (2) onto end of center stem (b) and tighten to secure parts.
Slip center tube (1) along wires and thread tube into coupler (2), located on the
top of center column (c), approximately 3/8”. Tighten hex nut (h) down onto
coupler (2) to lock center tube (1) in place.
Slip top wood center column (3) over center tube (1) and align sides of top column
with sides of lower wood column (c) on fixture main body.
Slip coupler (4) along wire and thread onto top of exposed center tube (1), and
tighten.
3
1
2
Fixture is ready for installation.
Determine the desired height the chandelier will be installed at.
The fixture is supplied with 1-6” stem and 2-12” stems. Determine what combina-
tion of stems is needed to achieve desired length - see Drawing 2.
Slip stems over wire and thread first stem onto top of chandelier. Repeat this process
until all required stems are threaded together.
Slip wire through center of canopy swivel and thread onto stem assembly.
3
4
stem
wire
wire
wire
stem
STEP 2
STEP 3
[DRAWING 3]
1
2
3
To attach shade (7) , slip shade up around main body assembly and set shade tab (b)
on top of fixture arm (a).
Slip screw (8) through hole in fixture arm (a) and shade tab (b) and thread barrel
knob (9) onto end of screw (8) to secure shade.
Fixture can be lamped accordingly at this time.
4
7
b
a
8
9
3
1
2
4
c
h
b
a
d
e
5
6