Hinkley Lighting PANDORA FR42404BRC User Manual
Pandora
FR42404BRC
PANDORA
ASSEMBLY INSTRUCTIONS
Assembly of this fixture will be accomplished by first determining the length of stems
required, attaching the mounting strap to the junction box, making all necessary
electrical connections, hanging the fixture from the ceiling and then installing the
fixture shade.
SAFETY WARNING:
Read wiring and grounding instructions [FRIS 18]
and any additional directions. Turn power supply o
n. If new wiring
is required, consult a qualified electrician or local authorities for code requirements.
STEP 1
1
Determine the overall length you will need the assembled fixture to be.
2
Determine what stems will be needed to achieve the overall length you
require. (Additional stems are available and can be ordered. Ask your local
Fredrick Ramond representative or visit www.fredrickramond.com for
information).
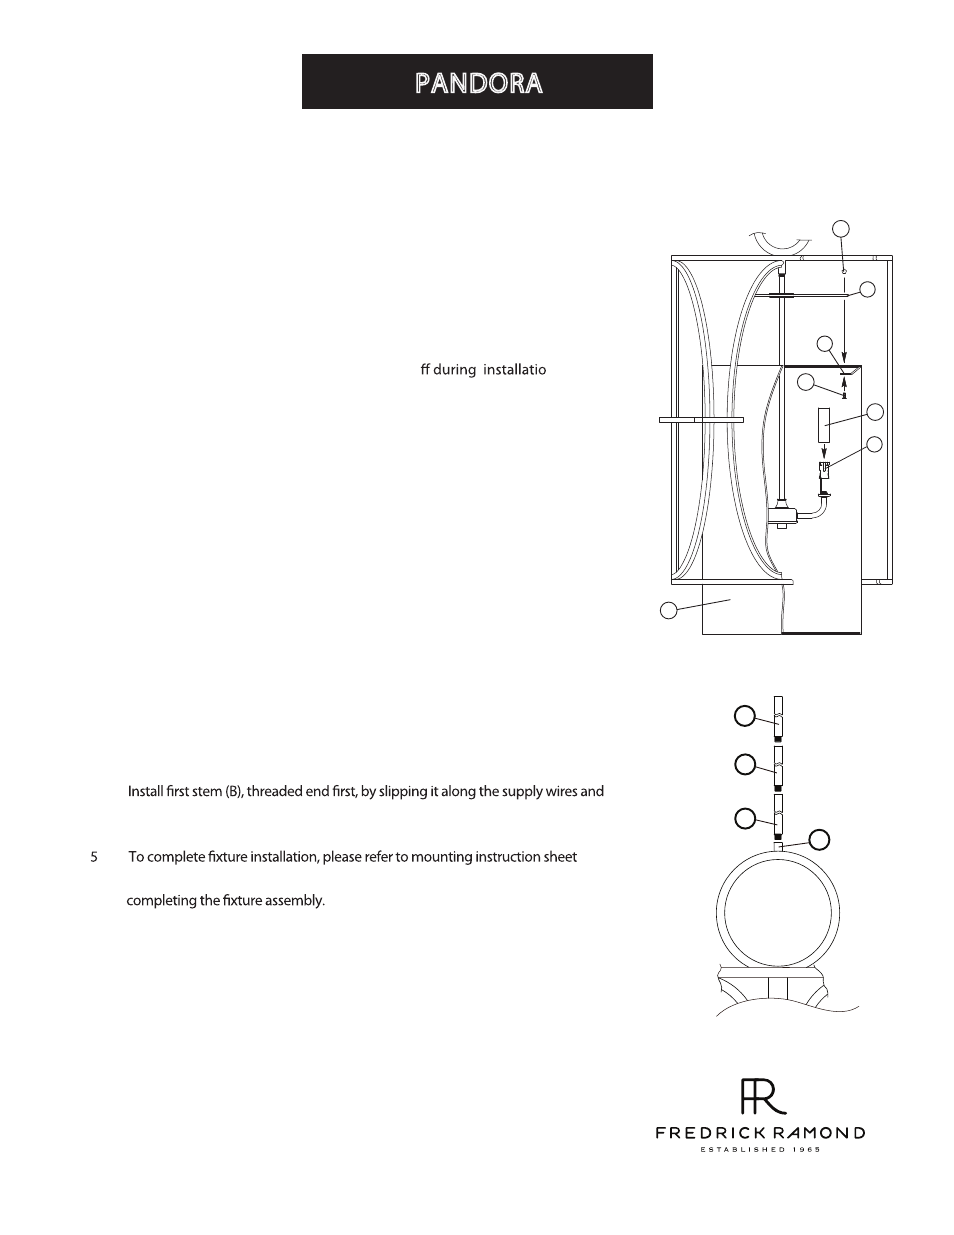
3
and threading it into coupler (A) - see Drawing 2.
4
Continue adding stems (C) in this fashion until the desired lenght is achieved.
{IS-19-91] supplied and then refer back to this sheet for instruction on
STEP 2
[DRAWING 1]
[DRAWING 2]
Bulbs:
60W CAND.
Replacement Parts:
SHADE: R42404SH
01.01.12
800.421.3517 WWW.FREDRICKRAMOND.COM
B
C
A
C
1
2
3
s
B
A
4
1 Slip candle sleeves (1) over sockets (S) - see Drawing 1.
2 To install cage (2), slip shade into cage assembly (C) from the bottom.
3 Now align holes in shade tabs (A) with holes in cage assembly arms (B).
4 Slip flat head screw (3) through the previously aligned holes from the bottom
and thread on ball knob (4) to secure shade.
5 Fixture can be lamped accordingly at this point.