Installation of magic net, Configuration of magic net – Metrohm VoltIC pro I User Manual
Page 11
Application Bulletin 356
Installation instruction for «VoltIC pro I»
Page 11 of 18
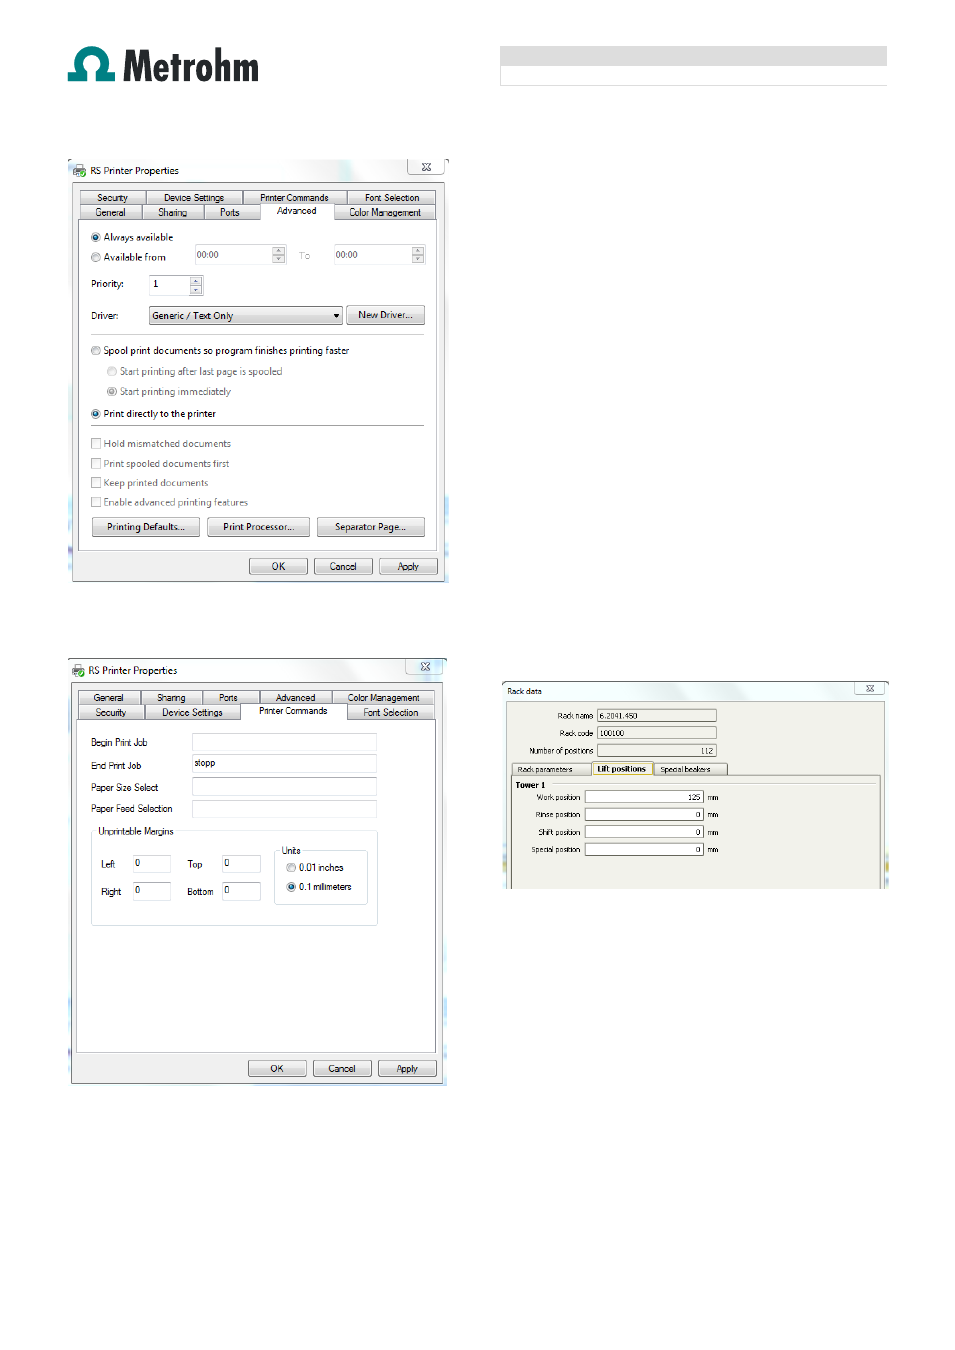
Enter «stopp» in the field «End Print Job» under «Printer
Commands»
Click «Apply» and «OK».
3.2
Installation of MagIC Net
TM
All programs must be shut down first. Install MagIC Net
TM
(MagIC Net
TM
CD). All the standard directories proposed by
the program should be accepted. Restart windows.
Connected USB devices are automatically recognized when
MagIC Net
™
is started. The Microsoft Installation Wizard is
accepted and executed. After confirmation of the
automatically generated request, the devices are stored in
the configuration. The devices are predefined as «850
Professional IC 1» and «858 Professional Sample
Processor 1». Name them accordingly, if other names
appear in your configuration (e.g. due to changed setting on
your computer).
3.3
Configuration of MagIC Net
TM
In the window configuration, the 850 Professional IC, the
858 Professional Sample Processor and the columns
Metrosep A Supp 5 - 150/4.0 and Metrosep C 4 - 100/4.0
are visible. Add and define the eluents and the suppressor
solutions.
The settings for the rack require a «work position» fitting to
the respective rack (e.g. 125 mm for rack 6.2041.450).
Also define an «External 1» position to access the rinsing
station for rinsing the needle. The needle position is in the
inner compartment which corresponds to an angle of ~116°
and a work position of 120 mm. The exact angle depends
on your installation (see chapter 2.4).
For the outer compartment, an external position 2 can be
defined with an angle of ~110° and a work position of 60
mm. The external position 2 could be used as drain position
(e.g. to expel sample directly to the waste), however, it is
not carried out during the time program of method VoltIC pro
I.