Bendix Commercial Vehicle Systems AD-SP SYSTEM PURGE AIR DRYER 10/04 User Manual
Page 9
9
Purge Valve Maintenance Kits
Purge Valve
Assembly Type
Configuration /
Installation
Piece
Number
Purge Valve Assembly
Kit for climate conditions
above -40°C (-40°F)
Bendix
®
AD-IP
®
Air Dryer
K022105
Bendix
®
AD-IP
®
EverFlow
®
Air Dryer
Module
AD-IP
Drop-In
Air Dryer
K031560
Arctic Purge Valve
Assembly Kit for climate
conditions between
-40°C to -50°C
(-40°F to -58°F)
AD-IP
Air Dryer
K031559
AD-IP
EverFlow
Air Dryer Module
AD-IP
Drop-In Air Dryer
K031561
Purge Valve Assembly
Kit for climate conditions
above -40°C (-40°F)
Bendix
®
AD-IP
®
Air Dryer
Discharge Line Unloader
K031562
Arctic Purge Valve
Assembly Kit for climate
conditions between -40°C
to -50°C (-40°F to -58°F)
AD-IP
Air Dryer Discharge
Line Unloader
K031563
Maintenance Kits
Description
Piece
Number
Cartridge Bolt Kit
109498
Desiccant Cartridge Service New
065624
Desiccant Cartridge Remanufactured
109493X
Bendix
®
PuraGuard
®
Coalescing Cartridge Kit -
Service New
065624PG
PuraGuard Coalescing Cartridge Kit -
Reman Exchange
109493PGX
Delivery Check Valve Kit
109494
Exhaust Cover Kit
5011327
Extended Purge Kit 3/8" U-Bolt; 90in
3
Reservoir
5012561N
Extended Purge Kit 3/8" U-Bolt; 288in
3
Reservoir
5008972N
Extended Purge Kit 1/2" U-Bolt; 90in
3
Reservoir
5005309N
12 Volt Heater & Thermostat Kit
109495
24 Volt Heater & Thermostat Kit
109496
Mounting Bracket Kit
5001247
Silencer Kit
K021189
Wiring Harness & Splicing Kit
109871N
2. Drain
all reservoirs to 0 psi. Compressor discharge
line may still contain residual pressure.
3. Identify and disconnect the three air lines from the end
cover and note the position of end cover ports relative
to the vehicle.
AD-IP
®
AIR
DRYER END
COVER
LOCKING LATCH
(MUST BE INSERTED UNTIL IT
SNAPS OVER THE MATING CONNECTOR
ON AD-IP
®
AIR DRYER
TOP VIEW
SIDE VIEW
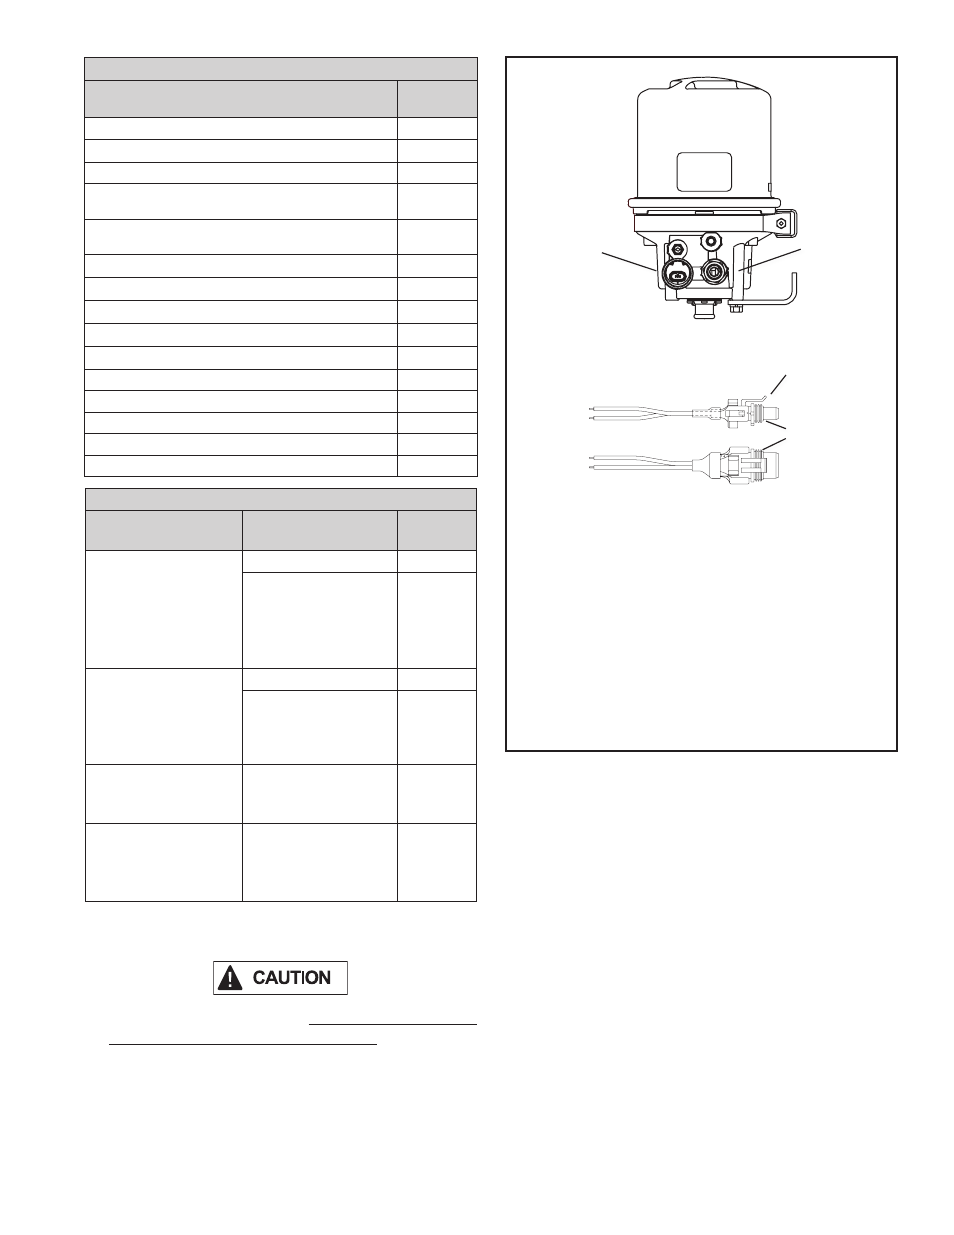
FIGURE 7 -
BENDIX
®
AD-IP
®
AIR DRYER HEATER AND
THERMOSTAT CONNECTOR
A two lead wire harness with attached weather resistant
connector is available as a service part. One of the two
leads is connected to the engine “kill switch” or ignition while
the other must be connected to a good vehicle ground. A
fuse is installed in the lead carrying vehicle power; install
a 10 amp fuse for the 12 volt heater and a 5 amp fuse for
the 24 volt heater.
Use 14 AWG wire if it is necessary to lengthen the wire
harness leads. Make certain all splices are weatherproofed.
Tie wrap or support all electrical wires leading to the AD-IP
air dryer.
WEATHERPROOF
ACCORDIAN
SEAL
HEATER &
THERMOSTAT
CONNECTOR
4. Unplug the vehicle wiring harness from the heater
and thermostat assembly connector on the end cover
assembly.
5. Remove the four bolts that secure both the upper and
lower mounting brackets to the vehicle, and remove
the air dryer from the vehicle.