Mount the shunt module – Rockwell Automation 2093-ASP06 Kinetix 2000 Shunt Module Installation Instructions User Manual
Page 5
Kinetix 2000 Shunt Module 5
Publication 2093-IN002A-EN-P - December 2006
Mount the Shunt Module
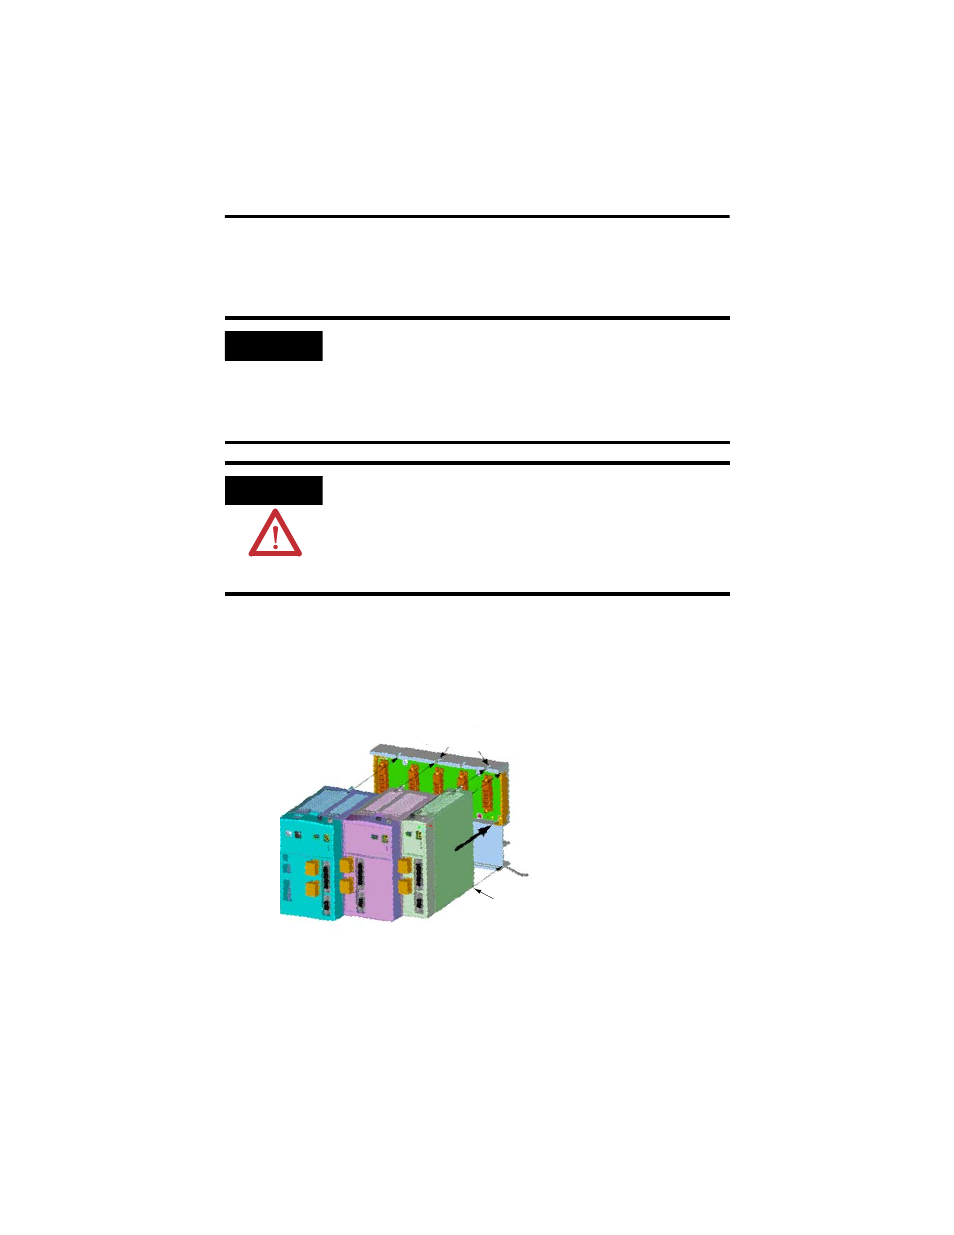
Follow these steps to mount a Kinetix 2000 shunt module on the power rail.
1. Align the module locking screw with its corresponding slot on the power rail.
2. Push the module straight forward, by applying force at the top and bottom edges of
the front cover.
The module is fully seated when each locking clip snaps into the bottom of the power
rail, and the locking screw boss is flush at the top of the power rail.
3. Torque mounting screw to 0.7 Nm (6 lb-in).
IMPORTANT
The shunt module is mounted to the right of the last AM, except the
2093-PRS8S power rail requires it be mounted in the last slot.
Do not mount the shunt module on a power rail with a follower IAM in a
common bus application. The follower IAM will disable an external or
rail-mounted shunt module.
ATTENTION
To avoid damage to the pins located on the back of each module and to make
sure that module pins mate properly with the power rail, install modules as
shown below.
The power rail must be mounted with the connectors in an upright or vertical
orientation to the panel. This provides proper cooling of the modules. Do not
mount modules if the power rail is not within 3° of vertical.
Top Front View of
Double-wide AM (2093-AM0x)
Single-wide AM (2093-AMPx)
Locking Screws
Top Front View of
IAM
(2093-AC05-MPx)
Locking clips at bottom of
module are not visible.
Shunt module (2093-ASP06) and
slot filler (2093-PRF) are not shown.