Rockwell Automation 6189 Accessory Mounting Brackets and Covers for 6180 Computers User Manual
Page 4
Accessory Mounting Brackets and Covers
4
4. Connect the cable connectors to the floppy drive. Connectors are
keyed so they cannot be installed backwards.
5. Align the floppy drive/bracket (or CDROM) and chassis
mounting holes and secure the with the 4 mounting screws
provided with the bracket (or CDROM). Tighten screws to a
torque of 6-8 in. lbs (.7-.9 N
Sm).
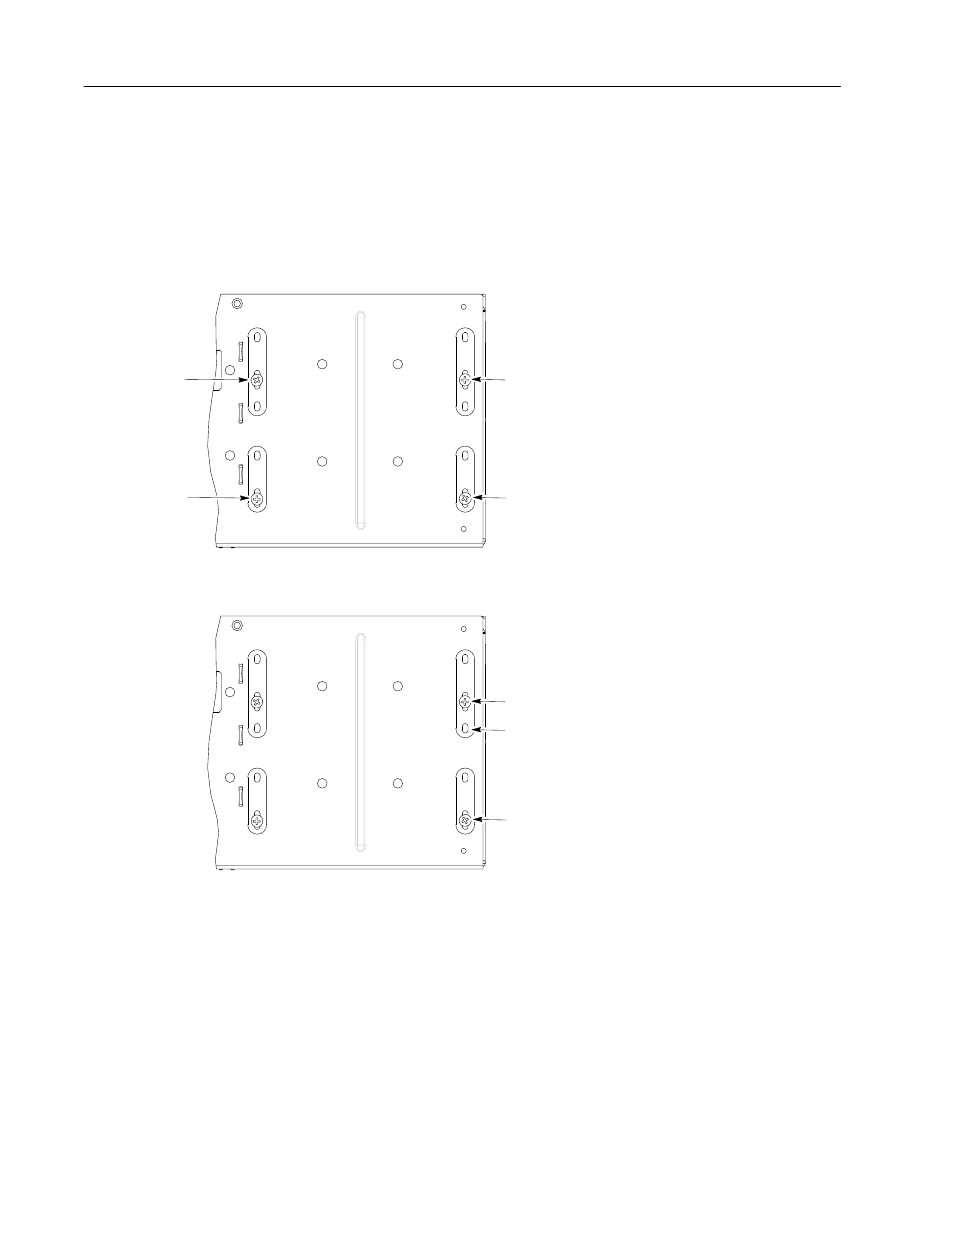
6180 Computer (Bottom View)
Front
Use these chassis holes for both rear and
front mounting of a floppy drive. For front
access mounting, use the rear hole pairs on
the mounting bracket. For rear access
mounting, use the front hole pairs on the
mounting bracket.
6180 Computer (Bottom View)
Front
For front access mounting of a CDROM
drive, use chassis hole pairs 2 and 5 and
the front hole pairs on the CDROM.
For Floppy Drive/Bracket Assembly
For CDROM Drive
2
3
5
For rear access mounting of a CDROM
drive, use chassis holes 3 and the rear hole
pair on the CDROM.
6. Swing the chassis back onto the bezel and secure chassis with the
three latching screws. Tighten screws to a torque of 18-22 inch
lbs (2-2.5 N
Sm).
7. Install the back panel.
8. Apply power to the 6180 Computer and verify operation of the
drive. You may need to edit BIOS settings to recognize the drive
or to allow the operating system to detect the new hardware.