Rockwell Automation 2364E Fan Replacement User Manual
Page 3
Fan Replacement (5, 7, 11, and 15-inch)
3
Publication 2300-5.10 - January 1999
Preliminary Steps
Before replacing any fans, shut off all power to the unit and wait
for all voltage to discharge. Refer to the appropriate instructions
to replace your fan.
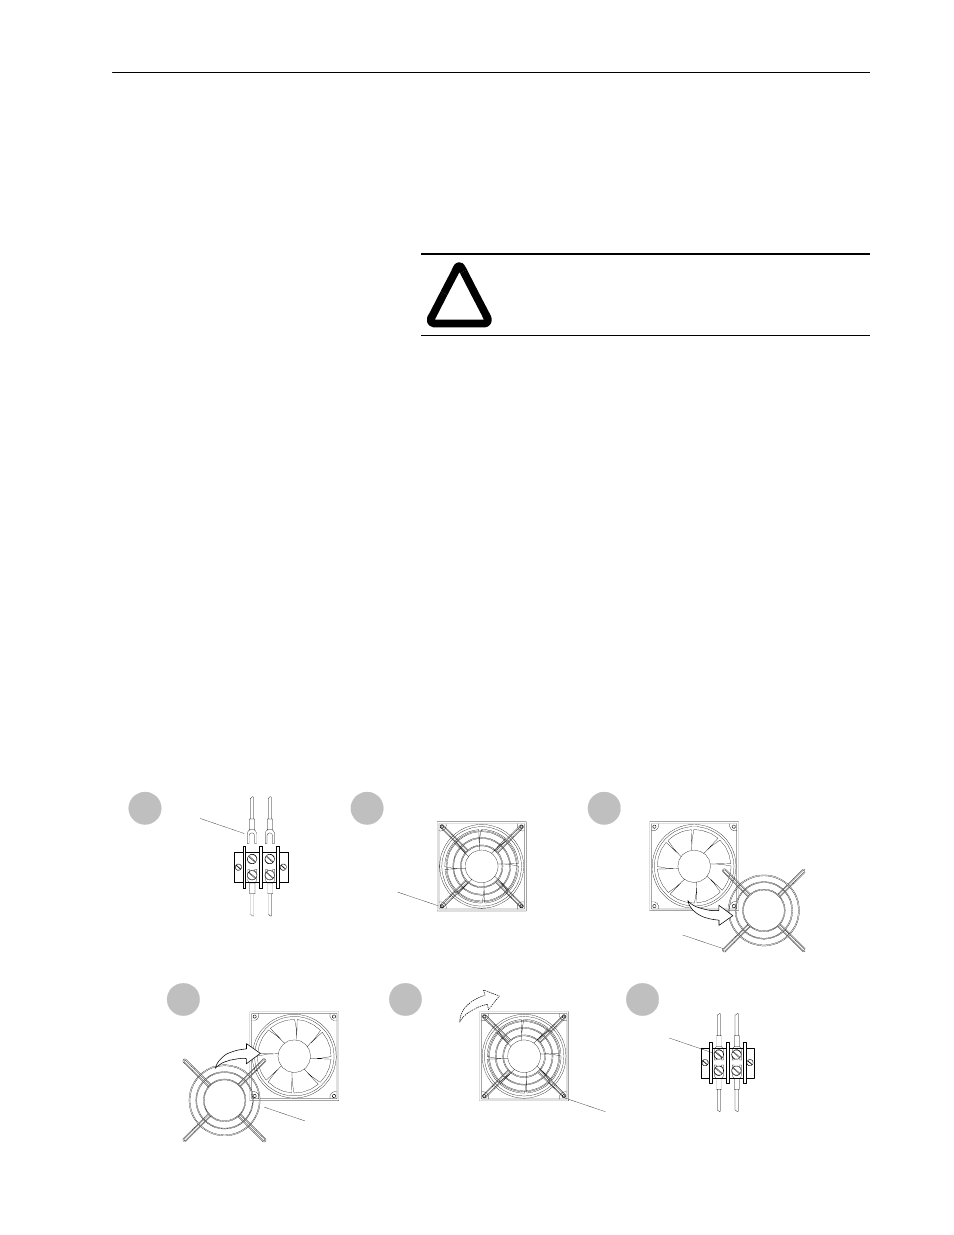
Replacing 5 and 7-inch Fans
1. Using a meter, verify that there is no voltage remaining in the
unit.
Check for voltage across the fan terminal block.
2. Disconnect the fan power leads from the terminal block (as
shown in Figure 1, step 2).
Important: Note the direction and orientation of the existing
fan (intake or exhaust). The new fan will need to
be installed in the same fashion.
3. Remove the four mounting screws that secure the fan and
pull the fan out.
4. Remove the guard from the fan.
5. Place the guard onto the new fan.
6. Secure the new fan into place with the four mounting screws.
The fan should have the same direction and orientation as the
old fan.
7. Connect the fan power leads to the terminal block (see
Figure 1, step 7).
Figure 1
Replacing 5 and 7-inch Fans
!
ATTENTION: If there is any voltage present,
remove the source of the voltage and check for
voltages again before proceeding to the next step.
To Fan
To Source
Remove
leads
Remove
screws
Remove
guard
Attach
guard
Secure
screws
If necessary,
rotate 90°.
Wire polarity does
not affect the fan
operation.
Secure
leads
2
3
4
5
6
7