Preliminary steps, Removing the bridge fan – Rockwell Automation 2361 Bridge Fan and Capacitor Replacement User Manual
Page 3
Publication 2361-5.16 April 1999
Bridge Fan and Capacitor Replacement (for 1250 and 1650A 1395 DC Drives)
3
Preliminary Steps
Before replacing the bridge fan and fan capacitors, shut off the drive power.
Wait five minutes for all voltage to discharge. Open the bridge bay door
and remove all Lexan™ guards that shield the bridge fan.
Note: The bridge fan and fan capacitor both must be replaced together.
Removing the Bridge Fan
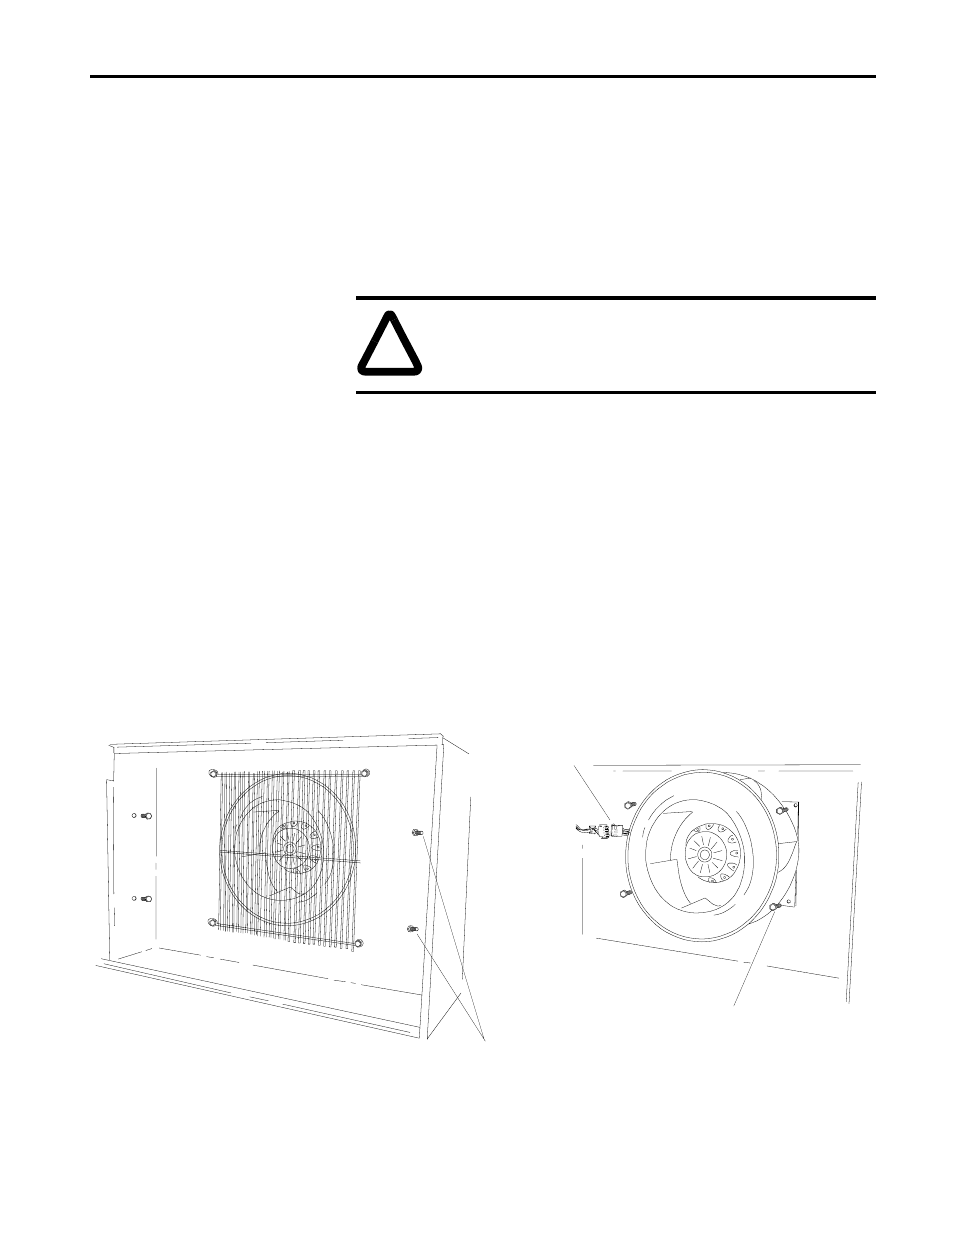
1. Using a meter, test the voltage across the three phases of the AC line.
2. If two capacitors are mounted to the fan inlet cover, disconnect the
capacitor coupling.
3. Remove the fan inlet cover screws (as shown in Figure 1). Remove the
cover from the assembly.
4. Disconnect the power connector for the fan.
5. Remove the four screws from the fan mounting bracket (as shown in
6. Remove the four screws which attach the fan to the bracket.
Figure 1
Replacing the Bridge Fan
!
ATTENTION: If there is any voltage present, remove the
source of the voltage. Check for voltages again before
proceeding to the next step.
Fan Inlet Cover
Screws
Power Connector
Bracket Mounting
Screws