Rockwell Automation 14885P KwikLink Lite, Field Network Pressure-Welded Connectors User Manual
Page 2
2
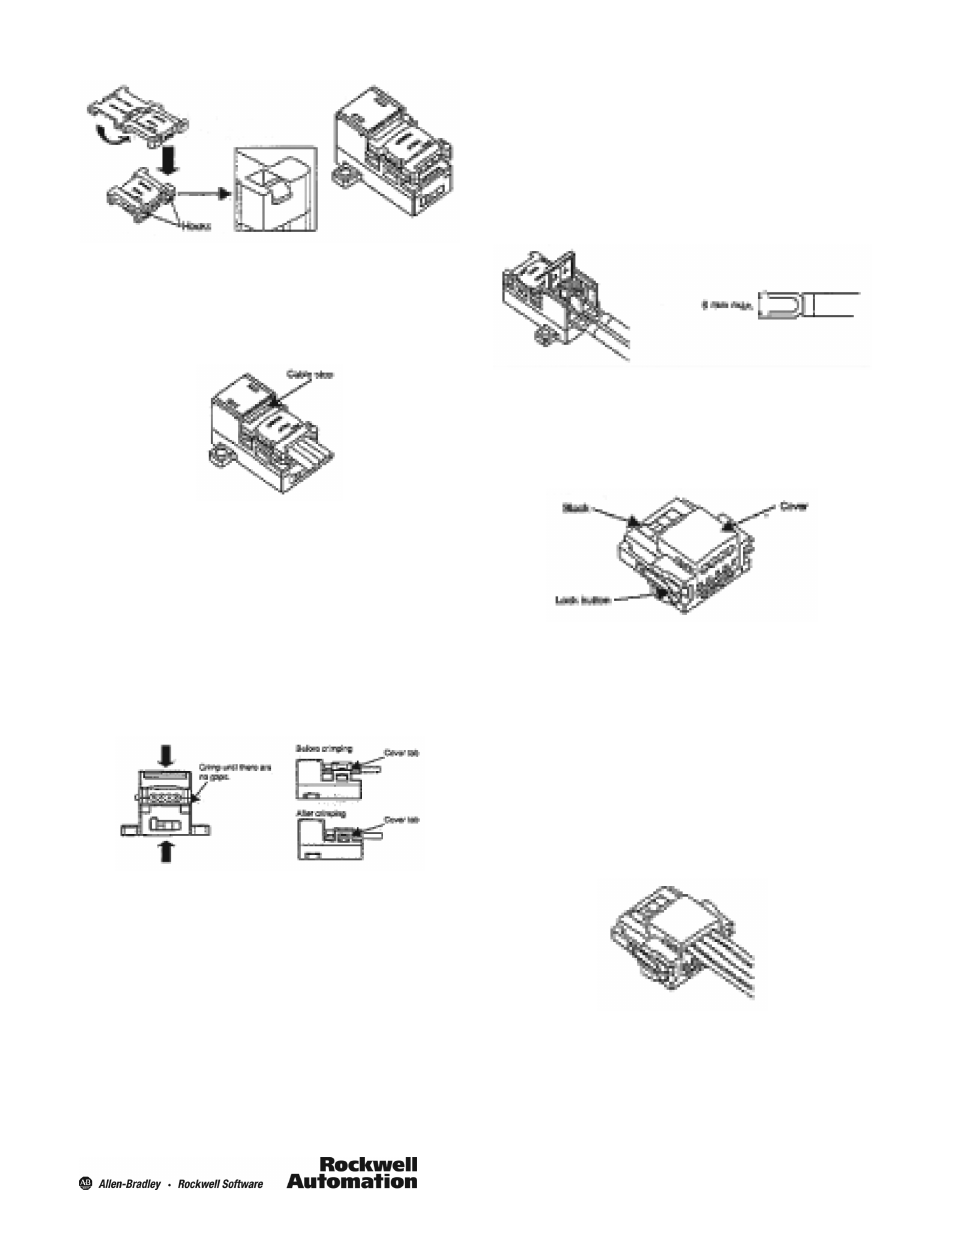
3. Attaching the Cable
S
Match the cable label with the cable colors and insert the
cable accordingly.
S
The back of the main unit acts as a cable stop. Insert the
cable all the way to the cable stop.
4. Crimping the Connector
S
Before crimping, be sure that the cable is inserted all the
way to the cable stop with no gaps.
S
Crimp at the center of the connectors using the DWT--A01
pliers.
S
After crimping, check to be sure that the cable was
crimped correctly.
Check to be sure that the housing lock is fully hooked
onto the cover tabs.
After crimping, check to be sure that there are no gaps
between the cover and the main unit.
Wiring Procedure for the End that Is Attached
Using Screws
1. Connect the Wires
S
Connect the wires with the crimp terminals to the terminals.
S
Connect crimp terminals for M3 screws. The appropriate
tightening torque is 0.30.5 Nm (2.6554.425 lbf in).
Use a screwdriver that is an appropriate size for the M3
screws.
Thin-Cable Flat-Cable Conversion Connector
Part Names
1485P--K1GK4
Wiring Procedure
1. Cutting the Cable
S
Cut the cable at a 90 angle to the length of the cable.
S
To prevent short circuits, be sure to cut the cable with a
sharp knife and be sure that there are no short conductor
wires protruding from inside the cable sheath.
2. Attaching the Cable
S
Match the cable label with the cable colors and insert the
cable accordingly.
S
The cover is semitransparent, which allows you to check to
be sure that the cable is fully inserted.
3. Crimping the Connector
S
Before crimping, be sure that the cable is inserted all the
way to the back and there are no gaps.
S
Crimp at the center of the connectors using the
1485AKCRIMP flat cable crimp tool.