Bulletin 194rc installation (cont'd) – Rockwell Automation 194RC-Nxxxx NFPA 79 Compliant Cable Operated Disconnect User Manual
Page 2
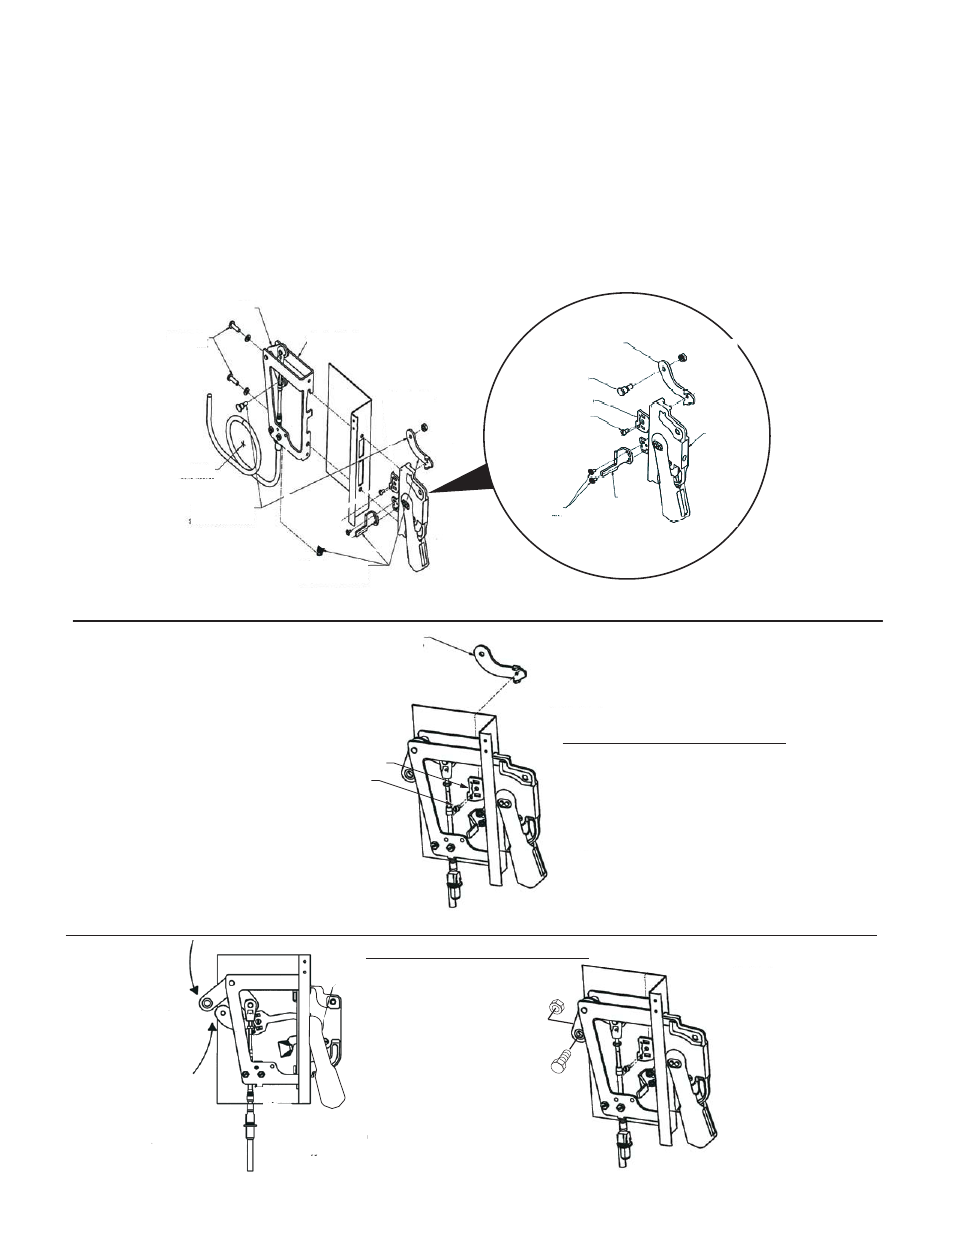
Figure 1-2 Securing Toggle Mechanism and Handle to Flange
2. Install handle to enclosure by placing the outer handle mechanism with the attached gasket over the enclosure cutout. Insert
the top mounting screw with lockwasher through the enclosure and thread it into the outer handle mechanism for a few turns but
not all the way. (See Figure 1-2).
3. Slide the toggle mechanism assembly over the top handle mounting screw. Insert the bottom handle mounting screw and
lockwasher through the toggle mechanism assembly, through the enclosure and into the handle. Tighten both mounting screws
to specified torque. (See Figure 1-2).
4. Assemble adapter link to actuator link. Tighten to specified torque. (See Figure 1-3).
5. Align adapter link with the bell crank. Attach bell crank to adapter link with shoulder bolt and nut. Tighten to specified torque.
(See Figure 1-4).
6. Mount door hasp to handle using the two screws provided with the handle. (See Figure 1-2).
7. Operate handle mechanism to ensure functionality. To operate either close door or defeat door interlock.
8. If minor adjustments are necessary, refer to adjustment checklist (Page 3).
9. Install appropriate door hardware (supplied). (See Figure 1-7).
Bulletin 194RC Installation (Cont'd)
Bail
23 - 37 lb-in
Max.
6" Min.
Bend Radius
Connect Adapter Link
to Bell Crank with
Shoulder Bolt and Nut
These items are to be assembled
after handle is mounted to enclosure
Toggle
Mechanism
Rotate Bell Crank
and Adaptor Link
to line up holes
(2)
Adapter Link
Door
Hasp
Handle
Mechanism
Actuator Link
Actuator Link
Shoulder Bolt
18 - 20 lb-in
18 - 20 lb-in
7 - 11 lb-in
Max.
Figure 1-3 Assembly of Adapter Link to Actuator Link
Actuator Link Screw
Figure 1-4 Assembly of Adapter Link to Bell Crank Using Shoulder Bolt
After aligning assemble with
Shoulder Bolt and Nut
Tighten to 18 - 20 lb-in.
Assemble Adaptor Link
with Screw to Actuator Link
Tighten to 18 - 20 lb-in.
Note: Make sure handle is in OFF position.
Note: Make sure handle is in OFF position.
(2)