Flying mapping missions takeoff checklist, Initiating, Monitoring – 3D Robotics Aero-M User Manual
Page 36
35
Flying Mapping Missions
Takeoff Checklist
Before flying the mission, check the following:
»
Camera is on with mission script ready and is secured into the
mount with the mini-USB cable connected and the cap removed.
»
Aero is powered and connected to the ground station with all pre-flight
checks passed.
»
The survey mission has been adjusted to account for present
environmental conditions and saved to the Aero.
Initiating
For automatic takeoff, set the Aero to auto mode and launch according to the
instructions in the Automatic Takeoff section of these instructions (page 33).
For manual takeoff, set the Aero to auto mode after takeoff to initiate the mission
in flight.
Monitoring
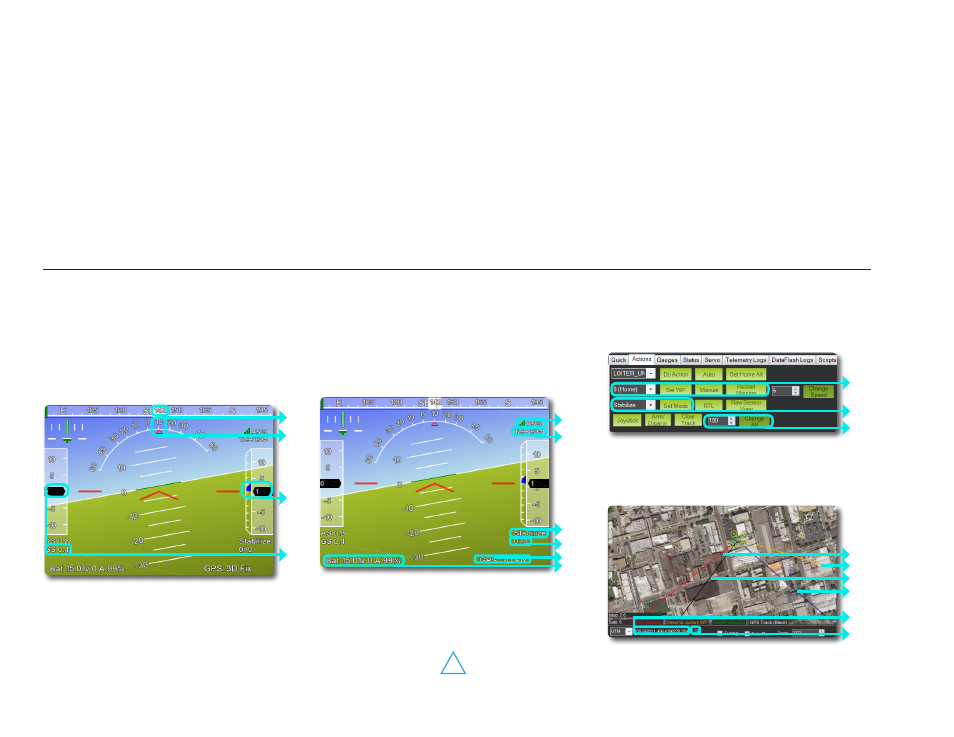
Mission Planner Flight Data: Attitude
1
Heading direction
2
Bank angle
3
Altitude (black) and rate of climb (blue bar)
4
Ground speed
Status
4
Distance to current waypoint >
current waypoint number
5
GPS status
6
Battery status*
1
Ground station signal
2
GPS time
3
Currently
enabled mode
1
2
3
4
1
2
3
4
5
6
Monitor the Aero closely during the mission using your line of sight and the
Mission Planner Flight Data screen.
Actions
1
Change waypoints or restart a mission
2
Change modes
3
Change altitude
Flight Map
1
Current heading
2
Direct path to current waypoint
3 GPS-reported direction of travel
4
Actual flight path
5 Latitude, longitude
6 Altitude
1
2
3
1
2
3
4
5
6
Full battery: 16.8 V
Low battery failsafe: 13.8 V
End your flight at 14 V!
!
*Failsafe behavior enabled