Arming & disarming led indicators, Tones, Gps lock – 3D Robotics Aero-M User Manual
Page 29
28
Arming and disarming are important steps that must be completed before
takeoff and after landing to activate and deactivate the motor, respectively.
The arming and disarming procedures ensure that you can safety start and
stop the motor without risk of injury.
The Aero’s motor can spin when armed! Do not place your hands in the
way of the propeller while the safety button is active (solid red).
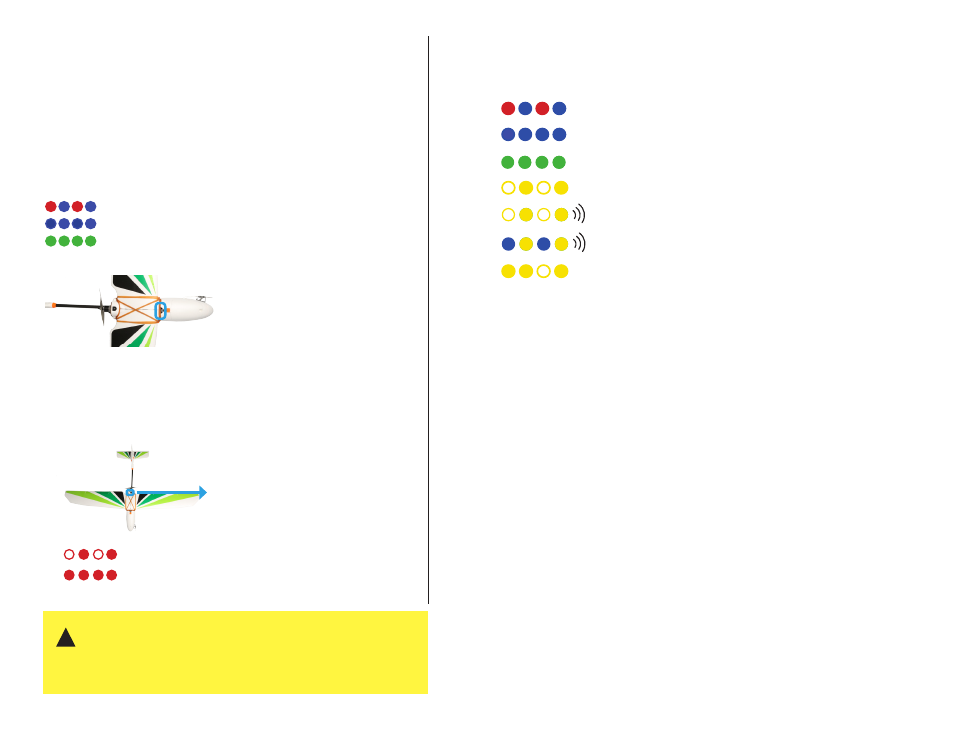
To arm the motor, press and hold the safety button until it
displays solid red.
To disarm, press and hold the safety button until it displays
blinking red.
safety button
Inactive, motor disarmed
Active, motor armed
Arming & Disarming
LED Indicators
Low battery, automatic landing
Loss of RC signal, automatic landing
System error, see troubleshooting guide
Loss of GPS signal, switch to fly-by-wre
Initializing, please wait
Acquiring GPS, please wait
Armed, GPS locked
Tones
Visit 3DR.com/Aero-M to listen to Pixhawk’s status tones.
GPS Lock
Auto, RTL, and loiter modes requires GPS lock. When powered, the autopilot will
automatically search for GPS lock. The position of the Aero when the autopilot acquires
GPS will be saved as the home position, and used as the coordinates for the launch
point during RTL. If you plan to use auto, RTL, or loiter modes during your flight, ensure
that the Aero is located at a suitable launch point when powered, and the autopilot
acquires GPS lock before takeoff, indicated by a blinking green status LED.
Before arming, check the status LED. The LED will flash blue while
the Aero acquires GPS; this can take a few minutes. Once you see
the green LED, the autopilot has acquired GPS lock.
Autopilot ready, GPS locked
Acquiring GPS lock, please wait.
Initializing, please wait.
!