Setup instructions, Components, Camera setup – UVP VisiDoc-It Imaging System User Manual
Page 6
VisiDoc-It Imaging System
6
Setup Instructions
Components
Camera with zoom lens, bracket, filter, cables
VisiDoc-It hood or stand
USB storage device, 8GB (minimum)
Transilluminator (may be ordered separately)
WARNING: DO NOT ATTEMPT TO CONNECT ANY WIRING WHILE THE
EQUIPMENT IS CONNECTED TO ANY POWER SUPPLY
CAUTION:
Do not install the system in places with high moisture, dust, or high temperatures. Do not use any oil or
petroleum based cleaner for the cabinet. Use only mild soap or detergent solution for cleaning. Ensure that
the system is turned OFF during cleaning. Keep the equipment away from motors or other large magnetic
equipment.
Camera Setup
In the VisiDoc-It Hood
The camera and zoom lens are assembled at the
UVP factory.
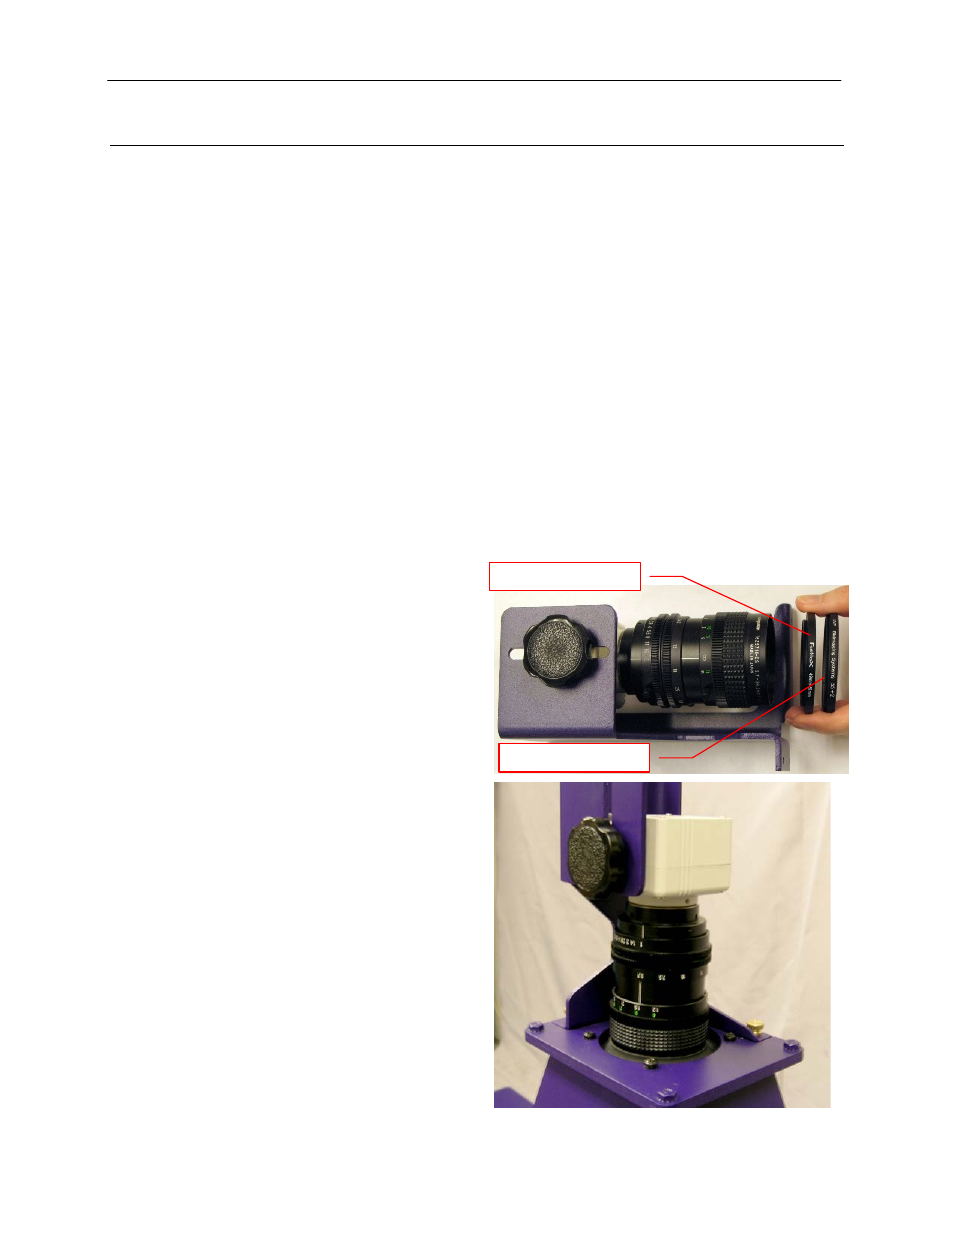
Remove the cap from the lens.
Attach the step up ring and diopter to the
lens. The step up ring and diopter will only fit
one way.
Using the four thumb screws provided,
secure the bracket to the base.
Slide the camera and lens assembly into the
camera bracket. Slide the lens through the
center hole in the gasket. The gasket forms
a seal around the lens.
Step up ring
Diopter