Maintenance, Removing valve, Installing valve assembly – Regency Hampton H35 Large Gas Stove User Manual
Page 44
44
Hampton® H35-2 Direct Vent Freestanding Gas Stove
MAINTENANCE
11) Carefully lift the burner tray assembly out.
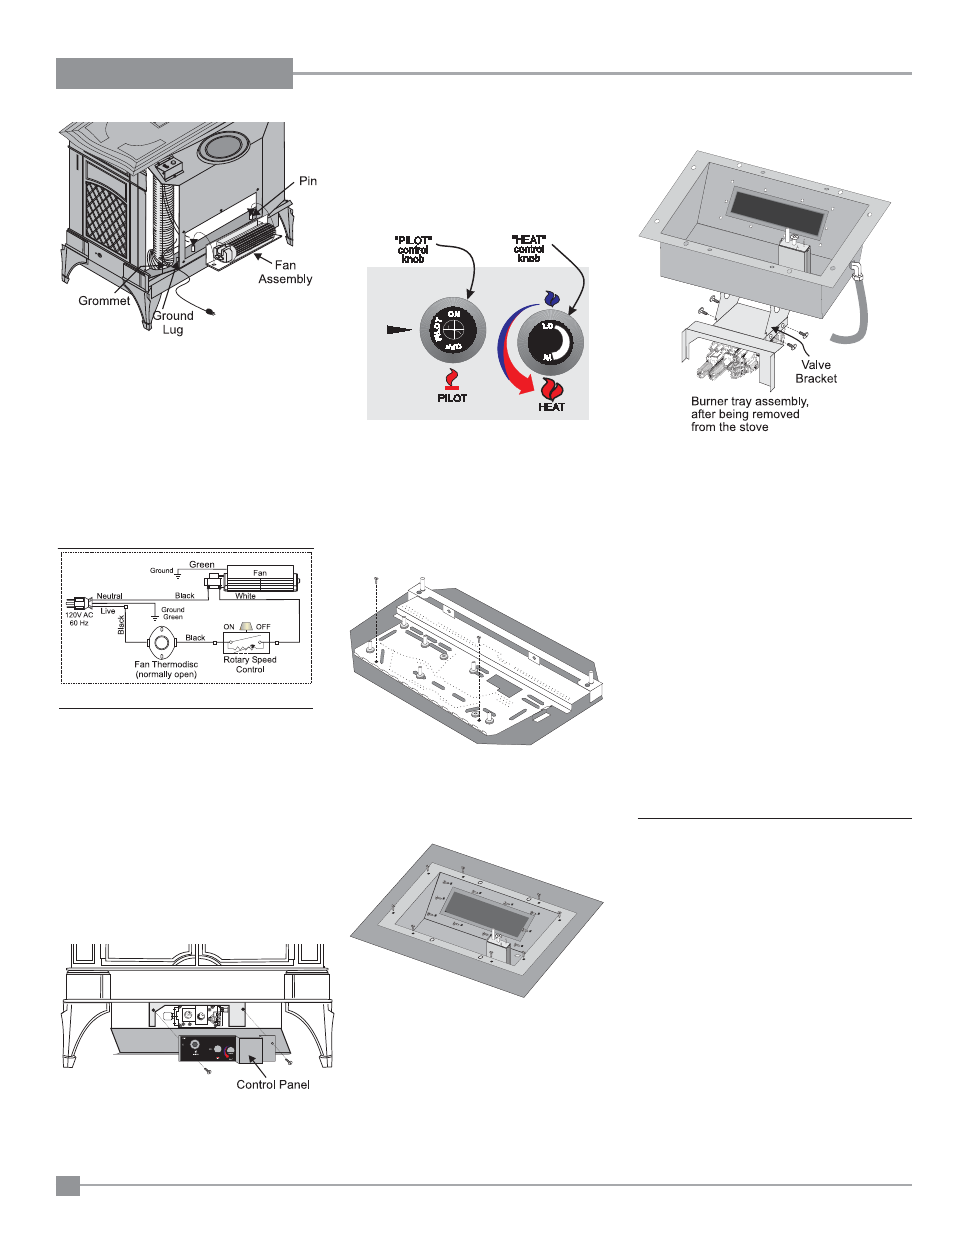
REMOVING VALVE
If your valve requires maintenance or replace-
ment, use the following instructions:
Note: Always close off the gas supply before
removing the valve.
1) If optional fan is installed, disconnect power
source to stove.
2) Remove access panel.
3) Disconnect gas line to stove.
4) Disconnect 3/8" NPT pipe from 90
o
elbow on
valve.
5) Disconnect the two (2) switch wires from valve.
6) Disconnect piezo wire.
7) Lift off the Cast Top and lift out the front door.
8) Carefully remove the logs, embers and rock-
wool.
9) Remove burner (see diagram below).
12) To replace the burner tray assembly, simply
reverse these instructions.
To remove valve from valve assembly, continue.
13) Remove two (2) thermopile wires.
14) Remove thermocouple with a 9 mm (metric)
wrench.
15) Remove pilot nut with an 11 mm wrench.
16) Remove valve to orifi ce nut with a 13/16" wrench.
17) Remove inlet pipe with pipe wrench. Note
orientation of 90
o
elbow.
18) Remove two (2) phillips head M5 screws on
each side of the valve.
19) Remove valve and remove gas out 90
o
brass
fi tting. Note orientation of fi tting.
INSTALLING
VALVE ASSEMBLY
1) To install a new valve assembly, reverse instruc-
tions for removing valve. See assembly steps
1-12.
2) Check for leaks and manifold pressure. See
Gas Pressure Test instructions.
3) To reinstall valve, reverse instructions for remov-
ing valve assembly, steps 13-19.
Note: Use a
magnetic type
screwdriver if possible.
10) Remove all 18 screws holding the burner tray
assembly in place.
Replacing the Fan:
Reverse the above steps (1 - 4). Make sure the
fan wires and the ground wire are reattached.
Hint for pushing fan down onto pins - rub a
bit of dish soap on the grommet so it will slide
more easily onto the pin. Check to make sure
the fan is seated properly on the pins - try to
move the fan back and forth, there should be
no noise, if there is check that the grommets
haven't come loose.