3 display and button function – Schwank ThermoControl Plus 2 User Manual
Page 6
- 6 -
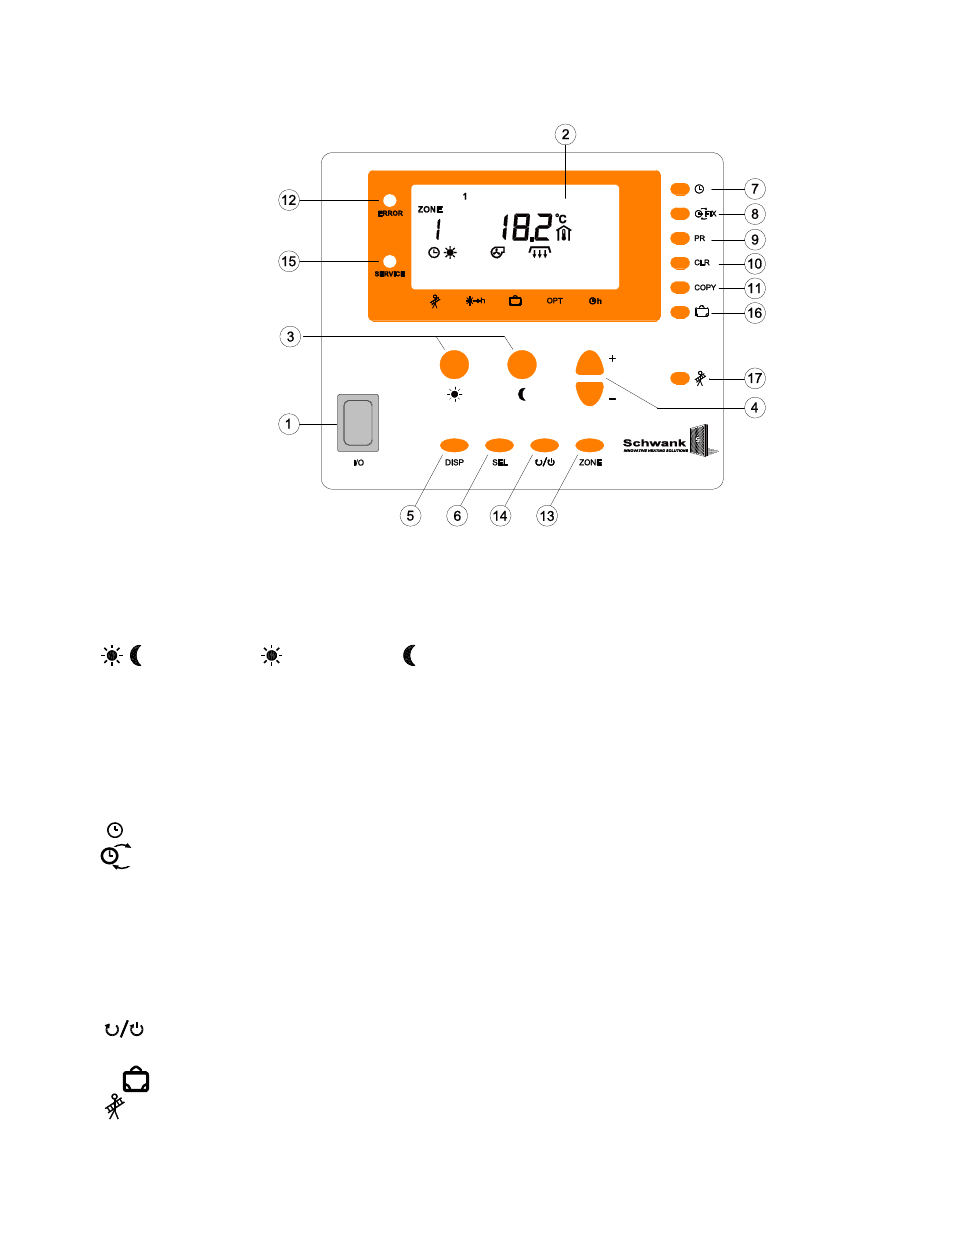
3 Display and Button Function
Front panel layout:
1. I/O
Main switch on / off
2. LCD
Display: All functional and operating information is shown in the base display mode
(upper picture). If no button is pushed for more than one minute, the control unit
switches back to the base display.
3.
Push
the button or the button to display the day or night set value. Use the
+/-
buttons to modify the values.
4.
+ / -
With these buttons the display values can be increased or decreased.
5. DISP
“Display-button“: To change the display. This button also offers the ability to switch
back to the main menu immediately.
6. SEL
“SELECT”: This button allows selection of a certain parameter shown in the display.
The chosen/selected parameter can be modified using the
+/-
buttons.
7.
Clock-button: display and modify time and date.
8.
FIX
Toggles between programmed and FIXED modes.
9. PR
To check and modify the weekly time program in the displayed control circuit.
10. CLR
“Clear-button“: To delete a switch-point or a complete time program.
11. Copy
This button can be used to copy time- and temperature programs.
12. ERROR The system-error lamp flashes for any kind of error. An flashing sign will provide
information about the cause.
13. ZONE
To switch between different control circuits.
14.
To turn on/off the single control circuit.
15. SERVICE “Maintenance”: If this appears, please call your service professional.
16.
Button to program holiday operation mode.
17.
Button for service maintenance operation mode: all control circuits heat full load.