S&S Cycle Bore Big Twin Stroker Kit 1936–1999 3 7/16 - 3 1/2 User Manual
Page 7

7
NOTE: If material is removed from sides of female rod, overall width of bearing cages must be reduced so bearings and cages are free to float with rods
without contacting flywheel thrust pads. Bearing cage side clearance of .008 to .020 less than rod width is recommended.
Connecting rod bearing and cage assemblies that are wider than female rod may become damaged upon contact with flywheel thrust
pads. Damaged rod bearing assemblies and/or foreign material from damaged components circulating in oil could cause further
destruction and possible failure of other engine parts.
I. Finish assembling flywheels and rods. Flywheel assemblies 1972 to early 1981 may be more difficult to true because of the 81⁄2° sprocket
shaft taper. Following above procedures will help diagnose problem if difficulty should arise.
4. Connecting Rod Alignment (All)
After flywheel assembly is installed in crankcases, rods must be checked for straightness. S&S rod checking pin, PN 53-0002, was designed to
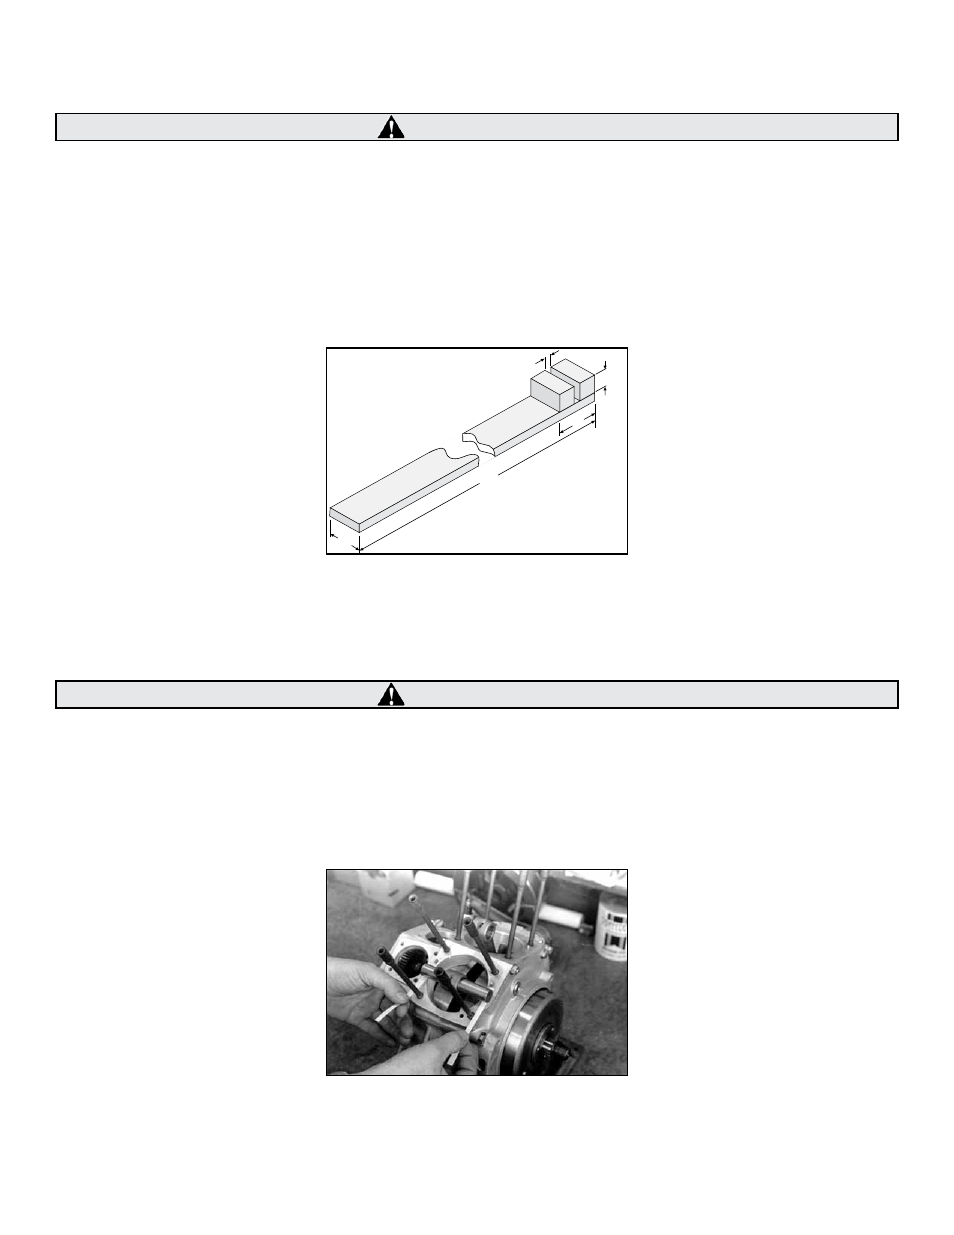
help perform this procedure. It may also be necessary, to fabricate a rod bending tool as illustrated in Figure 2.
NOTE: The purpose of this procedure is to correct for machining tolerance discrepancies in components which may lead to pistons not running true in
cylinder bores. While rods may be straight and true, it is sometimes necessary, to bend them to correct for these machining discrepancies. Do not bend rod
by using tool in wristpin hole as this method may distort wristpin bushing. We also feel that using a piston in lieu of a checking pin may prove inaccurate
due to variations in lengths of piston skirts from one side of piston to the other.
Pistons which do not run true in cylinder bores may cause excessive connecting rod side thrusting. This in turn may lead to premature
ring, piston, connecting rod and rod bearing wear and eventual failure of these parts.
Checking Pin Procedure
A. Insert checking pin into wristpin hole. Place strips of paper between checking pin and crankcase cylinder gasket surface and apply slight
downward pressure to wristpin end of rod by rotating flywheels. Pull papers out slowly. Drag on papers should be equal.
B. Rotate flywheels in opposite direction until checking pin contacts cylinder gasket surface again. Repeat procedure to rod again. If drag on
papers is equal no bending is required. If one paper is loose, use rod bending tool to tweak rod in direction of loose paper and recheck.
See Picture 5.
C. Repeat checking and bending procedure for other rod.
CAUTION
1
1
/
8
"
.510"-.520" Wide Slot
22"
1
1
/
4
"
4"
Figure 2
CAUTION
Picture 5
