S&S Cycle TÜV Approved Super E Carburetor Kits User Manual
Page 9
9
Overflow hose must not contact hot surface such as exhaust pipe where it could melt and catch fire.
E. Install fuel line
1. Slip hose clamp over end of fuel line with 90° bend.
2. Apply thin coat of oil to carburetor fuel inlet fitting and slip end of fuel line with 90° bend on fitting.
3. Position fuel line in such a way as to avoid contact with cylinders and other hot engine parts. Tighten hose clamp.
4. Slip protective fuel line covering over fuel line and position to protect fuel line where contact with engine parts could occur. On models
equipped with fuel line support guide, use guide if possible.
5. Connect other end of fuel line to gas tank petcock using hose clamp provided.
Fuel line must be clamped securely and not contact hot surfaces such as exhaust pipes where it could melt and catch fire.
6. Install Air Cleaner Backplate
NOTE: Air cleaner backplate screws supplied with kit have thread locking compound on threads. If screw without thread locking compound is used, a
thread locking product such as Loctite® 242 must be applied, and screws properly tightened.
Failure to apply thread locking compound or properly tighten screws may cause screws to loosen and fall into engine, causing engine
damage not covered under warranty.
A. Harley-Davidson® Evolution® big twin 1984 to 1992 and Sportster® models 1986 to 1990
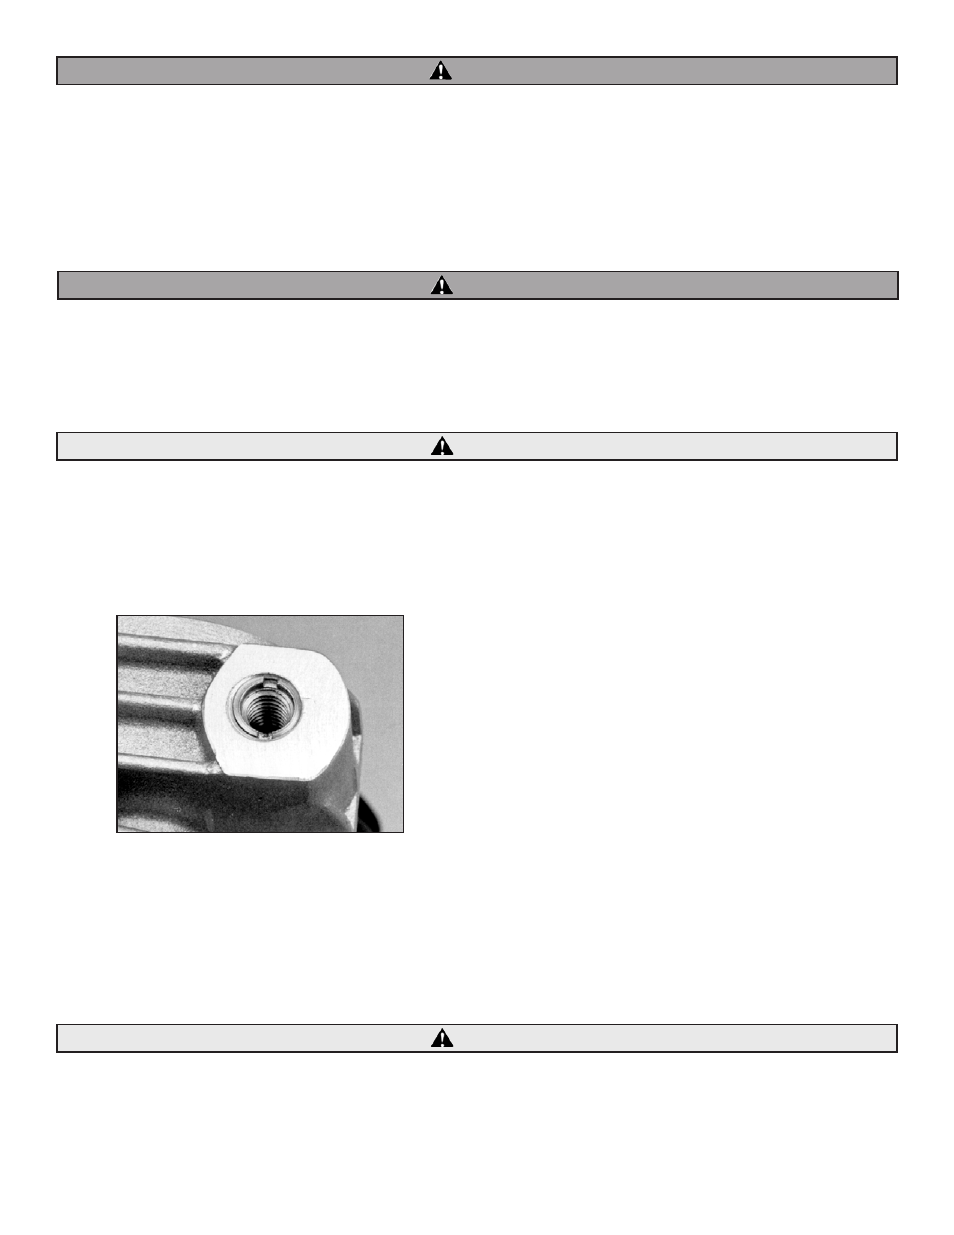
1. 1992 big twin models with crankcase breather vented from cases to air cleaner backplate - Install thread-sert in each cylinder head air
cleaner mounting bolt hole. This converts stock 1⁄2"-13 thread to 5⁄16"-18 thread. Surface of thread-sert should be just below surface of
cylinder head. See Picture 16.
NOTES:
Most 1992 big twins have crankcase breather routed from case to air cleaner backplate. However, some late 1992 engines have breather routed from
•
heads to air cleaner backplate through air cleaner mounting bosses. If crankcase breather is routed through heads, 1993 and later carburetor kit must be
installed. Follow instructions for installation on 1993 engine.
Thread-serts may be supplied with or without thread locking compound on threads. Loctite® 242 or equivalent should be applied to threads of thread-
•
serts not supplied with thread locking compound. Thread-serts should be installed in desired position and left in place.
Installing thread-sert in hole activates thread locking compound making it difficult to change position of thread-¬sert after installation.
•
Cylinder head vent passages in "head breather" type engine must not be plugged as oil leakage and engine damage may result. Same
applies to crankcase vent in "case breather" type engine.
WARNING
WARNING
CAUTION
Picture 16
CAUTION