A. contacting pololu, B. shield features, Wireless sketch uploading – Pololu Wixel Shield for Arduino User Manual
Page 3: General-purpose wireless serial, Prototyping space, Arduino reset button, user led, and pins, A. contacting pololu 1.b. shield features
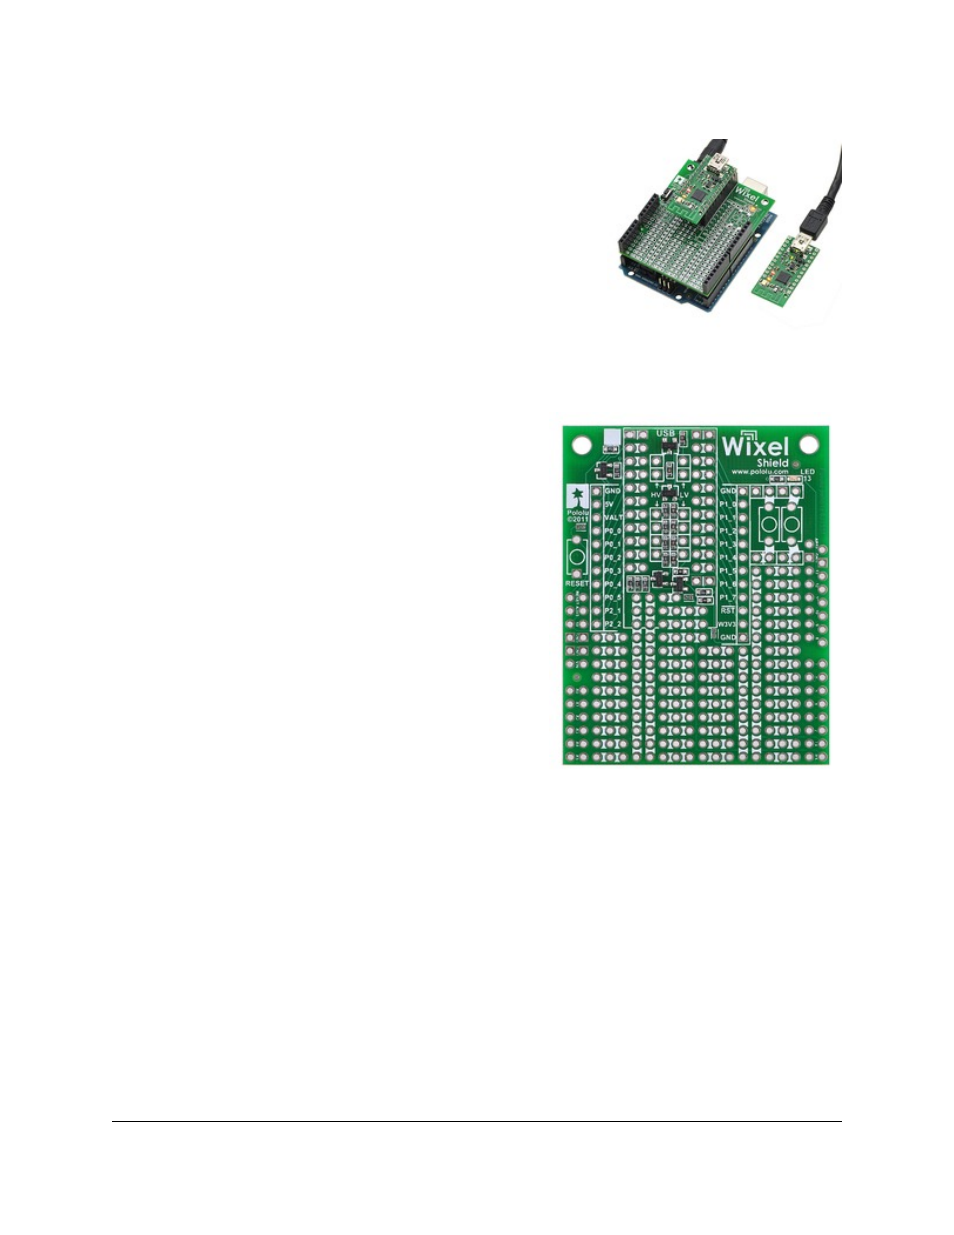
Wixel shield for Arduino
powered through its power jack,
communicating wirelessly with
another Wixel.
Wixel shield for Arduino top view.
1.a. Contacting Pololu
Thank you for your interest in the
If you need technical support for this
product or have any feedback you would like to share, you can
directly
or
post
on
our
We would also be delighted to hear
from you about any of your projects and about your experience with the
Wixel shield. Tell us what we did well, what we could improve, what you
would like to see in the future, or anything else you would like to say!
1.b. Shield Features
Wireless Sketch Uploading
The Wixel shield connections allow it to duplicate the functionality
of the Arduino’s USB circuitry, which means the shield can
wirelessly program the Arduino using the standard Arduino
software. These connections do not interfere with the Arduino’s
USB interface, so the Arduino’s traditional wired USB connection
can still be used while the shield is connected. A schematic of the
connections between the Arduino and the Wixel shield is available
in
. More information on wireless sketch uploading is
available in
.
General-Purpose Wireless Serial
The Wixel shield makes general-purpose wireless serial
communication
easy.
Arduino
serial
functions,
such
as
Serial.print()
, will transmit data wirelessly from the shield’s
Wixel to a remote Wixel that then relays the information to the
computer or embedded electronics to which it is connected.
Similarly, data from the remote Wixel will be transmitted to the
Wixel shield and can be read by Arduino functions like
Serial.read()
. This enables wireless sketch debugging using the
Arduino serial monitor, wireless communication between custom
PC software and your Arduino, wireless communication between
multiple Arduinos, and more.
Prototyping Space
The unused portions of the Wixel shield are configured as general-purpose prototyping space in which you can
construct your own circuits. The holes in this prototyping area are connected in a breadboard-like configuration, as
indicated by the top silkscreen. The traces connecting the prototyping holes are located on the bottom side of the
shield and can be cut if a particular connection is not desired.
Arduino Reset Button, User LED, and Pins
Since the shield covers the Arduino’s reset button and user LED, the shield makes parallel versions of these
components accessible on the shield itself. The shield features an Arduino reset button and a yellow LED (connected
to Arduino pin 13). The shield pin spacing along the sides matches the standard (irregular) Arduino pin spacing, but
these pins are additionally broken out to neighboring columns that are on a 0.1" grid. All square pads on the shield
are ground.
Pololu Wixel Shield for Arduino User's Guide
© 2001–2014 Pololu Corporation
1. Overview
Page 3 of 12