PIAA 530 Series L.E.D. User Manual
Page 5
-5-
PKI-0007-3
1
4
8
3
2
6
5
11
9
12
7
10
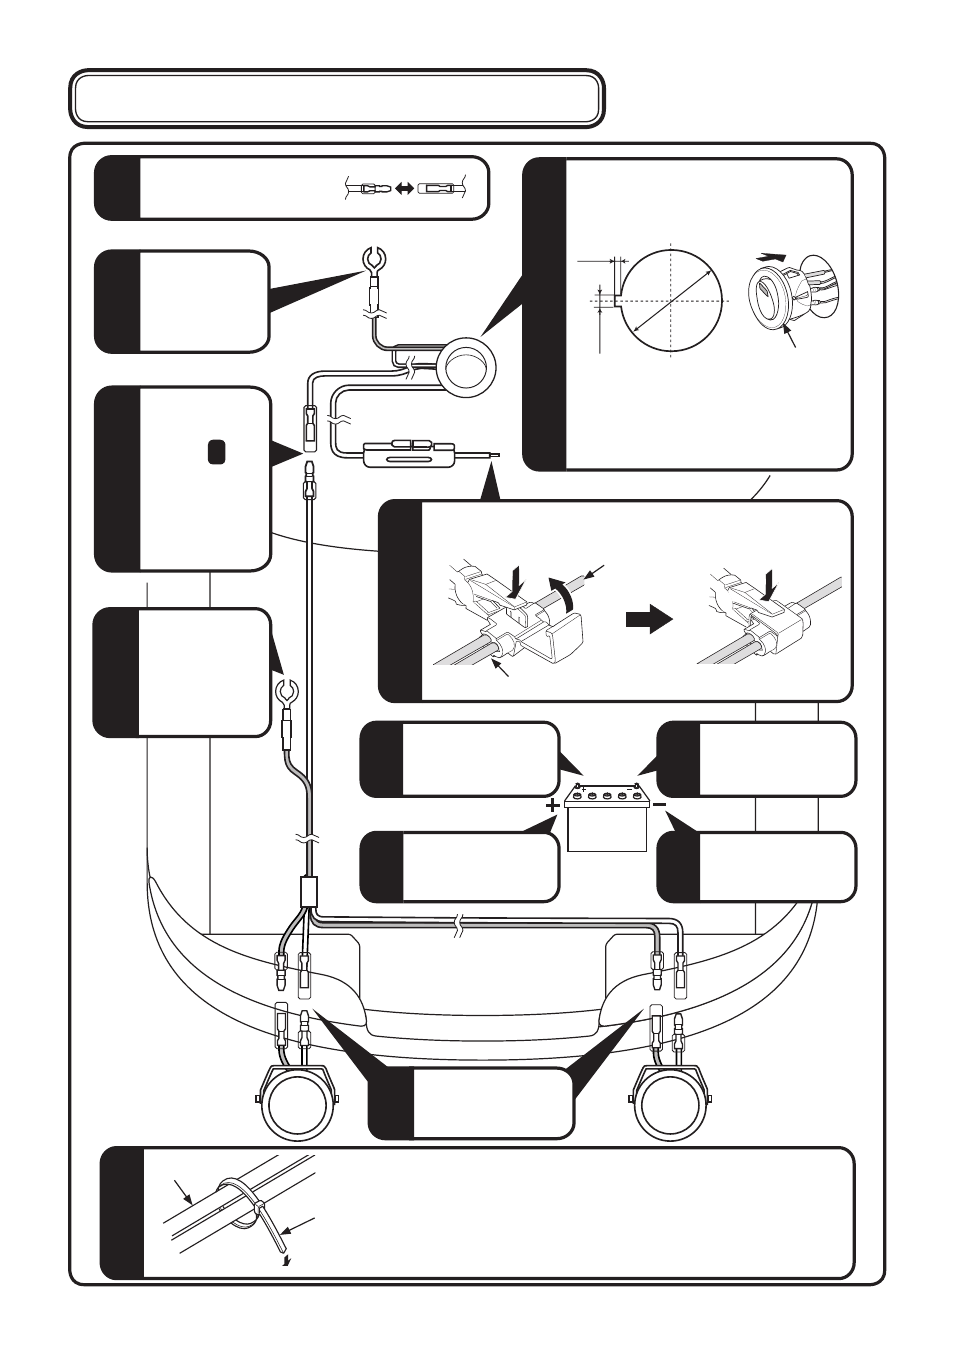
バッテリー 端子を
取り外してください。
Switch
❷
❸
2mm
1mm
φ
20mm
❶
Vehicle (+) cord
1
After lamp has been installed, verify the switch harness does not
make contact with the engine s moving parts or sections that
emit extreme heat. Use the wire tie included (Item 5) and secure
to harnesses inside engine compartment.
Harness
Wire tie
(-) cord (Black)
(-) cord (Black)
Battery
Remove the (+)
terminal from the
battery.
Attach the (-) terminal
to the battery.
Remove the (-)
terminal from the
battery.
Attach the (+) terminal
to the battery.
Take the (+) cord (white) and using the one-touch connector
(Item 4), tie it together to the vehicle s (+) cord.
Connect bullet
connectors to the
lamp harnesses.
Switch harness
The numbers shown in the figure below
indicate the sequence the parts should
be installed.
【2】Switch Harness Installation Sequence
Switch
Remove the bullet connector
of
the switch
harness .
Attach the (-)
cord to the
body earth.
Bring the bullet
connector which
took on into
the interior of the
vehicle and
connect to the
bullet connector.
Drill a hole of 20mm diameter in the
dash board or interior switch cover,
then mount the switch stably.
※ If the hole is bigger than 20mm
diameter, the switch does not fix
stably. Recommend to make a
smaller hole, then adjust the size
by inches.
Switch harness (+) cord
Lamp
Lamp
Attach the (-)
cord to the
body earth or
the (-) battery.
Fuse box