Step nine, Step ten, Step eleven – Pavement Ends 51201 Replay User Manual
Page 4: Step eight
51201 pg 4
0612 Rev. B
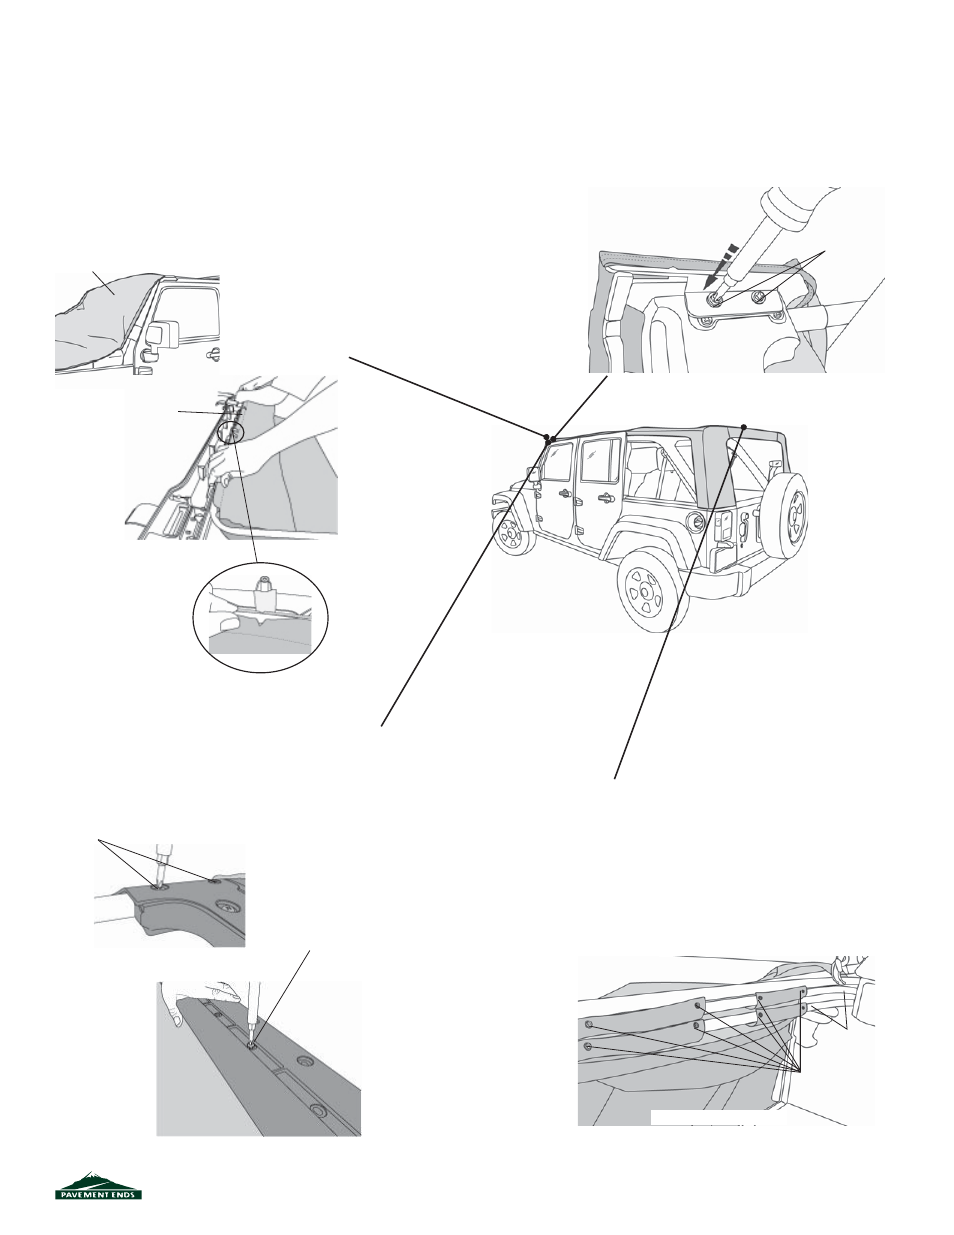
Step Nine
I
NSTALL
T
OP
F
ABRIC
Close the upper header over the fabric, sandwiching
the fabric. Reinstall the four (4) corner screws. Then
install the twenty-three (23) screws across the header.
Lower the bow assembly to the rear of the vehicle.
Step Ten
I
NSTALL
C
ORNER
S
CREWS
Wrap the fabric around the header and raise the
header slightly to work the pockets in the fabric
over the corners of the header. Install the screws
removed in Step 6 in each corner to secure the
fabric to the header.
Step Eleven
A
TTACH
T
OP
TO
R
EAR
2 B
OWS
Raise the header and bow slightly to allow you to
attach the rear bow fl aps, that are inside the top
above the rear window opening, to the rear bow.
Use the screws that were removed in Step 5 to
secure the fl aps to the bow. Then secure the fl aps
to the bow in front of the rear bow.
Step Eight
I
NSTALL
T
OP
F
ABRIC
Raise the bow assembly and lock the header to the
windshield.
Drape the top fabric, backing side up, over the hood
and windshield. Slide the extrusion along the front edge
of the top into the channel in the lower header. Line up
the center notch in the fabric with the center notch in
the header. Use masking tape to help hold the fabric in
place along the lower header.
Top Fabric - Backing
Side Up
Slide Extrusion along
the Front Edge of the
Channel
Line up the Center
Notch in the Fabric with
the Center Notch in the
Header
Reinstall Corner
Screws
Install Screws
Across Header
Install
Screws
Rear
Bows
Screw Flaps to
Rear 2 Bows
View from inside vehicle