MTS Series 609 Alignment Fixture User Manual
Page 59
Adjust the Concentric Alignment
Series 609 Alignment Fixture Product Information
Alignment Procedure
59
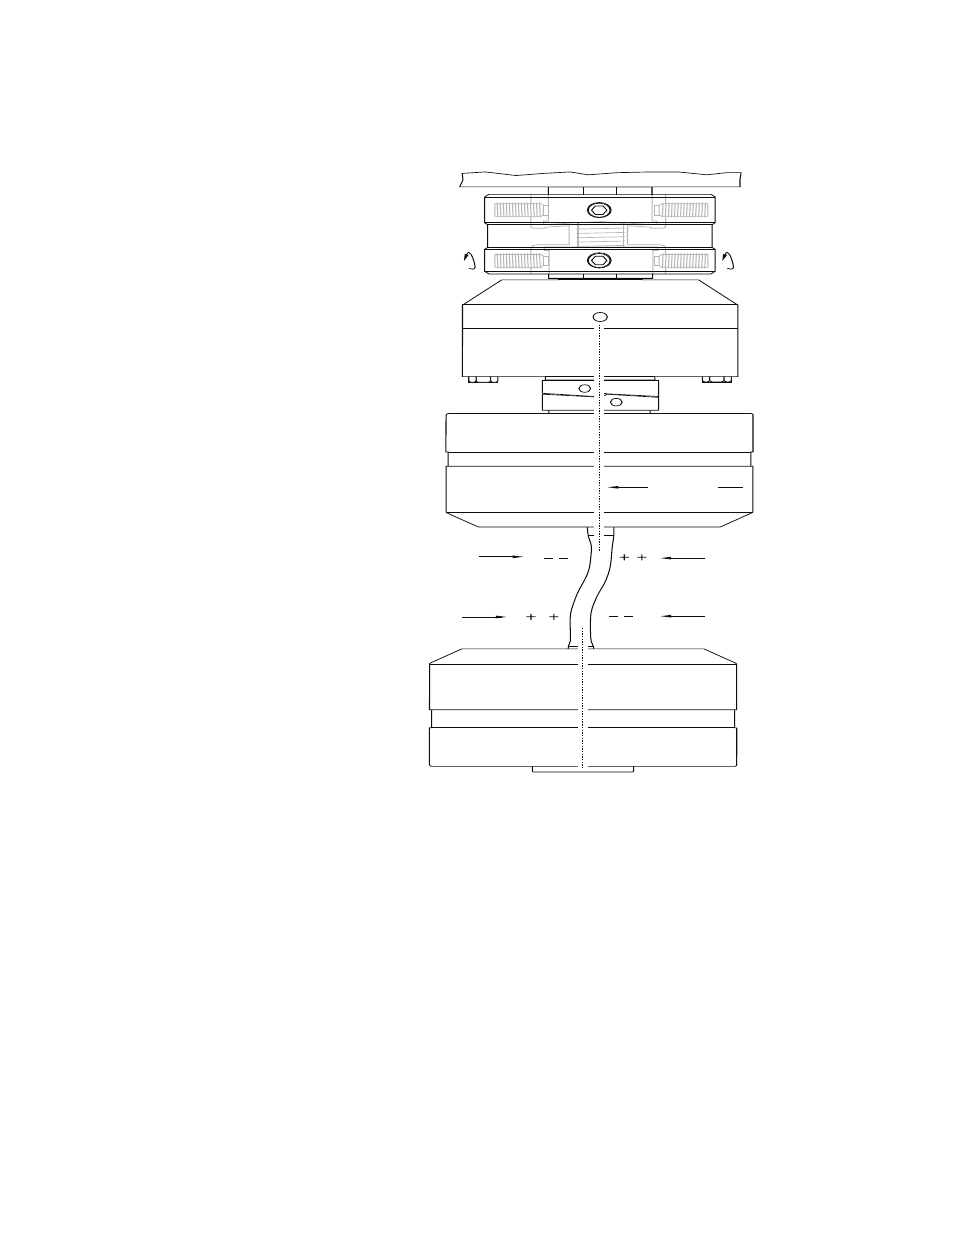
3. Using the following figure, determine which screws to adjust.
•
If you are making minor adjustments, keep all four screws in contact
with the concentricity collar.
•
If you are making adjustments of 75 µS or more, loosen the opposing
screws. Tighten one to get a reading slightly beyond your goal. Tighten
the other to reach your goal. End with all screws tight.
•
If you are adjusting a round specimen, see “Round Specimens—
Reduce the “S” Bend.”
•
If you are adjusting a flat specimen, see “Thin Flat Specimens –
Reduce the “S” Bend.”
You should end up with readings characteristic of the remaining “C” bend—
uniformly higher readings on one side of the specimen and uniformly lower
readings on the specimen’s opposite side.
The following figure shows typical readings before and after an adjustment.
This figure shows how
turning the concentricity
adjustment screws affects
strain gage readings.
Note
If the screws can
not be adjusted,
reduce the preload
by 50%
Loosen
Tighten
Move
This reading
moves
negative
This reading
moves
positive
This reading moves positive
This reading moves negative