Installation, Mounting options, Installation mounting options – Johnson Systems DMX 6-PORT MERGER User Manual
Page 8
WWW.JOHNSONSYSTEMS.COM
8
Installation
All DMX 6-PORT MERGER models are intended for indoor use only, in a
controlled environment at room temperature..
• Mount in a suitable location.
Refer to the Mounting Options section
on page 8 for applicable details.
• Connect the applicable power supply input.
Refer to the Power Supply Input Connections section
on page 9 for applicable details.
• Connect DMX inputs and output.
Refer to the DMX Input / Output Connections section
on page 10 for details.
• Program, setup, test and verify functionality.
Refer to the Detailed Programming of System Configuration Menu
Items section on page 16 for details.
• Optionally, monitor/view the DMX channel levels on a PC.
Refer to the USB Tech Port Operation section on page 19 for details.
WARNING: Type 1 enclosure for indoor use only!
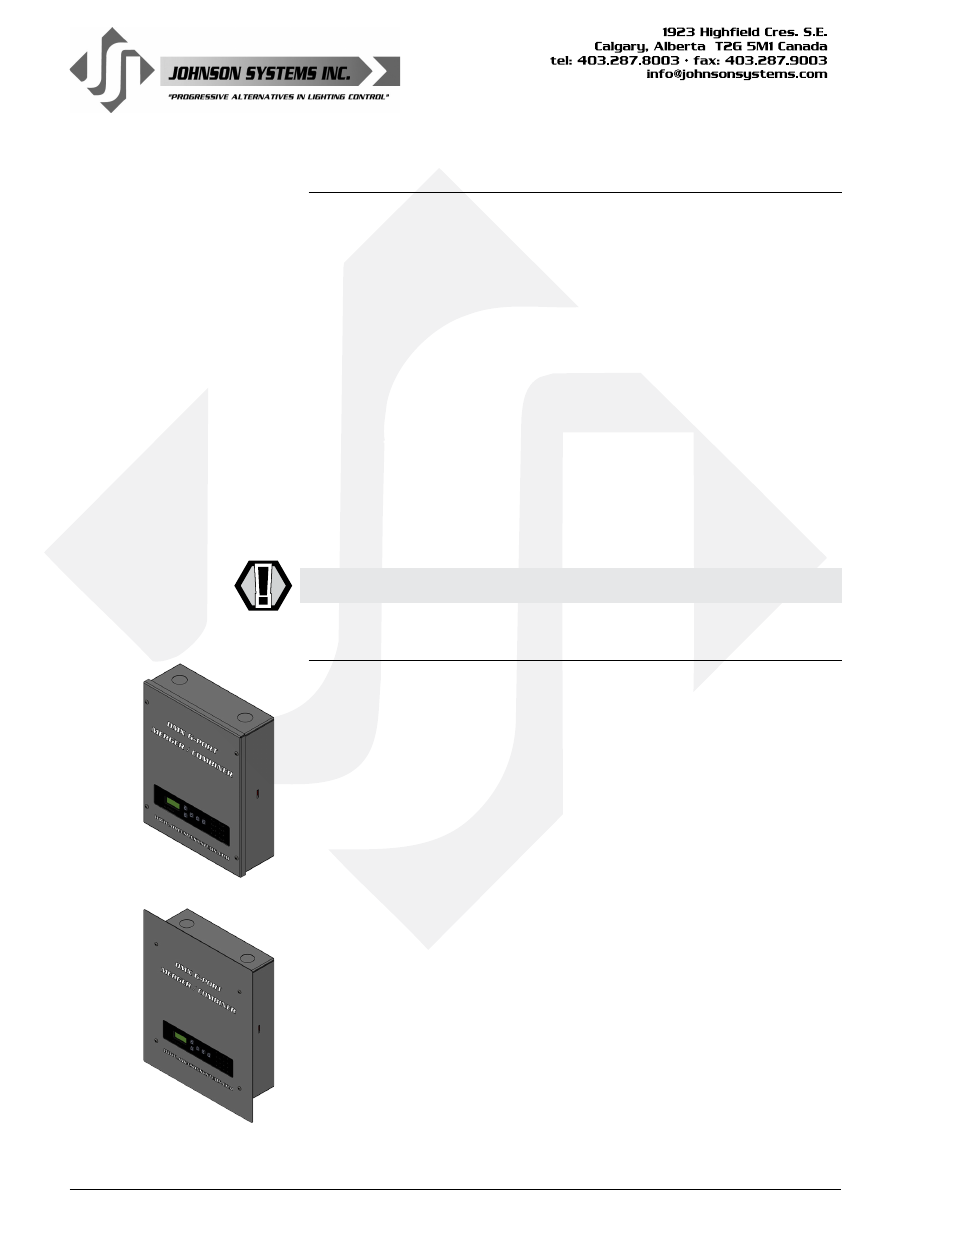
Mounting Options
DMX 6-PORT MERGER models are capable of various mounting options to
suit the application required.
Model: DMX-6PIM
Mount to any wall surface located in a suitable location. Four 1/4" (6mm)
screws or bolts are required to fasten the enclosure safely to the wall (refer
to drawing for mounting locations and dimensions). To access the mounting
locations, simply remove the lid. The lid is secured by four (4) #6-32 x
3/8" machine screws. Use a #2 Philips screwdriver to remove the screws.
Be sure to save the screws to re-install the lid once installation is complete.
Model: DMX-6PIM-FM
Mount inside a studded (3.5
"
minimum depth) wall for a flush finish in a
suitable location. Four 1/4" (6mm) screws or bolts are required to fasten
the enclosure safely in the wall (refer to drawing for mounting locations and
dimensions). Alternatively, the enclosure may be mounted on the sides of
the enclosure to a single stud or two studs with 9.5" centers. When side
mounting the enclosure to studs, drill suitable mounting holes in the sides
of the enclosure. When drilling holes on the side(s) of the enclosure, be
sure to protect the internal electronics and clean out all metal filings. The
lid is secured by four (4) #6-32 x 3/8" machine screws. Use a #2 Philips
screwdriver to remove the screws. Be sure to save the screws to re-install
the lid once installation is complete.