Installation instructions, Shelf mounting instructions, Rack mounting instructions – Intelix DIGI-88B User Manual
Page 8: Utp output wiring, Ir port wiring, Edid management
DIGI-88B Installation Guide
Installation Instructions
Shelf Mounting Instructions
The DIGI-88B comes with pre-installed feet and can be shelf mounted directly out of the box.
Rack Mounting Instructions
The DIGI-88B requires one rack unit (2 RU) of space. At least 2 inches of free air space is required on both
sides of the DIGI-88B for proper side ventilation. Avoid mounting the DIGI-88B near a power amplifier or
any other source of significant heat. It is recommended that you leave an empty rack space above and
below the DIGI-88B for additional cooling.
Remove the feet from the bottom of the chassis by unscrewing the 4 Phillips head screws inside of the
feet. Set feet aside. Attach the rack ears using the 6 Phillips head screws provided. Mount the DIGI-88B
in the desired location within the rack enclosure.
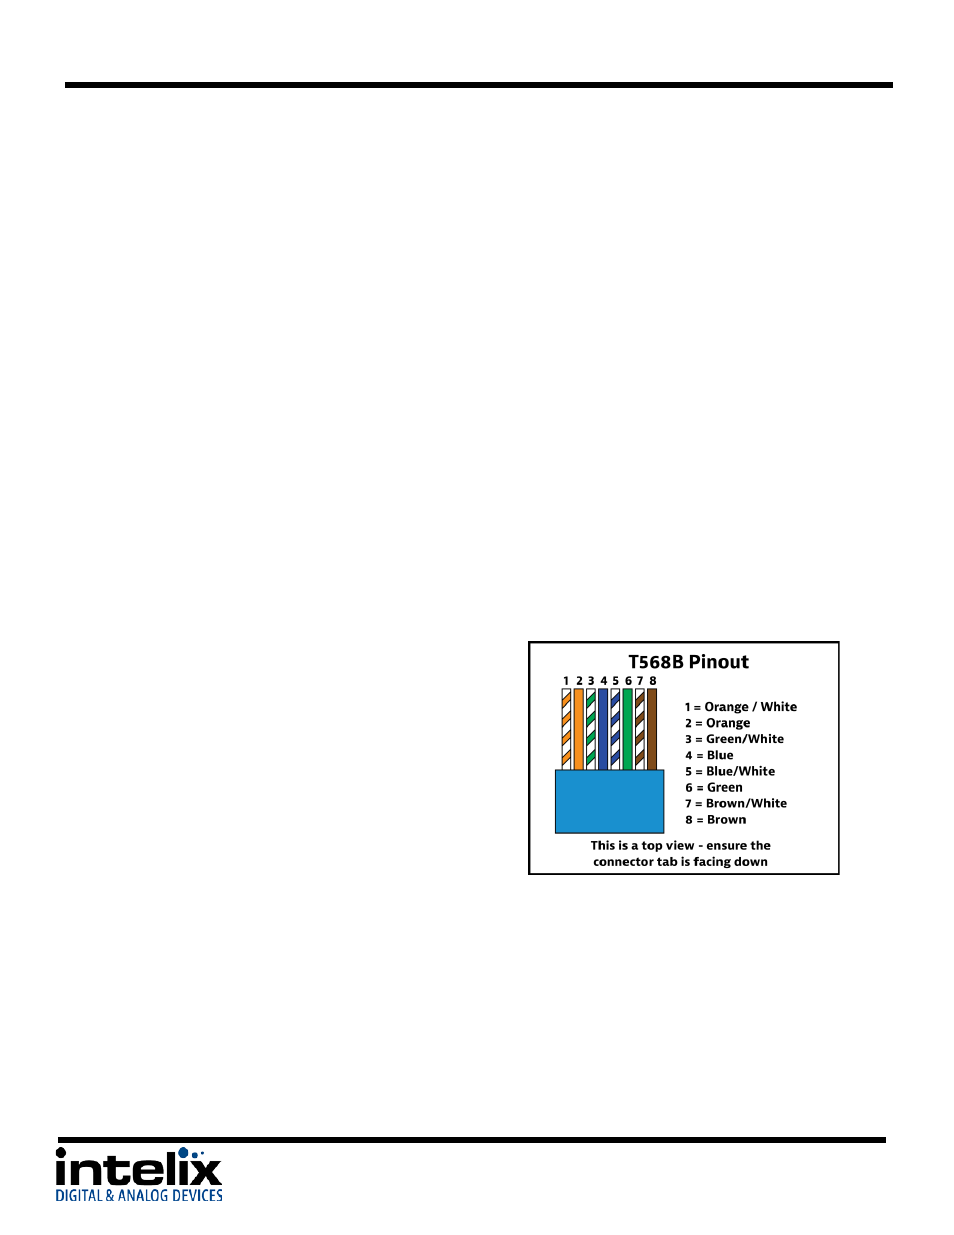
UTP Output Wiring
A compatible HDBaseT receiver is required to extend the
output signals over Twisted Pair cabling. To connect the
DIGI-88B to a compatible receiver, a Cat 6 or greater cable
with a TIA-568B crimp termination on the RJ45 connector
must be used. The Cat 6 cable must not exceed 40 meters
for 3D content. The Cat 6 cable must not exceed 70 meters
for 2D content.
IR Port Wiring
To use the IR extension capabilities of the DIGI-88B, the DIGIB-EYE (wideband IR receiver) and DIGIB-EMT
(wideband IR emitter) will need to be connected to the appropriate IR ports. DIGIB-EYE’s should be
connected to the IR RX ports and DIGIB-EMT’s should be connected to the IR EMITTER ports. After
connecting the DIGIB-EMT to the IR output, mount the IR emitter to the appropriate source gear.
*Note: Third party IR components such as connecting blocks or base stations are not compatible with the
DIGI-88B ports
8