Making loose tenon stock, Tips – INCRA Build-It STS Slot Mortiser User Manual
Page 4
INCRA Build-It STS Slot Mortiser Kit Manual
INCRA Build-It STS Slot Mortiser Kit Manual
Page 6
Page 7
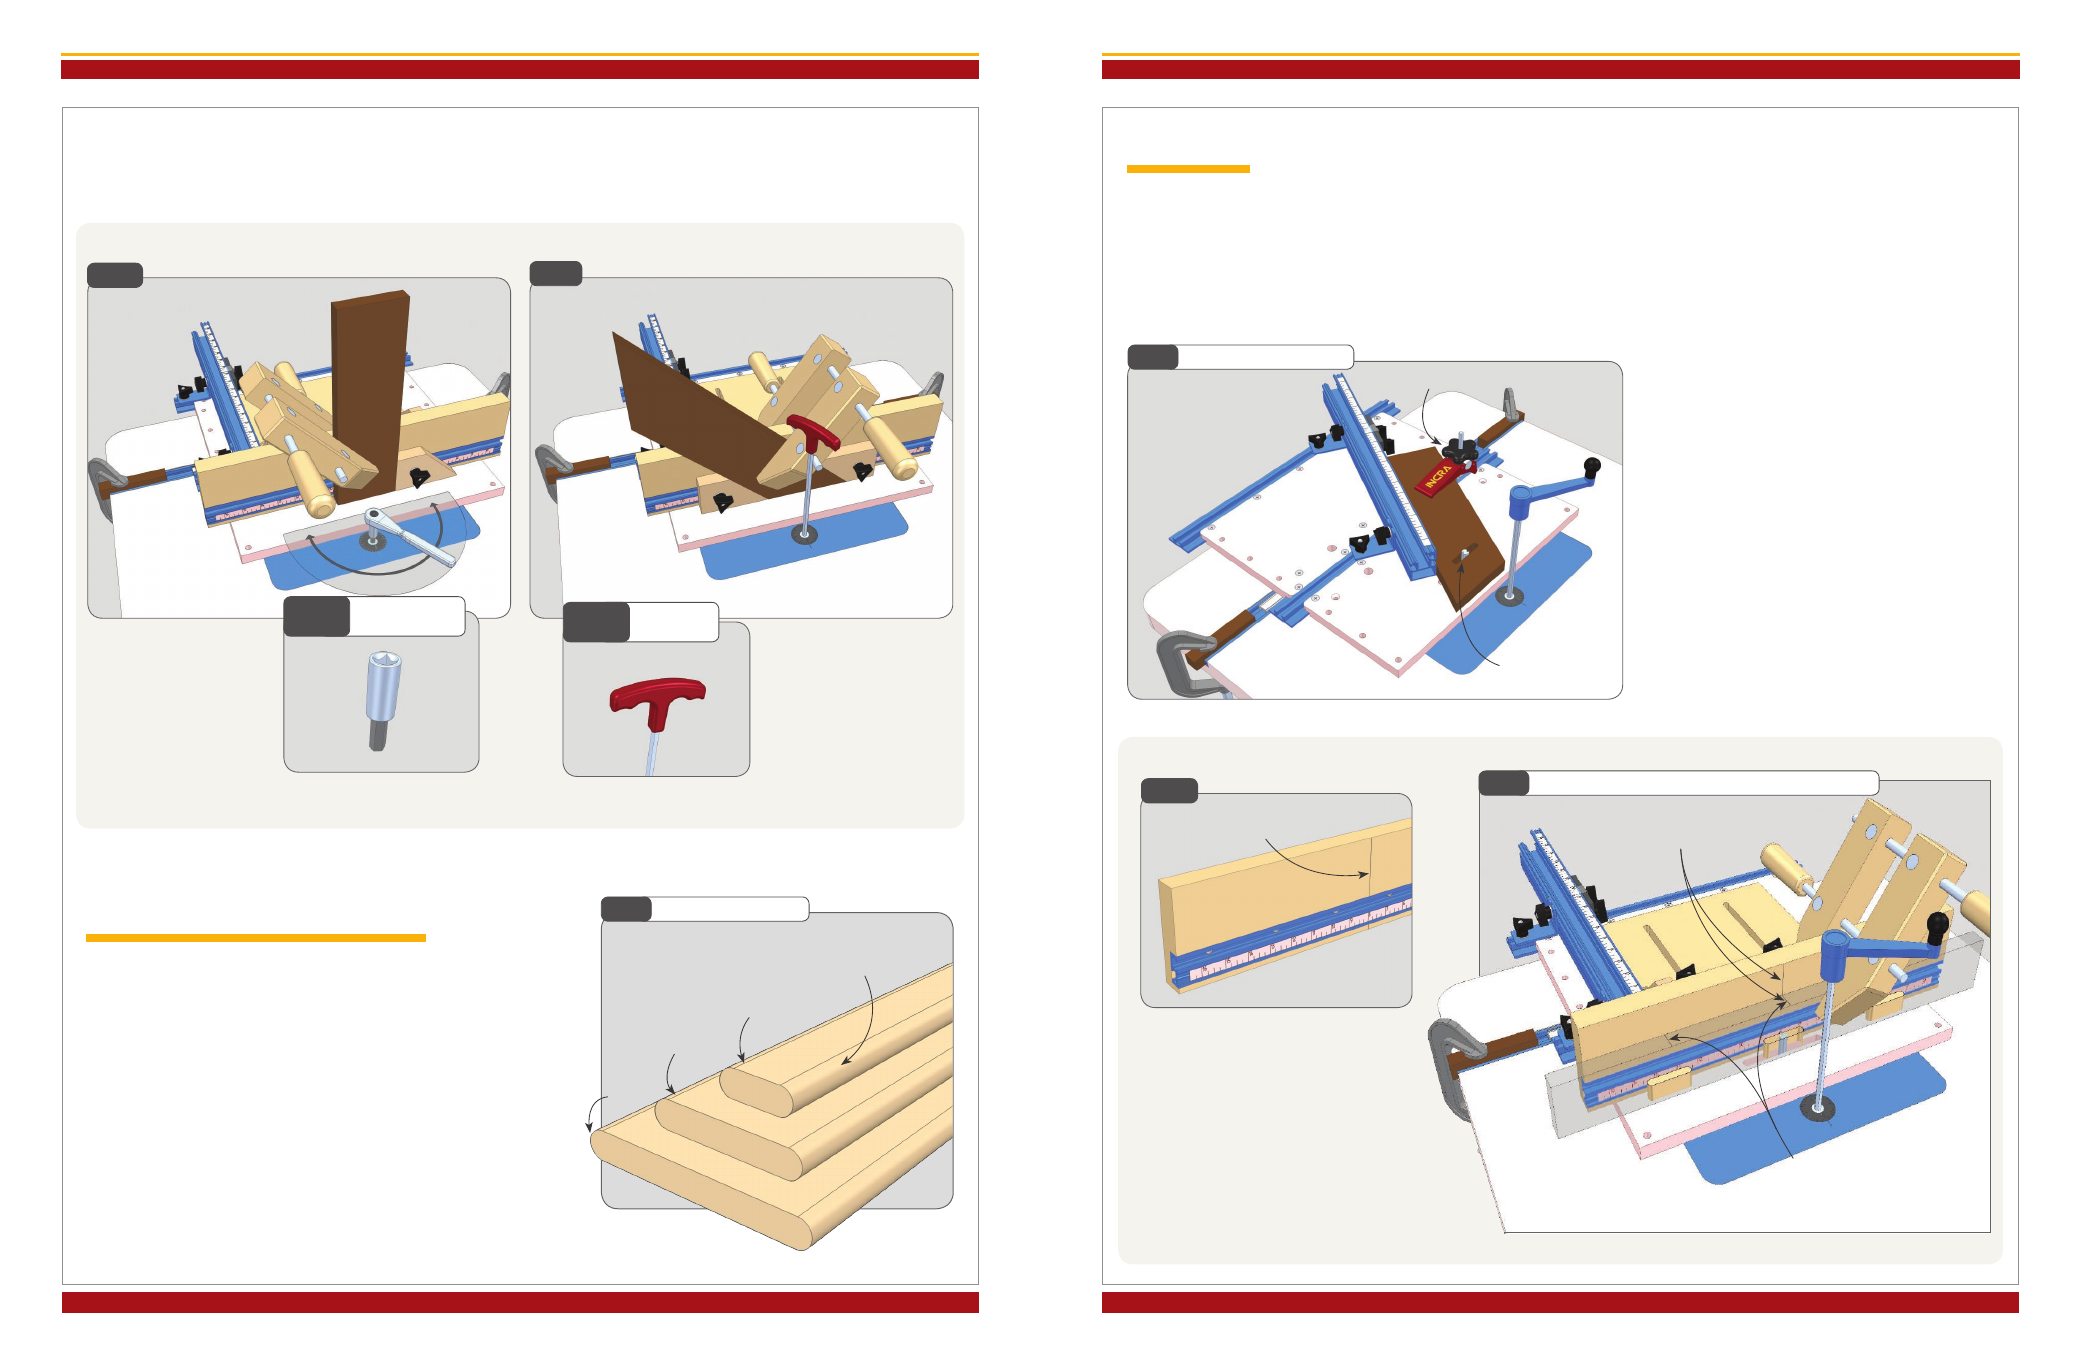
Vertically held stock will often interfere with full rotations of the
crank handle but your local hardware store has an easy solution.
Just purchase a hex driver for your ratchet set as shown and use
half rotations of the crank mechanism,
Figs. 20 & 20A. In many
cases, a T-handle hex key will work as well,
Fig. 21 & 21A.
To avoid interference
when cutting vertical
boards, use a ratchet
along with a hex driver
Making Loose Tenon Stock
Of course, slot mortises can be fun to cut with your new jig,
but you’ll need loose tenons to put it all together. When
preparing loose tenon stock, it’s a good idea to make several
sizes of long stock all at once then cut to length later as needed.
For instance, you can thickness plane material to match your
slot width then rip lengths of stock to 1”, 2” and 3” wide.
Roundover the edges with a bullnose bit that matches the slot
cutter’s diameter,
Fig. 22.
Fig.22
Loose Tenon Stock
3” Wide
2” Wide
1” Wide
Roundover edges with
bull nose bit
Faceplate stops can
be installed in a
variety of ways to
support your
workpiece
Fig.21
Fig.21A
T Handle
Hex Key
Tips
By removing the faceplate assembly and using the T-Track fence
along with one of the Build-It hold down clamps, you can cut
slot mortises and dados across the grain. And by angling the
fence across the Build-It platform you can angle the mortises
as well.
A stop positioner should always be clamped to the T-Track fence
at the left end of your material and a Build-It Clamp should be
used to prevent slippage during the cut,
Fig. 23. And again,
always start and stop each cut cycle with the jig against the
outfeed travel limit stop block.
Fig.23
Cross Grain Mortises
Fig.24
Fig.25
Cutting Mortise in the Middle of Long Stock
Need to cut a mortise in the middle of a longer
board? Just use a square to place a mark all the way
up the faceplate and in line with the 8” mark on the
faceplate scale,
Fig. 24.
(Remember the 8” mark will always be used as the
center of your slot length.) Now place a mark on
your board at the center of the desired slot
location.
The mark should be placed on the board edge
opposite where the mortise will be cut.
Align this mark with the faceplate mark when
clamping your material,
Fig. 25.
Through Mortise
Vertical mark on faceplate at 8”
Align marks when
clamping material
Mark center of slot
location on edge opposite where
slot is to be placed
Build-It Clamp
Fig.20
Fig.20A
A Hex Driver
for Ratchet