Warranty, Fig. 4 – INCRA Pro II Fence User Manual
Page 2
Made by: Taylor Design Group, Inc.
■
P.O. Box 810262
■
Dallas, Texas 75381
■
Web Site: www.incra.com
09-2000
Printed in the U.S.A. © 2000, Taylor Design Group, Inc.
INCRA is a registered trademark of Taylor Design Group, Inc.
WARRANTY
Taylor Design Group, Inc. warrants this product for one year from date of purchase. We will repair any defects due to faulty
material or workmanship, or at our option, replace the product free of charge. Please return the failing component only,
postage prepaid, along with a description of the problem to the address below. This warranty does not apply to parts which
have been subjected to improper use, alteration, or abuse.
LIFETIME WARRANTY ON POSITIONING RACKS
If an INCRA positioning rack in this tool becomes damaged for ANY reason, Taylor Design Group will replace it free of charge
for as long as you own your tool. Return the damaged rack, postage prepaid, and allow 1 to 2 weeks for delivery.
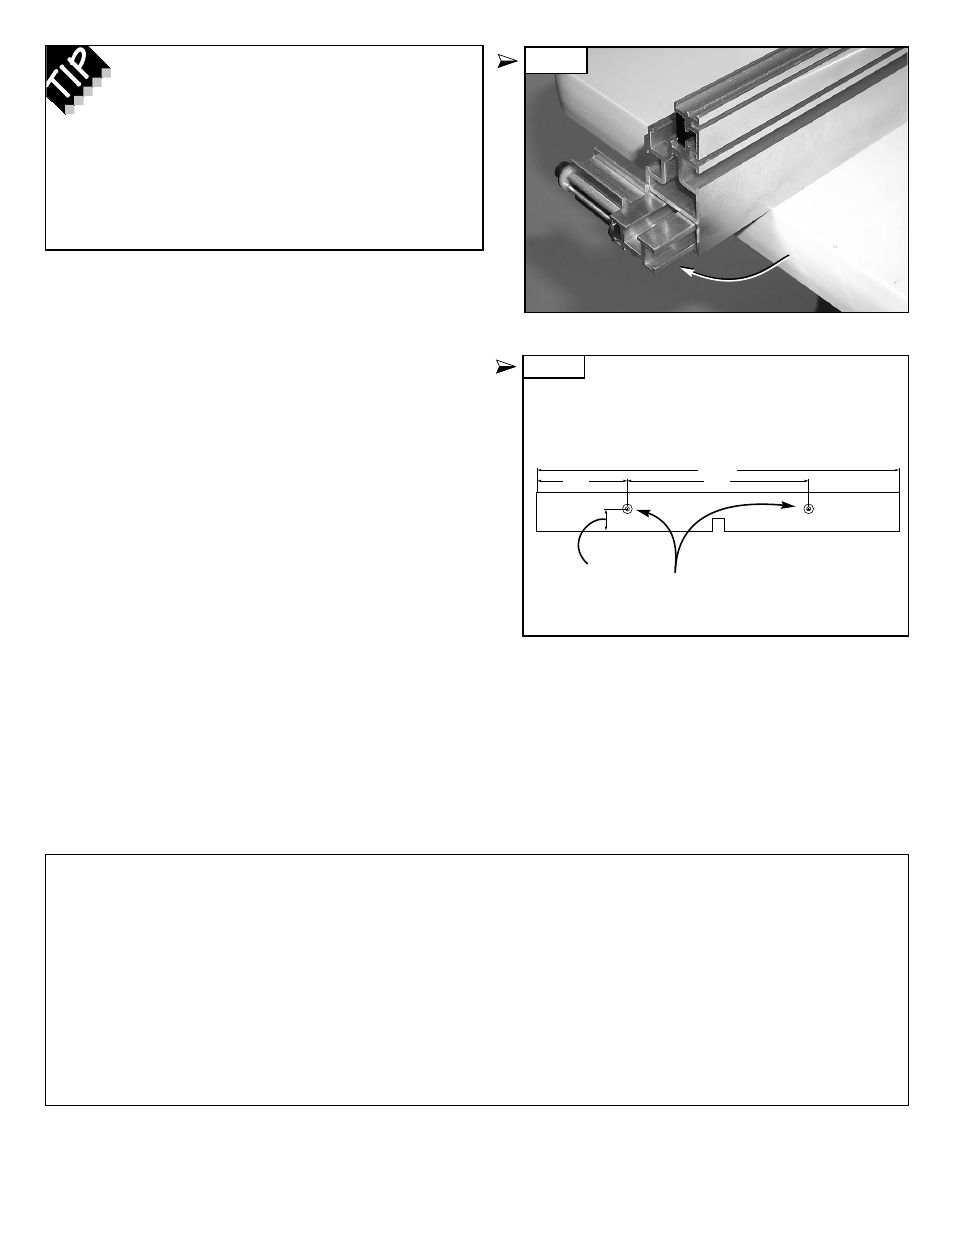
Fig. 5
Mounting an Auxiliary Fence to your
Pro II Fence.
(Replaces last paragraph on page 8 of the Incra Pro Fence
System Owner's Manual.)
To mount the auxiliary fence to your Pro II Fence, you will need
(2)
1
⁄
4
-20 phillips pan head screws, (2)
1
⁄
4
" flat washers and (2)
1
⁄
4
-20 hex nuts. The length of the screws should be slightly less
than the thickness of the auxiliary fence. Drill two
5
⁄
16
" through
holes in the auxiliary fence in the locations shown in Fig. 5.
Counterbore the holes with a
3
⁄
4
" diameter bit.
Adjust the depth of the counterbore so that the screw, when
installed in the counterbore with the
1
⁄
4
" washer, extends
3
⁄
8
"
through the back of the auxiliary fence. Loosely thread on the
1
⁄
4
-20 hex nuts, then slide the hex nuts into the T-slot located on
the front face of the Pro II Fence. Tighten the machine screws
to secure the auxiliary fence.
Fig. 4
When not in use, the extender bar and stop can be
stored in the fence. Just slide the extender bar out, turn it
over so that the scale is face down, and insert back into
the fence. Tighten the fastener to secure the bar, Fig. 4.
28"
14"
7"
1
3
/
4
"
5
/
16
" dia. through hole
3
/
4
" dia. counterbore
Extender bar
inverted for
storage