Vacuum supply, Electric branching, Set-up – Heidolph Vacuum Switchbox User Manual
Page 46: Install cooler holder and condensate cooler, Rotavac vario control
46
E
1.3. Vacuum
supply
- Connect vacuum with stud (12)
1.4. Electric
branching
- Before connecting with your local power supply make sure that:
mains voltage is identical with data plate (refer to "safety Information"; refer to "General" if
plug and outlet do not fit together.
- Connect power cord with outlet.
2. ROTAVAC vario control
Caution: ROTAVAC vario control may be used together with the LABOROTA 4002/4003
control vario evaporator only !
2.1. Set-up
- Locate items on solid and plain surface. Item must be horizontal.
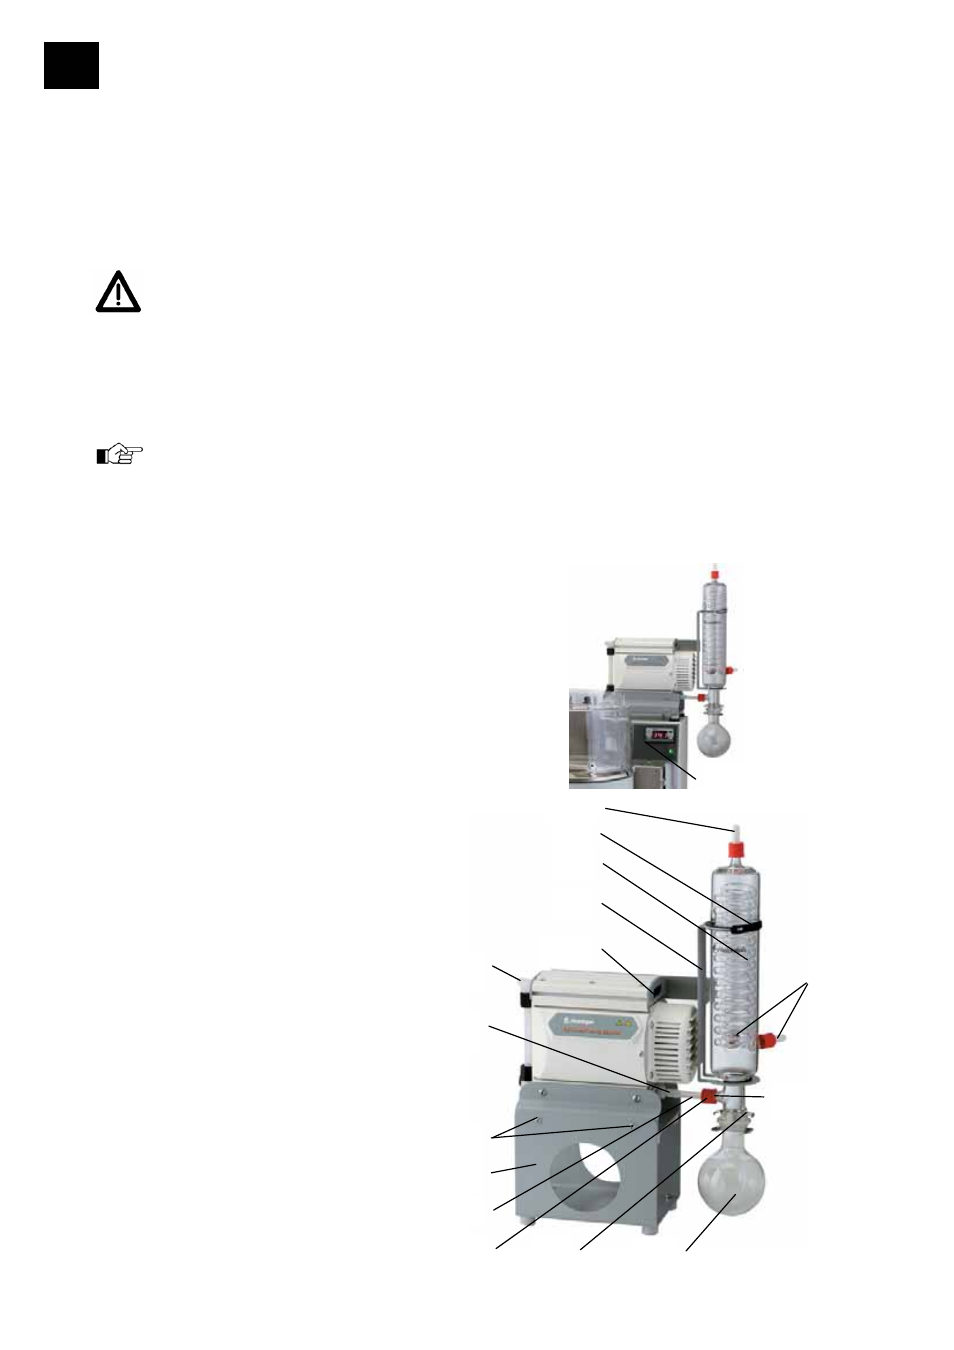
2.2. Install cooler holder and condensate cooler
- If your ROTAVAC vario control is used together
with the ROTACOOL reflux cooler, you may directly
place your ROTAVAC vario control on top of the
ROTACOOL.
- Using your ROTAVAC vario control without
ROTACOOL, an extra foot (15) has to be installed
for the condensate cooler.
- Refer to picture and install extra foot (15) with 4 ea.
screws (16), using hex pin from
you hardware kit.
- Remove fairing (17) by
unthreading two screws
- Install bracket (1) for condensate
cooler (2) on the rear of the
vacuum pump in a slot provided
to this end. Introduce 2 ea.
square nuts in slot.
- Re-install fairing (17).
- Remove coupling nut (10) from
condensate cooler (Attention,
retainer underneath coupling
nut!)
- Locate condensate cooler (2) in
holder
- Secure aftercooler with rubber
band (3).
- Install receiving flask (4) and
secure with clamp (5).
- Fit red coupling ring (10) and
seal (9) on right-hand end of
PTFE hose (7). Plug this line
ROTACOOL
14
3
2
1
17
12
6
11
4
5
10
15
16
7
18