GeoDesy FSO Next series User Manual
Page 17
GeoDesy Kft.
H-1116 Budapest, Kondorfa str. 6
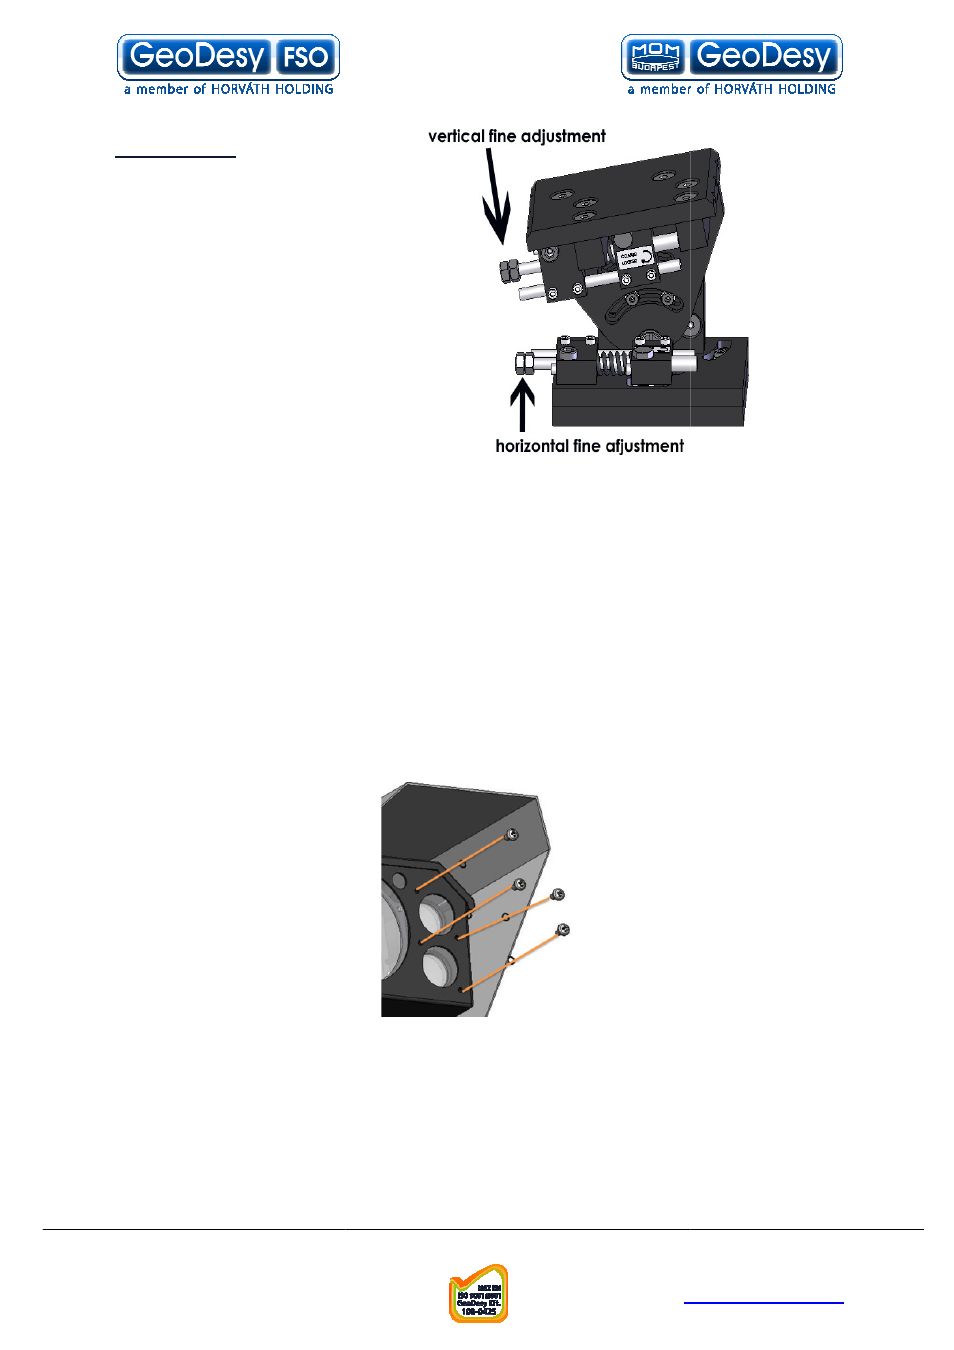
Fine tuning
1. Site A start moving the
laserhead
with
the
horizontal fine adjustment
screw by looking at the
Remote
end
received
level
2. Using the fine adjustment
screws, lighten as many
LEDs as possible
3.
Repeat step 1-2 on Site B.
4.
If necessary try step 1
on both sites again.
6.1.2 Pronto-X setting at the installation site
The installation of the Pronto
the two transmitters can be moved separately. (use only if there is no connection
between the two heads or they need adjustment). During installation the motor
control has to be switched off. It can be switched off by m
booting.
Transmitter setting screws can be approached after removing the 4 screws on the
front of the head. See image:
Telefon: 06
. 6-8.
E-mail: info@geodesy
http://www.
17
Site A start moving the
laserhead
with
the
horizontal fine adjustment
screw by looking at the
received
Using the fine adjustment
screws, lighten as many
2 on Site B.
If necessary try step 1-2
X setting at the installation site
The installation of the Pronto-X is as described above with the only difference that
the two transmitters can be moved separately. (use only if there is no connection
between the two heads or they need adjustment). During installation the motor
control has to be switched off. It can be switched off by making an unfinished
Transmitter setting screws can be approached after removing the 4 screws on the
front of the head. See image:
Telefon: 06-1-481-2050
Fax.: 06-1-481-2049
http://www.geodesy-fso.com
above with the only difference that
the two transmitters can be moved separately. (use only if there is no connection
between the two heads or they need adjustment). During installation the motor
aking an unfinished
Transmitter setting screws can be approached after removing the 4 screws on the