Gamber-Johnson 7160-0438 User Manual
Page 2
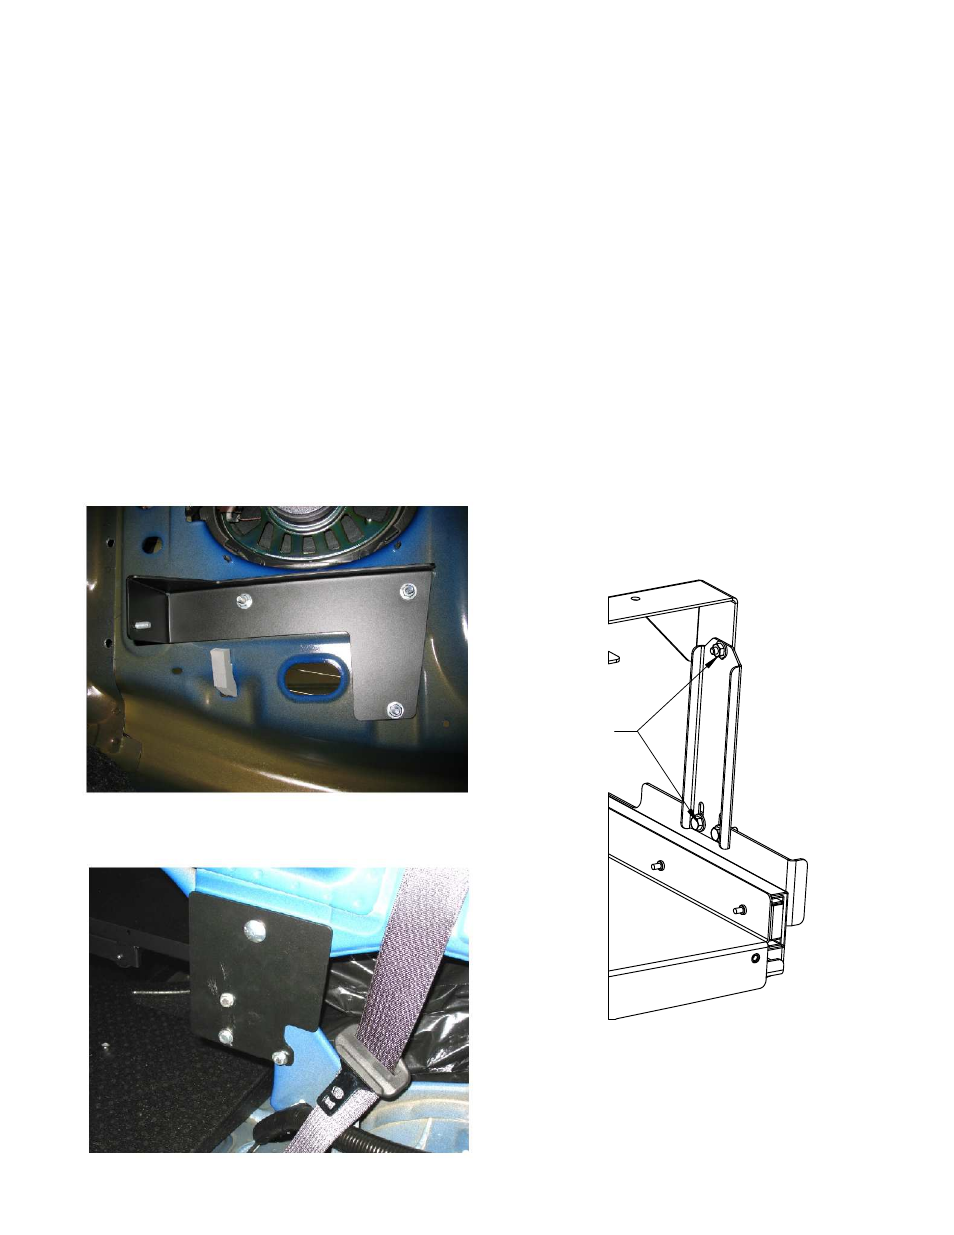
INSTALL
LOOSE
7. From inside the trunk, screw the Lower Brackets onto the bolts from the Upper Plates using
the provided flat washers and nylock nuts (Fig. 3). Drivers side shown.
8. Outside of the vehicle, loosely attach the Side Supports to the Shelf Deck using the provided ¼-
20x3/4 bolts and flat washers (Fig. 4)
9. Carefully slide the trunk shelf assembly into the vehicle trunk. Lift the trunk shelf assembly and
hook the Side Supports onto the studs in the Lower Brackets (Fig. 4)
10. Install and hand tighten the provided flat washer and nylock nuts to the studs in the Lower
Brackets.
11. From in the passenger compartment, attach the Rear Plates to the factory hole in the seat
back using the provided 3/8” carriage bolts, washers and nylock nuts (Fig. 5)
12. Install the four (4) ¼-20 x ¾ bolts and washers through the Rear Plate and into the threaded
inserts in the back of the trunk shelf.
13. Optional but recommended: The fourth hole in the Rear Plate should line up with the lip of
the wheel well. Make sure the Rear Plate is parallel to the body crease then mark and drill a hole
into the flange and secure with the provided ¼-20 x ¾ bolts, washers and nylock nuts.
14. Tighten the bolts and nuts on the Side Supports
15. Check the trunk shelf for proper latching and extension. It may be required to cut some of
the trunk liner to avoid interference with the trunk shelf operation
16. Reassemble vehicle interior in reverse direction of disassembly
Fig 3 - Upper Plate Mounting
Fig 4 - Side Support Assembly
Fig 5 - Rear Plate Installation