Feiss OL5700 User Manual
Assembly instructions for ol5700, E) 4/13
(E) 4/13
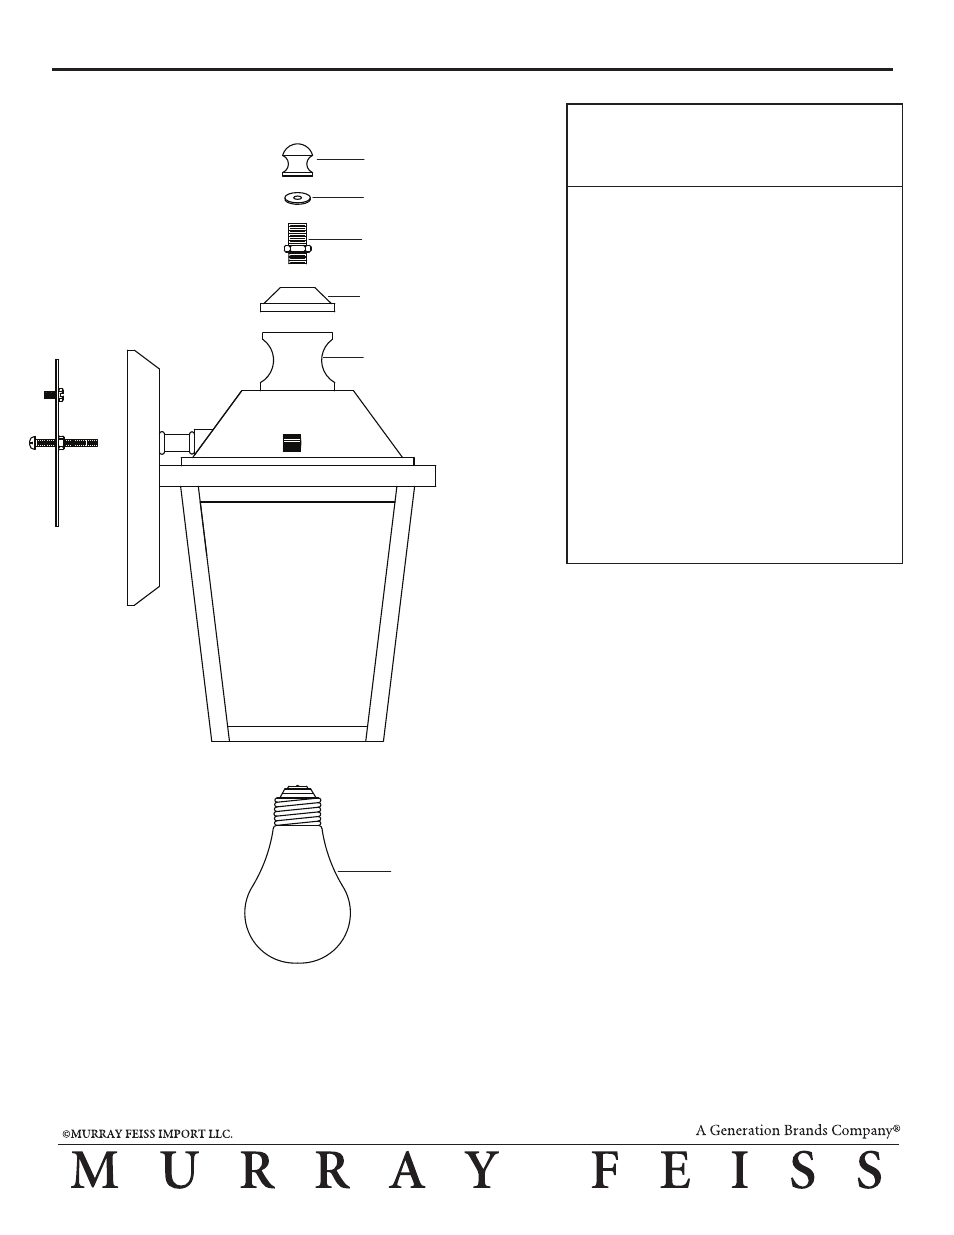
ASSEMBLY INSTRUCTIONS FOR OL5700
Lamp
(not included)
Threaded Pipe
IMPORTANT
TURN OFF THE POWER AT THE MAIN FUSE
OR CIRCUIT BREAKER BOX
BEFORE STARTING INSTALLATION
Cover
Break
Rubber Washer
Finial
Carefully unpack and identify all parts
before assembly. Lamp is not included.
1. Install a hex nut onto one end of
threaded pipe leaving about 3/8"
(10mm) thread exposed. Screw same end
of threaded pipe into the break. Tighten
hex nut. Slip the cover and rubber
washer through the installed threaded
pipe. Lock all together by fastening with
finial.
2. Install lamp (Not Included). See
relamping label located at socket area for
type and maximum allowed wattage.
3. Follow enclosed “Standard Outdoor
Mounting plate installation instructions”
for electrical and fixture installation onto
wall outlet box.
- VS3900_ (4 pages)
- VS4000_ (4 pages)
- VS50003 (4 pages)
- VS4200_ (4 pages)
- VS43003 (4 pages)
- VS44001 (4 pages)
- VS45003 (4 pages)
- VS46002 (4 pages)
- VS47002 (4 pages)
- VS48001 (4 pages)
- VS52002 (4 pages)
- VS53001 (4 pages)
- VS53002 (4 pages)
- WB1701 (4 pages)
- WB1703 (4 pages)
- WB1704 (4 pages)
- VS36003 (4 pages)
- VS36004 (4 pages)
- WB1702 (4 pages)
- WB1705 (4 pages)
- VS38001 (4 pages)
- VS38002 (4 pages)
- VS3100_ (4 pages)
- VS15901 (1 page)
- VS17401 (1 page)
- VS17802 (1 page)
- VS18201 (1 page)
- VS18401 (1 page)
- VS18501 (1 page)
- VS18702 (1 page)
- VS18902 (1 page)
- VS18903 (1 page)
- VS28001 (1 page)
- VS29001 (1 page)
- VS26001 (1 page)
- VS18904 (1 page)
- VS27001 (1 page)
- VS3200_ (4 pages)
- WB1598 (4 pages)
- VS3400_ (4 pages)
- WB1597 (4 pages)
- WB1601 (4 pages)
- WB1603 (4 pages)
- WB1606 (4 pages)
- WB1607 (4 pages)