Feiss P1161 User Manual
P1161, Assembly instructions for
IMPORTANT
TURN OFF THE POWER AT THE MAIN FUSE OR
CIRCUIT BREAKER BOX
BEFORE STARTING INSTALLATION
Carefully unpack and identify all parts before
assembly. Bulb not
included.
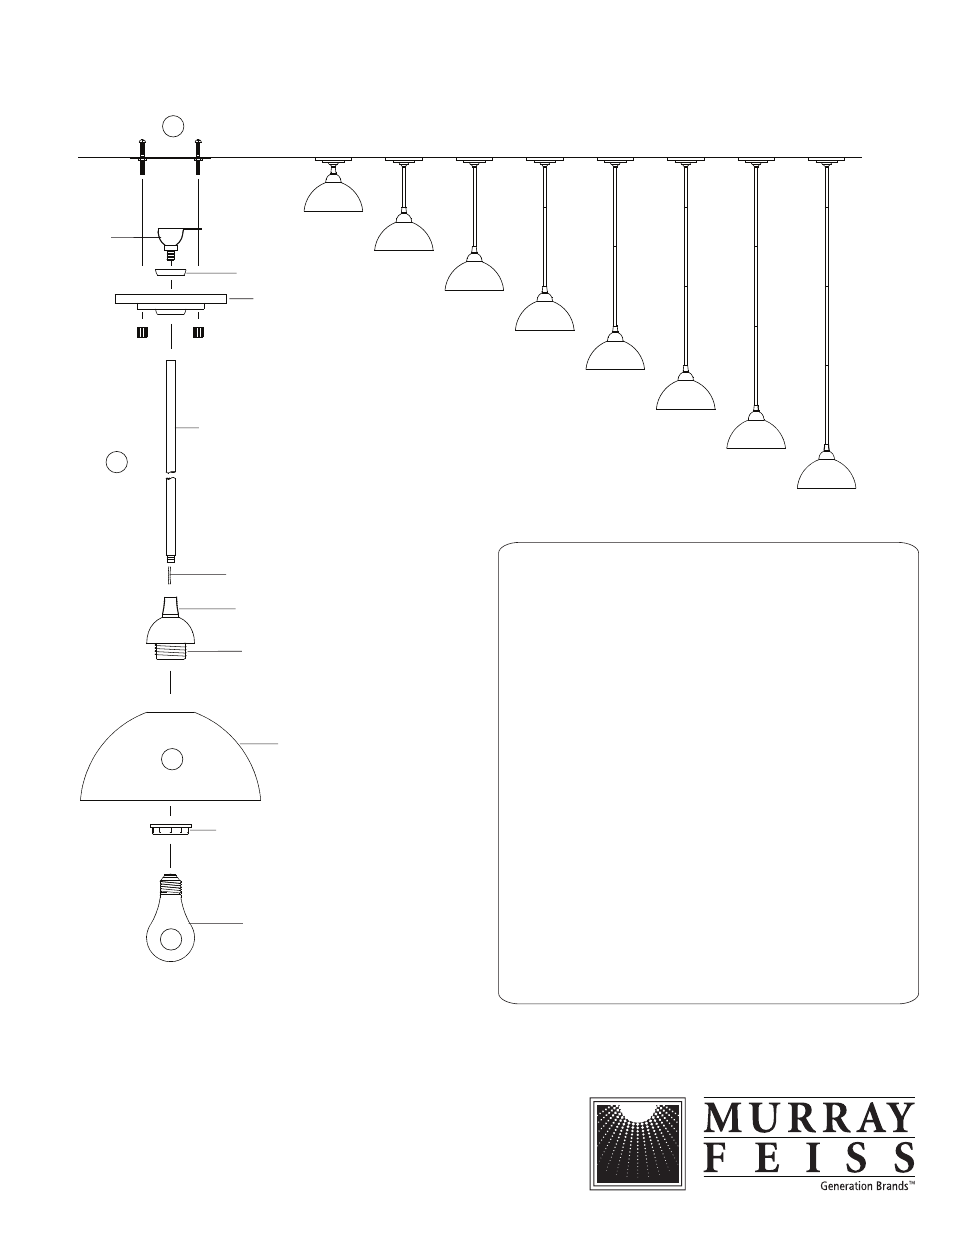
1. Install stems:
A. Choose desired installation height from dimensions shown in
above diagram. Thread fixture wires through each stems to be
used. Note correct position of stems from left diagram. Screw all
stem together until secure.
B. Install bottom end of stem assembly by screwing into top of
fixture.
C. Thread fixture wires through canopy, plastic ring and then
swivel. Allow canopy to carefully slide down without scraping the
surface of stems. Then install swivel by screwing onto top end of
stem assembly.
2. Follow enclosed supplement installation instructions for electrical
and fixture installation onto house outlet box. If you do not have
an outlet box at desired location to attach the fixture than hire a
qualified electrician to create one.
3. Install glass shade onto fitters by fastening counter ring onto
threaded sockets.
4. Install bulb (not included). See relamping label located near socket
area for type and maximum allowed wattage.
Assembly Instructions For
P1161
Socket
Bulb
(not included)
Counter Ring
Stem
Shade
Canopy
(Fixture Plate)
Plastic Bag
Swivel
(E) 11/08
Fixture
Fixture Wires
4
2
3
1
20"
14"
8"
38"
32"
26"
50"
44"