Feiss F2076 User Manual
E) 3/06
(E) 3/06
ASSEMBLY I NSTRUCTI ONS FOR F2076/6
IMPORTANT
TURN OFF THE POWER AT THE MAIN FUSE
OR CIRCUIT BREAKER BOX
BEFORE STARTING INSTALLATION
1. Carefully remove all parts from box and
remove wrappings. NOTE: DO NOT
YET REMOVE WRAPPINGS
SURROUNDING ARMS. Carefully
lay parts on a non-abrasive surface and
identify all parts before assembly. Bulb
not included.
2. Spread open all arms so they are equally
spaced apart to each other.
3. A. While one person holds top section
of arms neatly bunched together, slip
notched cover from above and secure all
L shaped pins inside of it's notches.
B. Remove all wrappings from arms.
C. Screw the long threaded end of spacer
tube through the notched cover. Then
secure all together by fastening fixture loop
from above.
4. Follow enclosed supplement installation
instructions for electrical and fixture
installation onto house outlet box. If you do
not have an outlet box at desired location to
attach the fixture than hire a qualified
electrician to create one.
5. Install threaded stud into finial. Then fasten
finial by screwing onto bottom of fixture.
6.
Place shade over threaded socket then
spacer ring and secure with counter ring.
7. Install bulbs (not included). See relamping
label located near socket area for type and
maximum allowed wattage.
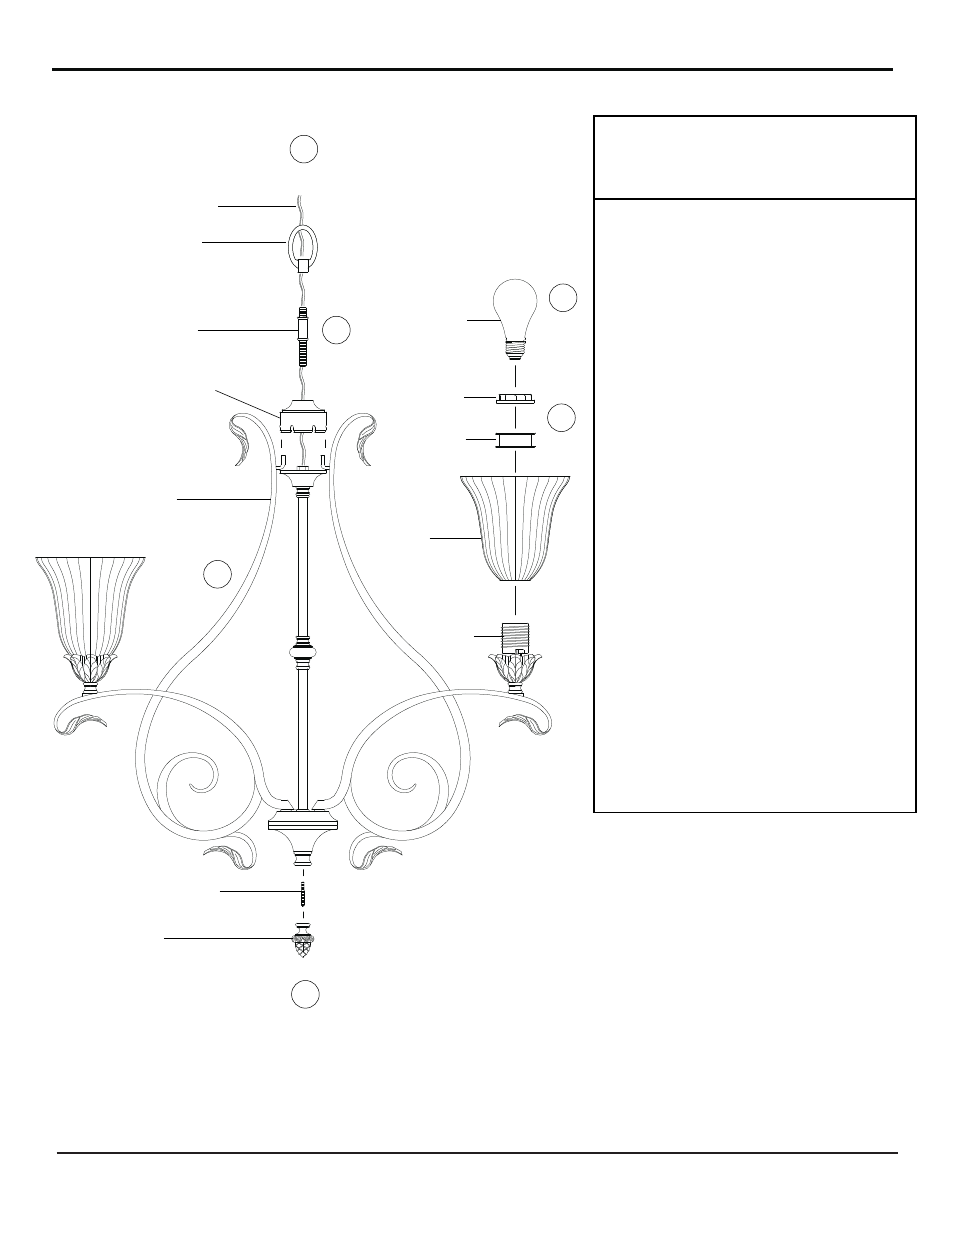
Fixture Loop
Fixture Wires
& Ground Wire
Spacer Tube
Notched Cover
Threaded Stud
Finial
Bulb
(not included)
Counter Ring
Spacer Ring
Arm
Socket
2
3
4
7
6
5
M U R R A Y F E I S S
©MURRAY FEI SS I MPORT LLC.
A Quality Home Brands Company®
Shade