Feiss F1902 User Manual
E) 10/04
(E) 10/04
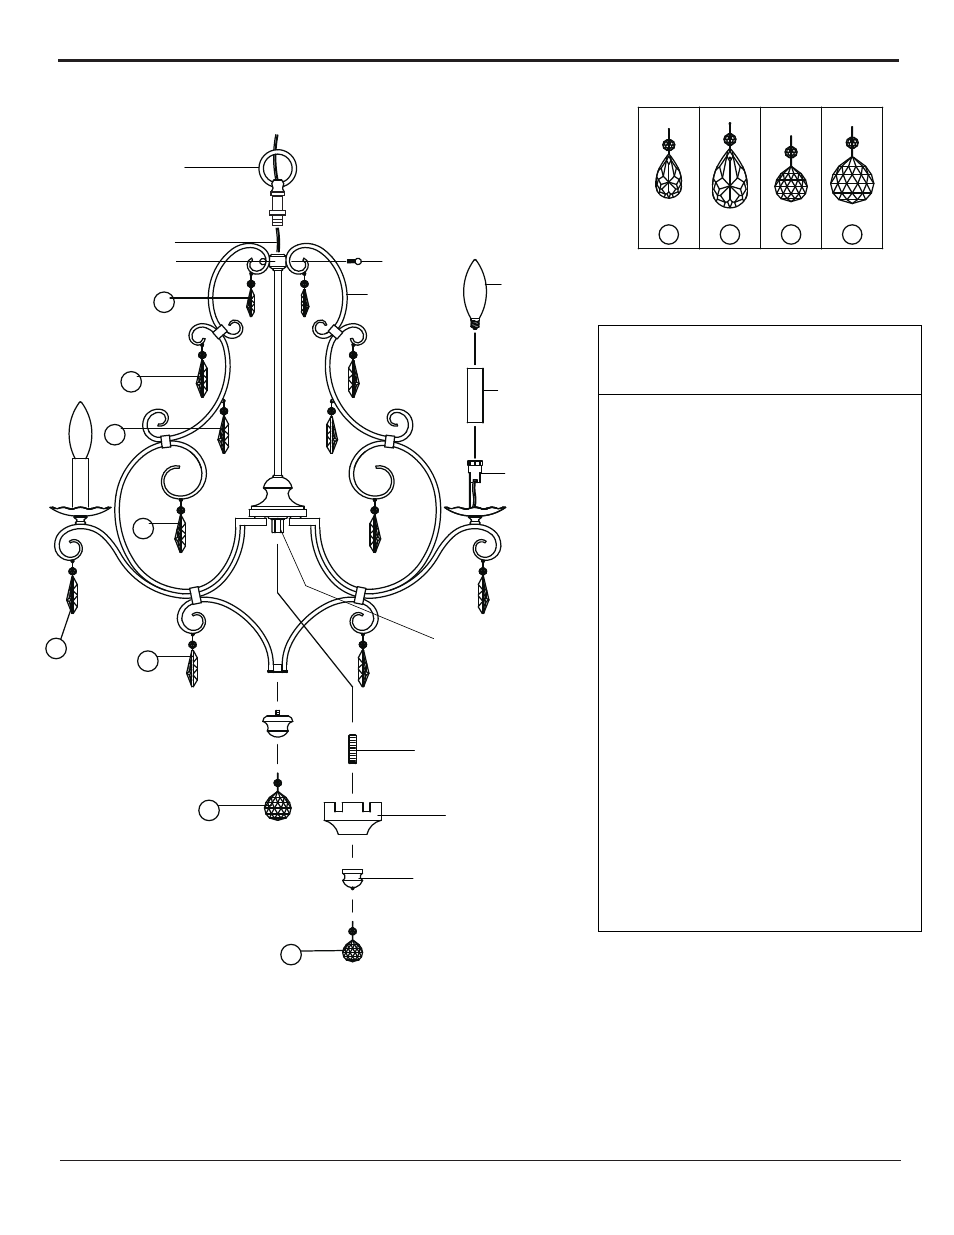
ASSEMBLY INSTRUCTIONS FOR F1902/6
M U R R A Y F E I S S
©MURRAY FEISS IMPORT LLC.
IMPORTANT
TURN OFF THE POWER AT THE MAIN FUSE
OR CIRCUIT BREAKER BOX
BEFORE STARTING INSTALLATION
Carefully unpack and identify all parts
before assembly. Bulbs are not included.
1. Spread open arms so they are evenly spread
to each other. Then lock upper section of
arms with cap screw onto corresponding
holes at center body.
2. Screw bottom threaded pipe into coupler.
Slide notched cap over bottom threaded pipe
and lock arms into its notches. Lock notched
cap into position by fastening finial onto
bottom threaded pipe.
3. Carefully thread fixture wire and ground wire
through fixture loop. Screw fixture loop onto
center body until secure.
4. Place candle tubes over candelabra sockets
and screw bulbs (not included) into sockets
to secure. See relamping label on candle tube
for type and maximum allowed wattage.
5. Follow enclosed “Chain Suspended Fixture
Installation Instructions” for electrical and
fixture installation onto ceiling outlet box.
6. Hang all crystal glass parts as shown on
drawing. NOTE: To replace broken crystals
extras are included in hardware bag. Replace
by gently bending open pins, remove broken
crystal, hook new one, then close back pins.
Avoid bending pins into sharp angle.
Fixture Loop
Fixture Wire and
Ground Wire
Bulb
(not included)
Candle Tube
Socket
Coupler
Notched Cap
Finial
Cap Screw
Bottom
Threaded Pipe
Arm
Center Body
2
2
1
2
3
4
2
2
(1) PC. (1) PC.
4
2
3
(6) PCS. (30) PCS.
1