Feiss MFMISCA0002 User Manual
Colin 1 light wall (fluorescent), Installation instructions for, Mfmisca0002
1
Installation Instructions for
Colin 1 Light Wall (Fluorescent)
1.0
MFMISCA0002
MFMISCA0002
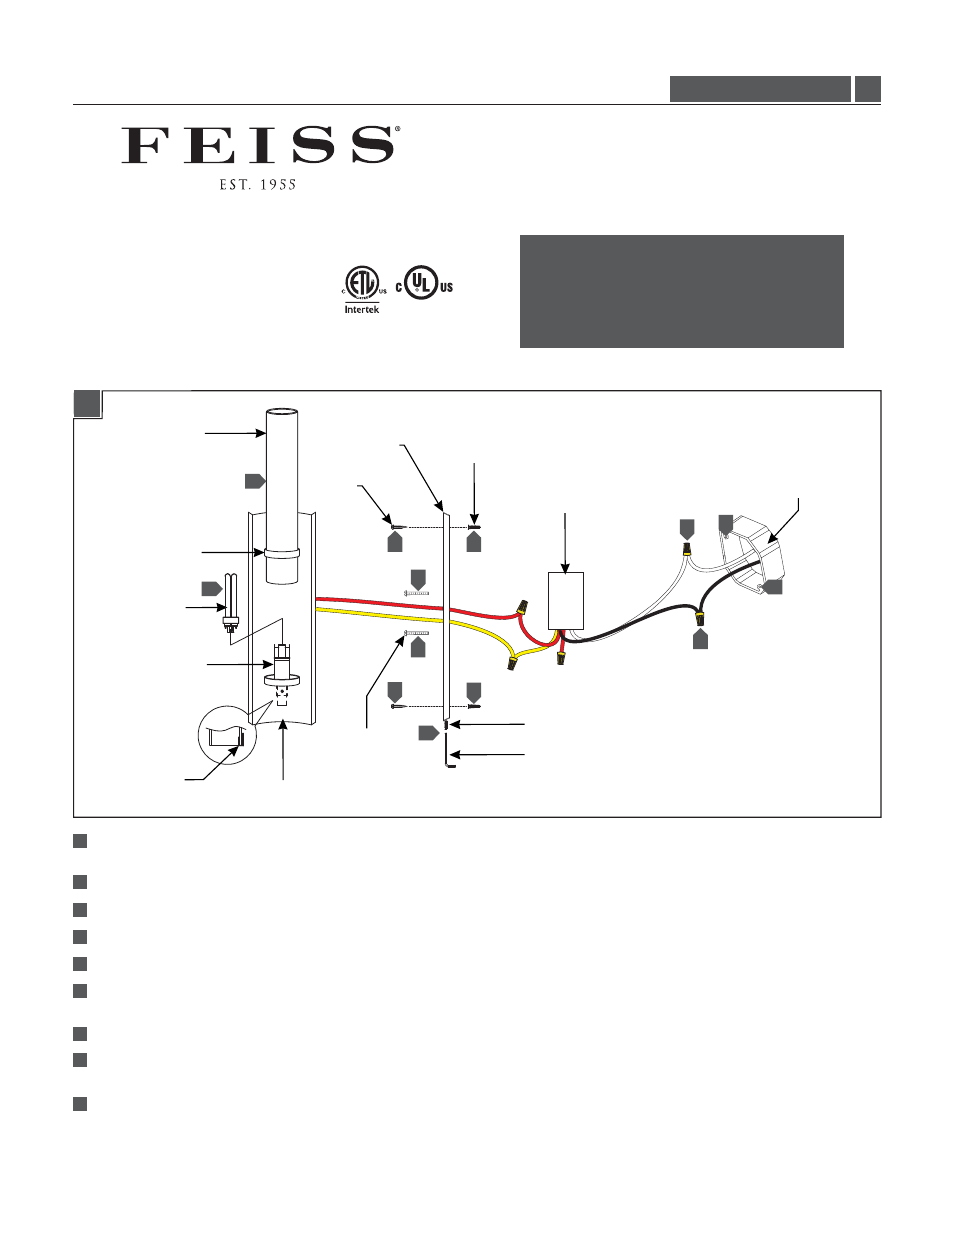
Temporarily install the mounting plate to the electrical box using the mounting plate screws and mark the anchor locations
on the wall. Remove the mounting plate.
Drill the appropriate size holes for the anchors and push the anchors into the wall.
Connect the fixture to a suitable ground in accordance to local electrical codes.
Connect the white ballast wire to the neutral power line wire with a wire nut.
Connect the black ballast wire to the hot power line wire with a wire nut.
Neatly place the ballast and wires into the electrical box, then reinstall the mounting plate to the electrical box and screw
the anchor screws into the anchors.
Mount the fixture base onto the mounting plate and secure it with the fixture screws using the Allen wrench.
Install the lamp by pushing the lamp pins completely into the socket holes. Refer to the label on the lamp socket for Max
Wattage information.
Install the shade by slipping it through both fixture rings and onto the bracket.
1
2
3
1A
FIXTURE
4
ELECTRICAL BOX
MOUNTING
PLATE
5
FIXTURE SCREW
Wall
G
P
I
:
ENERAL RODUCT NFORMATION
This product is listed by one of the following
“ ationally
ecognized
esting aboratory”
N
R
T
L
This product is suitable for damp locations.
This instruction shows a typical installation.
CAUTION - RISK OF FIRE
This product must be installed in accordance with
the applicable installation code by a person familiar
with the construction and operation of the product
and the hazards involved.
Use minimum 90°c supply conductors.
MOUNTING
PLATE SCREW
BALLAST
6
ANCHOR
SCREW
ANCHOR
1
1
7
8
4
5
7
8
2
6
9
SHADE
LAMP
FIXTURE
RING
SOCKET
ALLEN WRENCH
BRACKET
2
1
1
6
9