Replace phase a bus bar – ETC Sensor+ Portable Pack CEM+ to CEM3 Retrofit User Manual
Page 11
2
The Retrofit
9
Replace Phase A Bus Bar
A slightly modified Phase A bus bar is included in the upgrade kit. This new bus bar allows
for greater clearance between the bus bar and the CEM3 backplane. You will need to
remove the old Phase A bus bar and install the new one in its place.
To remove the old bus bar:
Step 1:
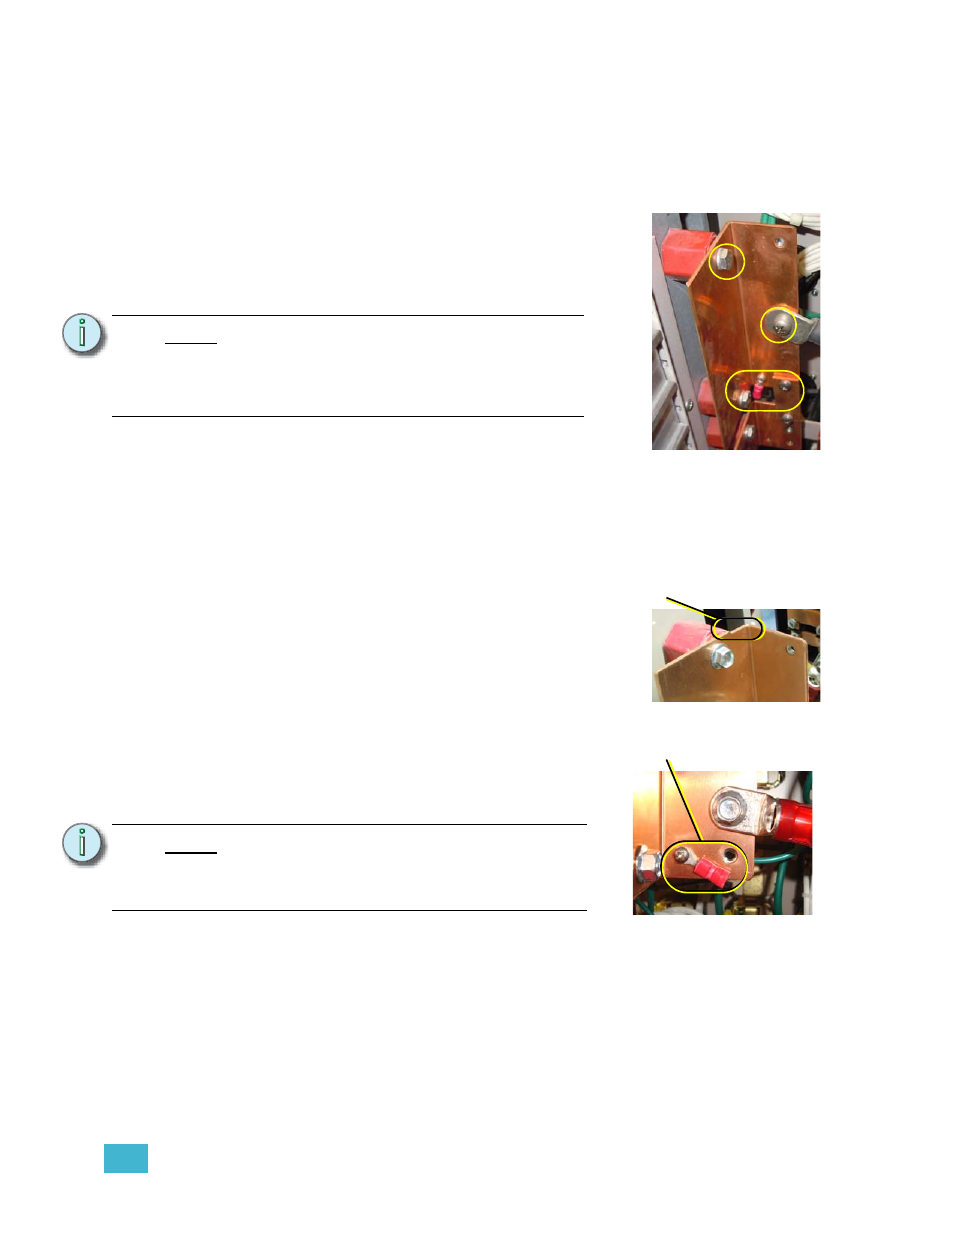
Disconnect the Phase A Cam Wire and
Phase A Detection Wire using a #2 phillips
screwdriver or socket (may be 7/16” or 3/8”
depending on your pack model) as
required. Save the hardware for these
connections as you will need to reuse them.
Step 2:
Using a socket (may be 7/16” or 3/8”
depending on your pack model), disconnect
the two hex head bolts holding the bus bar
to the pack.
Step 3:
Remove the old bus bar from the pack.
To install the new bus bar:
Step 1:
Place the new phase bar in its intended
location and secure it with the bolts
removed earlier. The new phase bar has a
distinctive notch in the copper at the top
corner bend of the bar. Tighten the bolts to
6 ft.-lbs.
Step 2:
Attach the Phase A Cam Wire to the phase
bar.
Step 3:
Attach the phase detection wire to the bus
bar. The phase detection wire must be
installed in the orientation shown at right to
meet minimum spacing requirements for
the Phase B bus bar.
N o t e :
If your pack is set up for single-phase
operation, you will have to remove the
screw that holds the phase jumper bar to
the phase A bus bar. Save the screw as you
will need it to reattach to the new bus bar.
N o t e :
If your pack was set up for single-phase
operation, you will have to reconnect the
phase jumper bar to the phase A bus bar
using the previously removed screw.
Remove these fasteners
Notch in new phase bar
Phase detection wire
must be in this orientation