Canopy fixture installation, Installing the portable fixture – ETC Desire D22 User Manual
Page 7
7
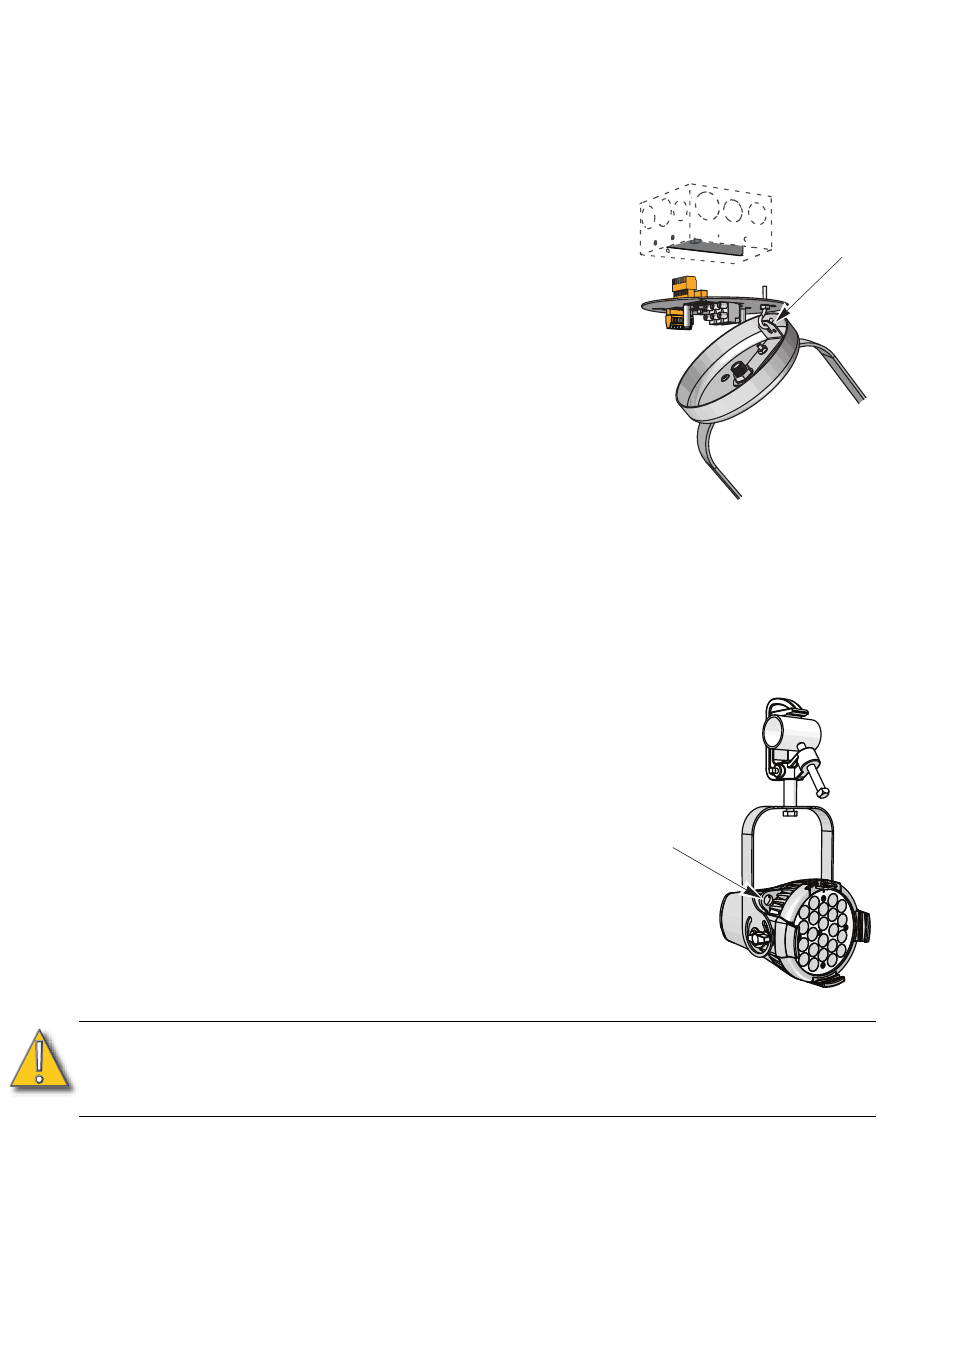
Canopy Fixture Installation
Step 1:
Strip the fixture’s power wires back 1/2 inch (13mm).
Step 2:
Using the hole in the mounting bracket,
hang the canopy on the Installation hook.
Step 3:
Following the label on the mounting plate,
attach the power wires to the power block.
Step 4:
Secure the fixture ground wire to the
mounting plate.
Step 5:
If the fixture is the last fixture on a
DMX/RDM line, terminate the fixture. See
Step 6:
Insert the DMX/RDM connector into the
Terminal board.
Step 7:
To determine the alignment of the canopy,
orientate the fixture to where it will need to
be focused.
Step 8:
Align the holes in the canopy with the
mounting posts on the mounting plate and using a #2 Phillips
screwdriver, secure the canopy to the mounting plate with the canopy
screws.
Step 9:
Focus the fixture.
Installing the Portable Fixture
The C-clamp attaches the fixture to the mounting pipe.
The position of the fixture can be adjusted once it is
mounted.Tightly fasten the C-clamp to the yoke with
the provided yoke bolt and lock washer.
Step 1:
Place the C-clamp on the mounting pipe,
and then tighten the pipe bolt to secure it.
Step 2:
Loop a safety cable over the pipe and attach
the ends to the safety cable loop on the body
of the fixture.
Step 3:
Loosen the C-clamp yoke bolt and rotate the
yoke to the desired position.
Step 4:
Tighten the bolt to lock the fixture.
C A U T I O N :
Tighten the C-clamp pipe bolt to about 18 inch lbs.
(Approximately finger tight plus up to one-quarter turn.) Do not
use excessive force.
Installation
hook and
bracket
Safety loop