Brother DR-250 User Manual
Page 7
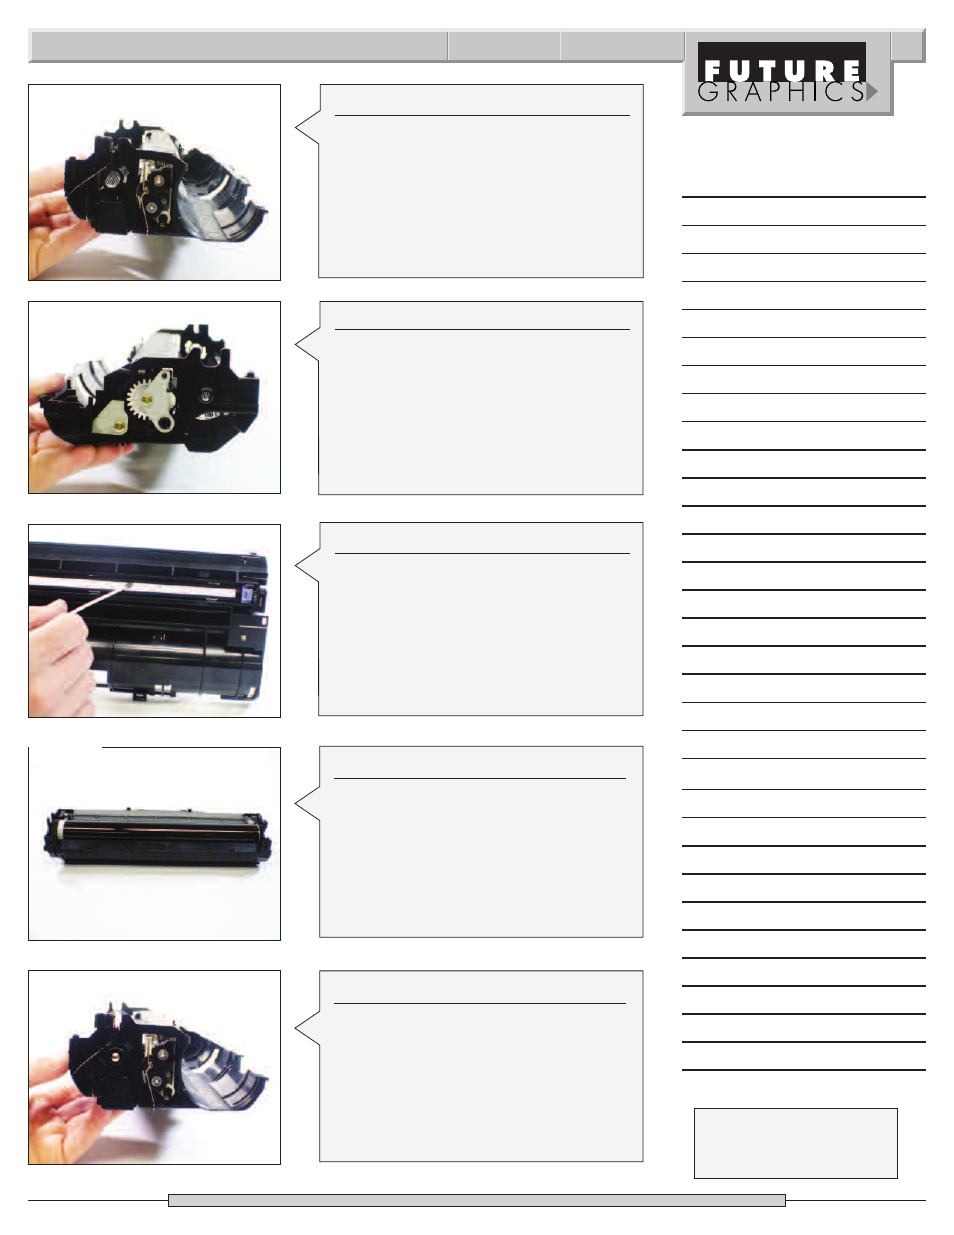
Photo 32
Photo 33
Need help with a particular remanu-
facturing problem?
Call the Technical Resource Center from
8am - 5pm PST: 800 394.9900
Photo 30
Step 27
Pull the drive gear end of the developer
roller out of the cartridge again. Install the
contact end gear onto the developer
roller axle. Place the contact bar back onto
the developer roller.
(See Photo 30)
Step 28
Install the developer roller bearing, drive
gear and the large white gear onto the
end of the cartridge. Place the metal gear
housing end plate onto the cartridge and
install the screw that holds the end plate
in place.
(See Photo 31)
Step 29
Clean the corona wire using a cotton
swab and alcohol.
(See Photo 32)
Photo 31
Step 30
Place the drive gear onto the drum and
install the drum into the cartridge.
(See Photo 33)
Step 31
Slide the drum axle through the drum
starting on the contact side. Install the
drum axle locking hub onto the drum
axle. Rotate the hub clock-wise to lock the
hub in position.
(See Photo 34)
Brother DR-250 Technical Instruction
7
Photo 34
Notes
- HL-2240 (522 pages)
- HL-2240 (21 pages)
- HL-2240 (150 pages)
- HL-2240 (2 pages)
- HL 5370DW (172 pages)
- HL-2170W (138 pages)
- HL 5370DW (203 pages)
- HL 2270DW (35 pages)
- HL 2270DW (47 pages)
- HL 5370DW (55 pages)
- HL-2170W (137 pages)
- HL-2170W (52 pages)
- PT-1290 (1 page)
- DCP-385C (122 pages)
- MFC 6890CDW (256 pages)
- DCP-585CW (132 pages)
- DCP-385C (2 pages)
- DCP-383C (7 pages)
- Pocket Jet6 PJ-622 (32 pages)
- Pocket Jet6 PJ-622 (11 pages)
- Pocket Jet6 PJ-622 (48 pages)
- Pocket Jet6Plus PJ-623 (76 pages)
- PT-2700 (34 pages)
- PT-2700 (62 pages)
- PT-2700 (90 pages)
- PT-2700 (180 pages)
- PT-2100 (58 pages)
- HL 5450DN (2 pages)
- DCP-8110DN (22 pages)
- HL 5450DN (168 pages)
- HL 5450DN (2 pages)
- HL 5470DW (177 pages)
- HL 5450DN (120 pages)
- DCP-8110DN (13 pages)
- HL 5470DW (34 pages)
- HL-S7000DN (9 pages)
- HL 5470DW (30 pages)
- MFC-J835DW (13 pages)
- DCP-8110DN (36 pages)
- HL-6050D (37 pages)
- HL-7050N (17 pages)
- HL-6050DN (138 pages)
- HL-6050D (179 pages)
- PT-1280 (1 page)
- PT-9800PCN (118 pages)