Brother DR-250 User Manual
Page 2
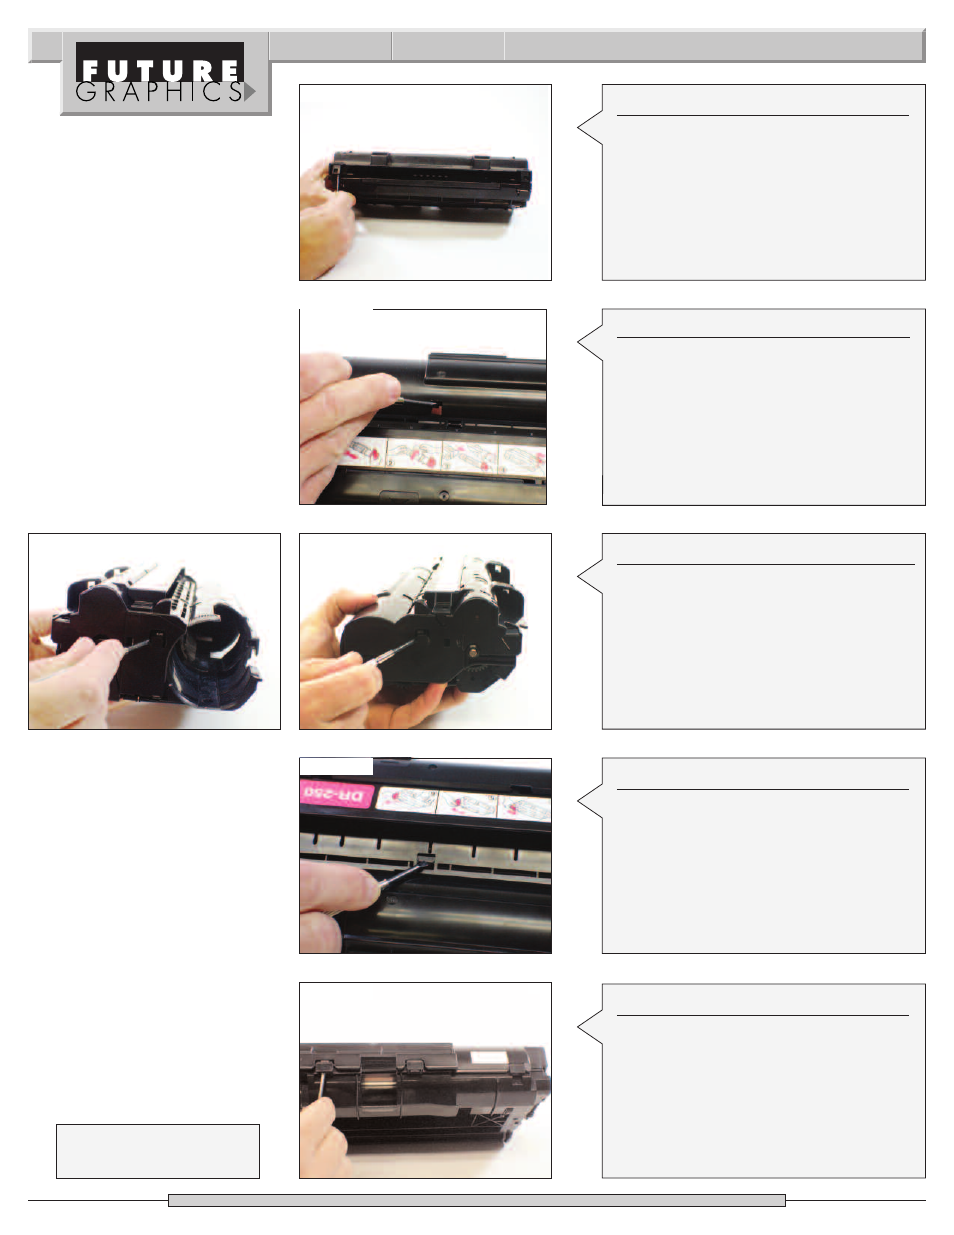
Photo 4
Step 4
Next to the locking tabs located on the
top of the cartridge there are two slots
were you can see the metal toner filling
cover. Using a screwdriver push the cover
down (towards the drum) till the guide
tab is exposed.
(See Photo 5)
Photo 6
Photo 7
Step 6
Using a flat blade screwdriver release
the two locking tabs from the top of the
cartridge.
(See Photo 8)
Photo 9
Photo 8
Need trustworthy, detailed Technical
Instructions for another engine?
V isit: www.futuregraphicsllc.com
2
Brother DR-250 Technical Instructions
Photo 5
Step 3
Step 3: Using a small flat blade screwdriv-
er, release the two locking clips on the
back of the cartridge. (See Photo 4)
Step 5
Release the locking tabs on both sides of
the cartridge.
(See Photo 6 & 7)
Step 7
Step 7: Release the three locking tabs
from the front of the cartridge.
(See Photo 9)
- HL-2240 (522 pages)
- HL-2240 (21 pages)
- HL-2240 (150 pages)
- HL-2240 (2 pages)
- HL 5370DW (172 pages)
- HL-2170W (138 pages)
- HL 5370DW (203 pages)
- HL 2270DW (35 pages)
- HL 2270DW (47 pages)
- HL 5370DW (55 pages)
- HL-2170W (137 pages)
- HL-2170W (52 pages)
- PT-1290 (1 page)
- MFC 6890CDW (256 pages)
- DCP-585CW (132 pages)
- DCP-385C (2 pages)
- DCP-383C (7 pages)
- DCP-385C (122 pages)
- Pocket Jet6 PJ-622 (48 pages)
- Pocket Jet6 PJ-622 (32 pages)
- Pocket Jet6 PJ-622 (11 pages)
- Pocket Jet6Plus PJ-623 (76 pages)
- PT-2700 (62 pages)
- PT-2700 (90 pages)
- PT-2700 (180 pages)
- PT-2100 (58 pages)
- PT-2700 (34 pages)
- HL 5450DN (2 pages)
- DCP-8110DN (22 pages)
- HL 5450DN (168 pages)
- HL 5450DN (2 pages)
- DCP-8110DN (13 pages)
- HL 5470DW (34 pages)
- HL-S7000DN (9 pages)
- HL 5470DW (30 pages)
- MFC-J835DW (13 pages)
- DCP-8110DN (36 pages)
- HL 5470DW (177 pages)
- HL 5450DN (120 pages)
- HL-6050DN (138 pages)
- HL-6050D (179 pages)
- HL-6050D (37 pages)
- HL-7050N (17 pages)
- PT-1280 (1 page)
- PT-9800PCN (104 pages)