2 layout at site, 3 lacing instructions – Anchor CENTURY 60 WIDE User Manual
Page 9
9
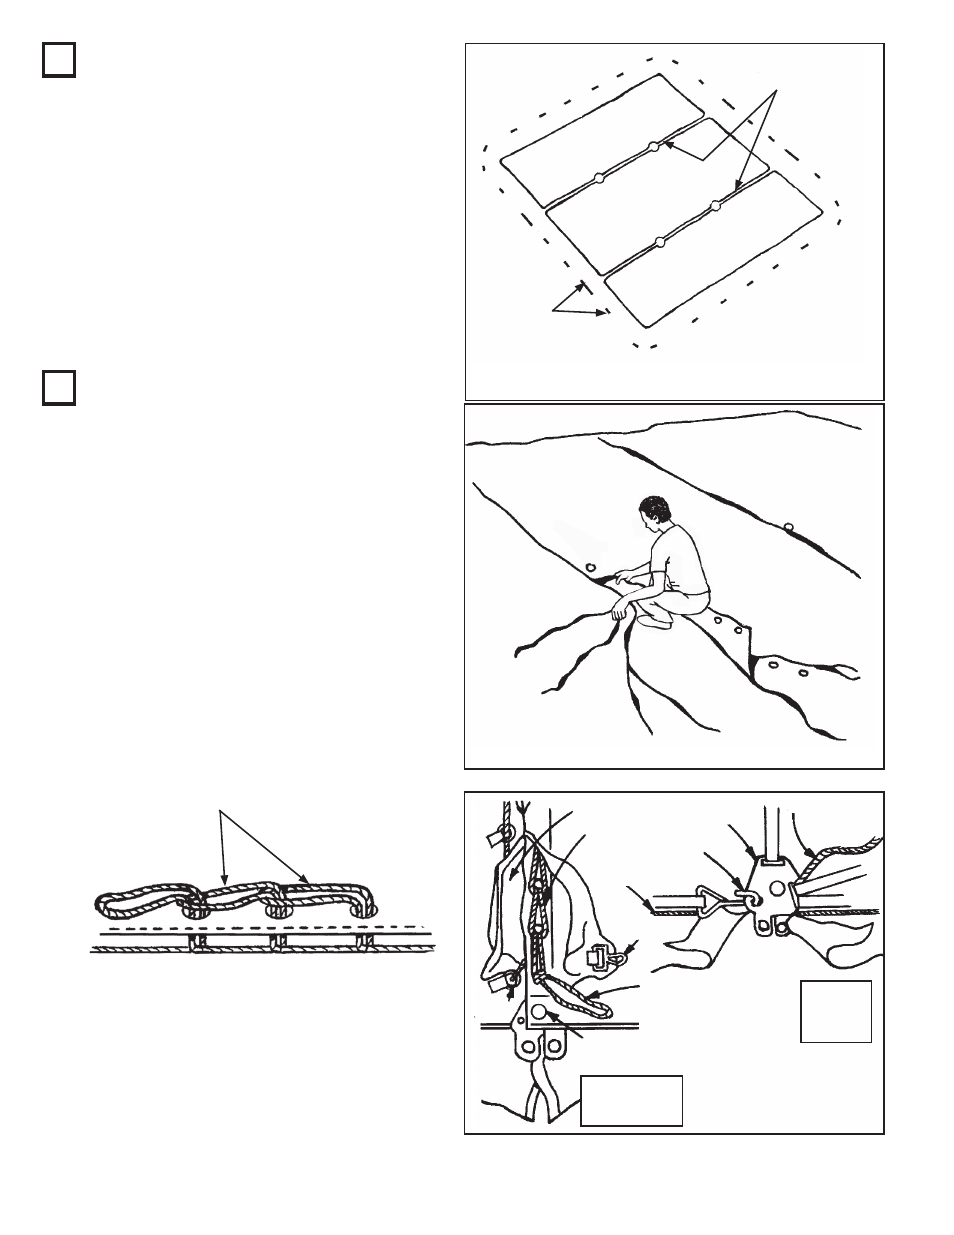
2 LAYOUT AT SITE
Drive stakes at points located. Each 2’
stake bar requires 3 stakes. A 4’ stake bar
requires 6 stakes.
Spread drop cloths and unroll tent.
Any objects with sharp projections which
must remain on site under the tent should
be padded and taped.
NOTE: Both Loop side and hole side of
sections are required for proper lace.
LACE
END
MIDDLE
END
3 LACING INSTRUCTIONS
With tent sections on ground, overlap cen-
ter pole holes with grommet side on top.
Lace between center pole holes first. Push
first loop up through corresponding grom-
met. Continue, passing each loop through
a grommet and the preceding loop. See
illustration below.
Continue lacing process and cover lacing
with protective rain flaps by velcroing the
short flap first, then snapping the top flap to
the rope as you move toward other center
pole hole.
Tie off last long loop.
LACE LOOPS
Then lace from center pole to eave on
both sides of tent. Tie off last long loop.
Align plates and attach hook to plates on
inside of tent, as shown.
MIDDLE
END
CENTER POLE
HOLE
END
FLAP
LACE ROPE
HOOK
PLATE
JUMP ROPE
WALL ROPE
SNAP
LAST
LACING
LOOP
POLE HOLE
RING
VIEW FROM
OUTSIDE
VIEW
FROM
INSIDE
SEE WEB GUY LAYOUTS FOR
STAKING CONFIGURATIONS.
STAKE
BARS