Led t8 tube – American Lighting LT8-4841-1700 User Manual
Page 4
RV-1333
Page 4 of 4
LED T8 Tube
Installation instructions for LT8-4841-1700
©2013 American Lighting
Denver, CO 80231 Made in China
www.americanlighting.com
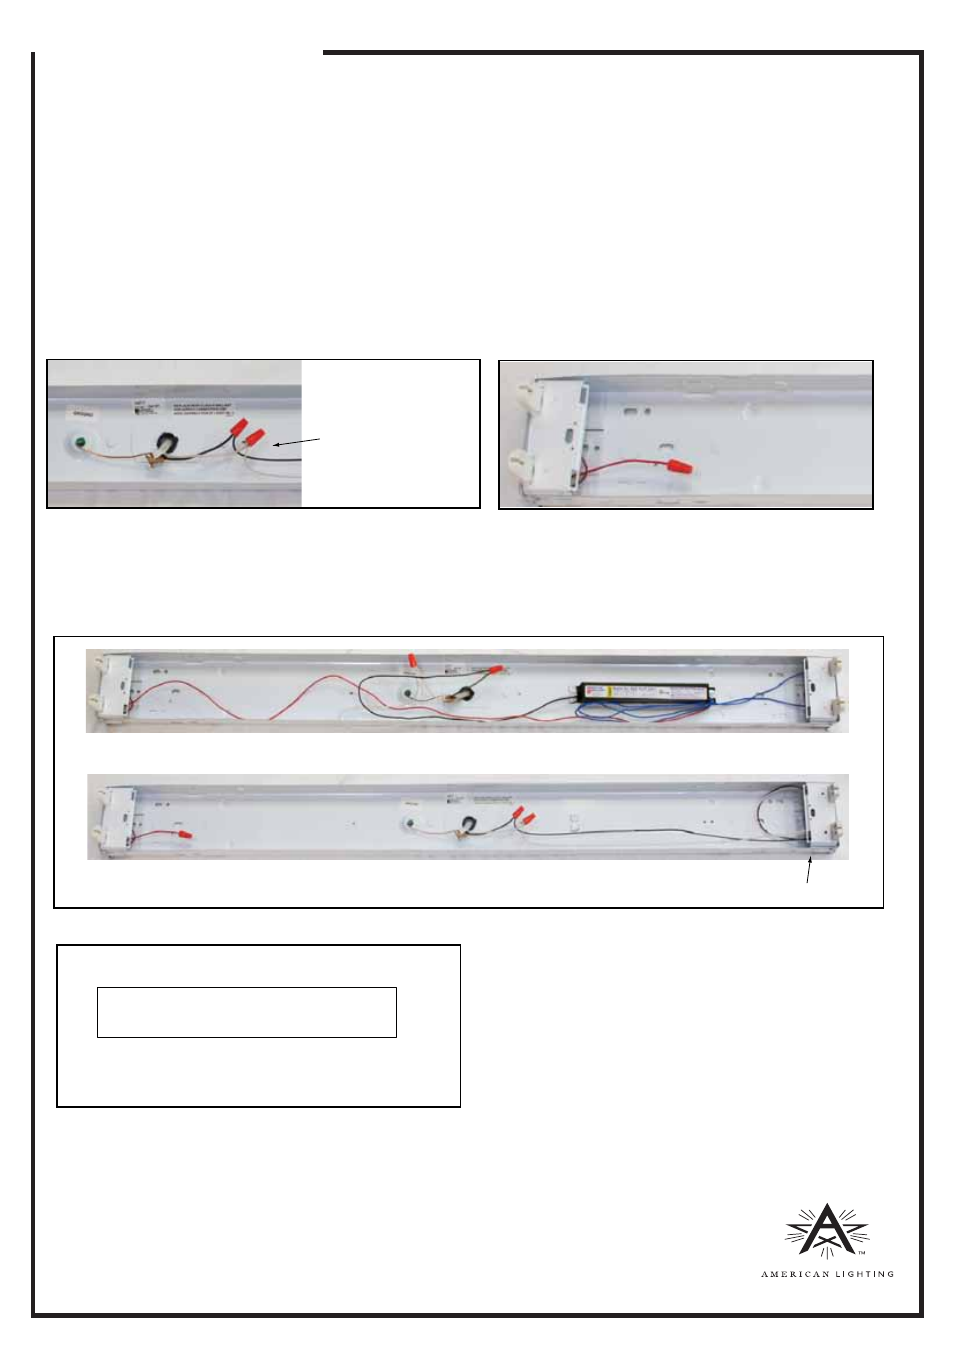
11. Attach lead wires from new sockets to supply wires, making sure to match polarity (connect black to black and white to white),
using appropriate UL Listed wire nuts. See Figure 8.
12. Cut back any remaining wires from the socket(s) at the “dead end” and cap off with a UL Listed wire nut. Leave this socket
in place to hold the LED T8 Tubes. See Figure 9.
13. Replace ballast cover.
14.
IMPORTANT: Install the fixture modification label “This luminaire has been modified and can no longer operate the
originally intended lamp” inside the fixture in an easily visible location to anyone changing lamps, possibly on the
cover over the wiring channel. See Figure 10 below.
15. Replace any lenses that were removed.
16. Turn back on power supply.
Figure 8
Figure 9
Attach lead wires from
sockets to supply wires,
making sure to match
polarity (connect black to
black and white to white.)
NON-SHUNTED SOCKET INSTALLATION AND FIXTURE MODIFICATION (continued from previous page)
Cut back remaining
wires and cap off. Leave
the sockets at the dead
end in place to hold the
LED T8 Tubes.
REFERENCE BEFORE AND AFTER FOR A RETROFIT FOR T8 TUBES INTO A BALLASTED T8 LUMINAIRE
BEFORE (WITH BALLAST AND ORIGINAL LAMPHOLDERS)
AFTER (WITH BALLAST REMOVAL AND NON-SHUNTED LAMPHOLDERS) INSTALLATION AT LIVE END
THE END RETROFIT LUMINAIRE HAS BEEN MODIFIED AND CAN NO LONGER
OPERATE THE ORIGINAL INTENDED LAMP(S).
Always connect ground lead to fixture where applicable.
Figure 10
IMPORTANT! Install the fixture modification
label in an easily visible location.
This luminaire has been modified and can
no longer operate the originally intended lamp