External network access – AirLive WIAS-1200G User Manual
Page 166
AirLive WIAS-1200G
User’s Guide
158
y
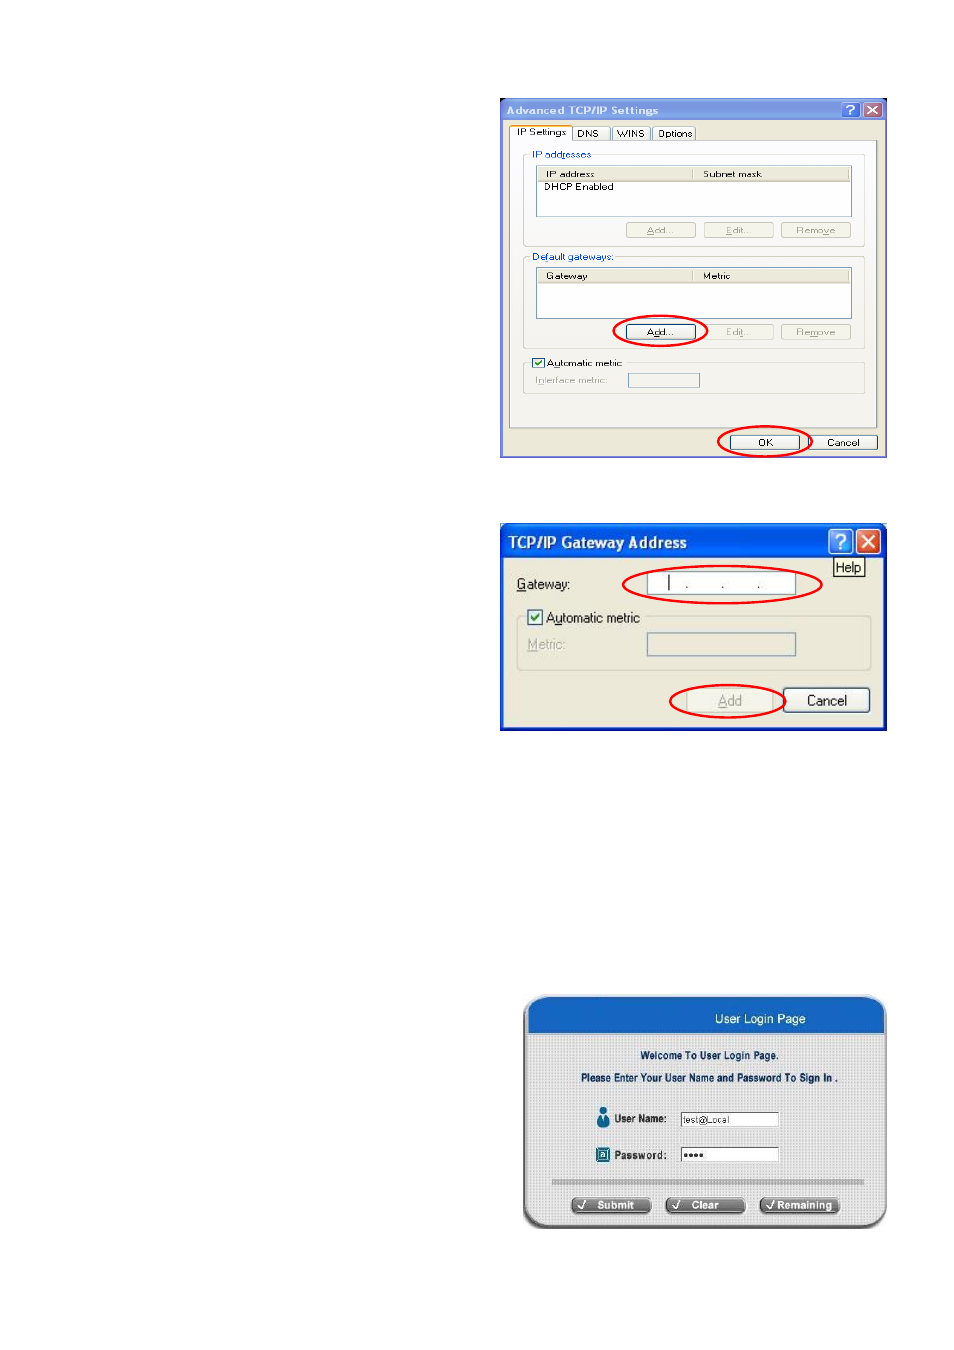
Choose
the
“IP Settings”
label and click
“Add”
below the “Default Gateways”
column and the “TCP/IP Gateway
Address”
window will appear. Enter the
gateway address of AirLive WIAS-1200G in
the “Gateway” of “TCP/IP Gateway
Address”
window, and then click Add. After
back to the “IP Settings” label, click OK to
finish.
2. External Network Access
If all the steps are set properly, AirLive WIAS-1200G can be further connected to the managed network to
experience the controlled network access environment. Firstly, connect an end-user device to the network at AirLive
WIAS-1200G’s LAN1/LAN2 and set to obtain an IP address automatically. After the network address is obtained at
the user end, open an Internet browser and link to any website. Then, the default logon webpage will appear in the
Internet browser.
1) First, connect a user-end device to LAN3/LAN4 port of the
AirLive WIAS-1200G, and set the dynamical access
network. After the user end obtains the network address,
please open an Internet browser and the default login
webpage will appear on the Internet browser.
Key in the username and password created in the local
user account or the on-demand user account in the
interface and then click Submit button. Here, we key in