2 wall mount installation – AirLive Air3G User Manual
Page 19
2. Install the AIR3G
AirLive Air3G User’s Manual
12
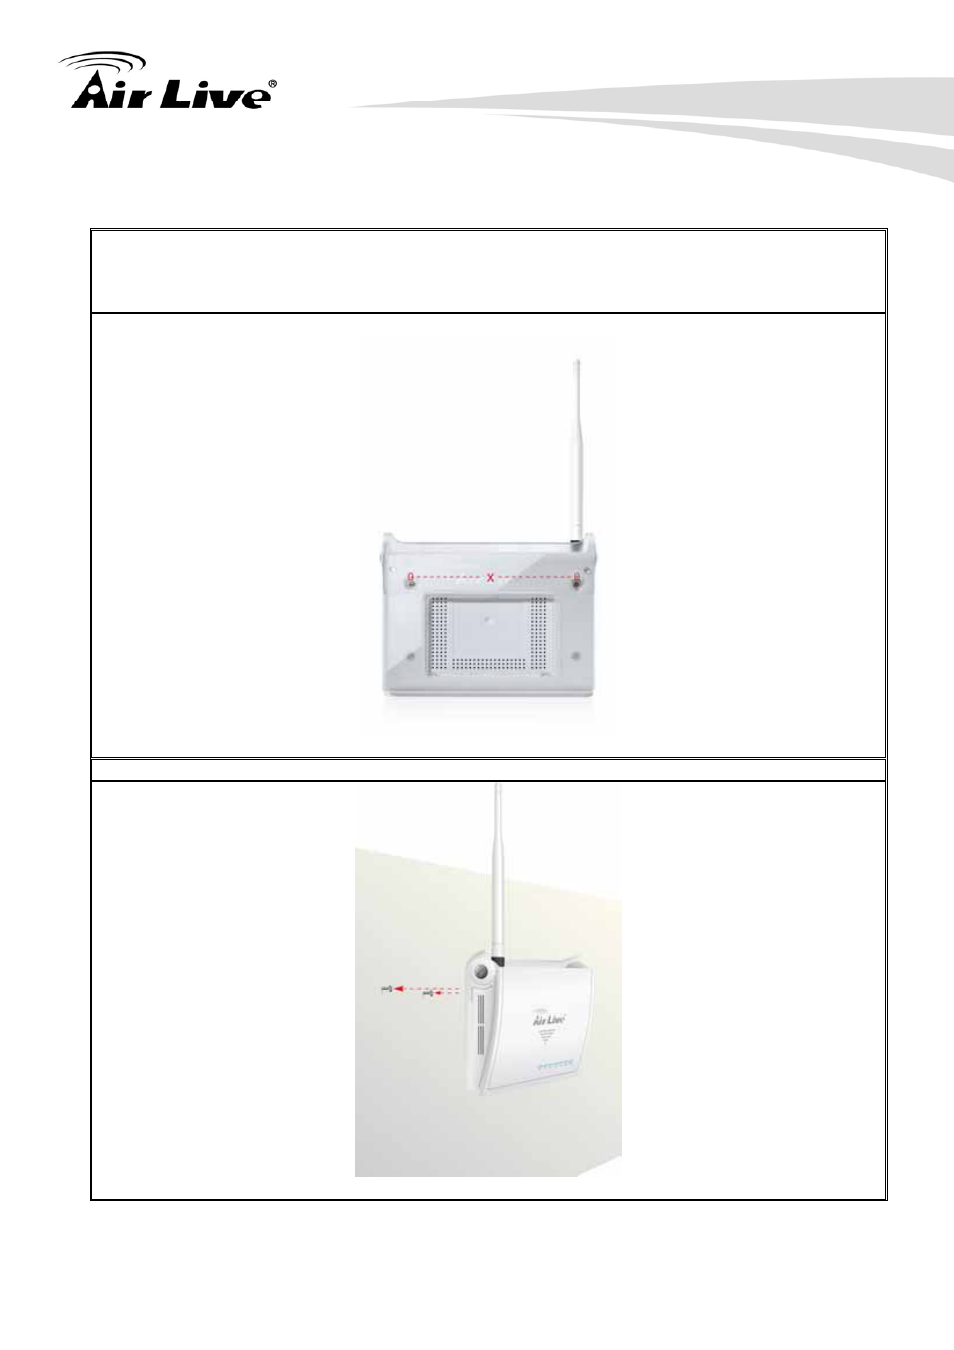
2.4.2 Wall Mount Installation
1. The holes for the wall mount screw are on the underside of the case. Please measure the
distance between the holes. Then install 2 screws in the desire location with the measured
distance apart from each other. Please do not screw all the way in, leave some space for
mounting with the Air3G
2. Now please hang the Air3G on those 2 screws.
See also other documents in the category AirLive Routers:
- A.DUO (189 pages)
- Air3GII (75 pages)
- Air4G (87 pages)
- ARM-104 v3 (148 pages)
- ARM-201 (81 pages)
- ARM-204E (60 pages)
- ARM-204 (77 pages)
- ARM-204 v2 (77 pages)
- GW-300NAS (75 pages)
- GW-300R (94 pages)
- IP-1000R (63 pages)
- IP-1000R v2 (49 pages)
- IP-2000VPN (177 pages)
- N.Power (103 pages)
- N450R (108 pages)
- Traveler3G (124 pages)
- Traveler3G II (97 pages)
- Traveler3GM (121 pages)
- VoIP-400R Series (56 pages)
- WL-1500R (60 pages)
- WL-1600GL (115 pages)
- WL-5470AP (50 pages)
- WMM-3000R (97 pages)
- WN-151ARM (119 pages)
- WN-200R (95 pages)
- WN-200USB (56 pages)
- WN-220ARM (72 pages)
- WN-220R (81 pages)
- WN-250R (160 pages)
- WN-250USB (60 pages)
- WN-300ARM-VPN (131 pages)
- WN-300R (110 pages)
- WN-301R (110 pages)
- WN-350R (176 pages)
- WN-5000R v2 (107 pages)
- WT-2000ARM (65 pages)
- WT-2000R (99 pages)