Smpp basic configuration – step by step – 2N VoiceBlue Next v3.7 User Manual
Page 70
70
1.
a.
b.
2.
a.
b.
c.
d.
3.
a.
b.
SMPP Basic Configuration – Step by Step
This section helps you define the basic parameters for SMS sending/receiving via SMPP
in
. Read the
subsection carefully before setting
2N VoiceBlue NEXT
®
details.
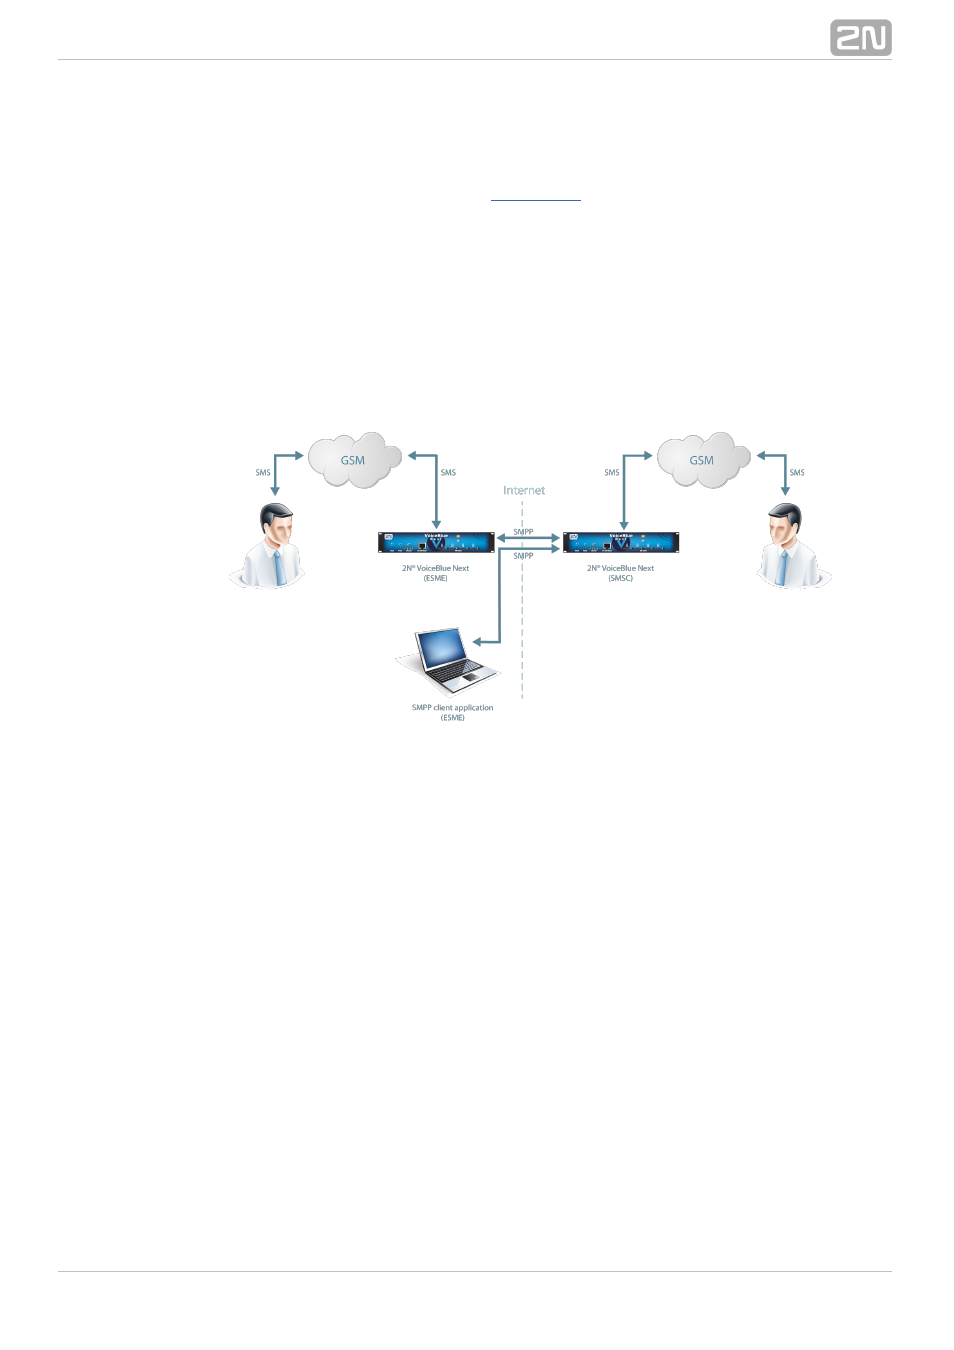
shows sending/receiving SMS via SMPP. Having created user accounts in
Figure 1
2N
, the users can send/receive SMS via SMPP. The figure shows an
VoiceBlue NEXT
®
example with two SMSC accounts created in
(to the right).
2N VoiceBlue NEXT
®
Another
(ESME) gateway and a PC on which the SMPP (ESME)
2N VoiceBlue NEXT
®
application is running are connected to these accounts via SMPP. An SMS coming to 2N
via SMPP is routed according to the gateway outgoing routing rules
VoiceBlue NEXT
®
and sent to GSM. An SMS coming from GSM is routed according to the gateway
incoming routing rules and sent to the destination via SMPP.
SMPP Communication
Figure 1:
Take the following basic steps in
to enable SMS
2N VoiceBlue NEXT
®
sending/receiving:
In the
/
menu:
Messaging
SMS grouping
Assign the selected GSM modules to the SMS groups (according to the GSM
provider and SIM cards with identical tariffs, for example).
Assign the SMS groups created in step 1.a above to the User groups if you
use messaging with different routing rules to different company
departments, for example.
Add users in the
menu:
Messaging / Users
Add
/
Assign the user to a
.
User group
Set
.
Access type: SMPP (SMSC)
Set
and
to access the GSM gateway SMS server via
Sy stem ID
Password
ESME.
Set
.
TCP type: server
Create the incoming SMS routing rules in the Messaging
User Group /
/
menu:
General settings / Incoming SMS routing / Add
Select the group to receive the SMS via the Message from SMS group
menu.
Select the
to define how to process incoming SMS. Example:
A ction type