Warning, 9 chute extension tray, 8 chipper chute – Echo 76824 Owners Manual v.2 User Manual
Page 14
PN 18280-00 R041306
12
ASSEMBLY
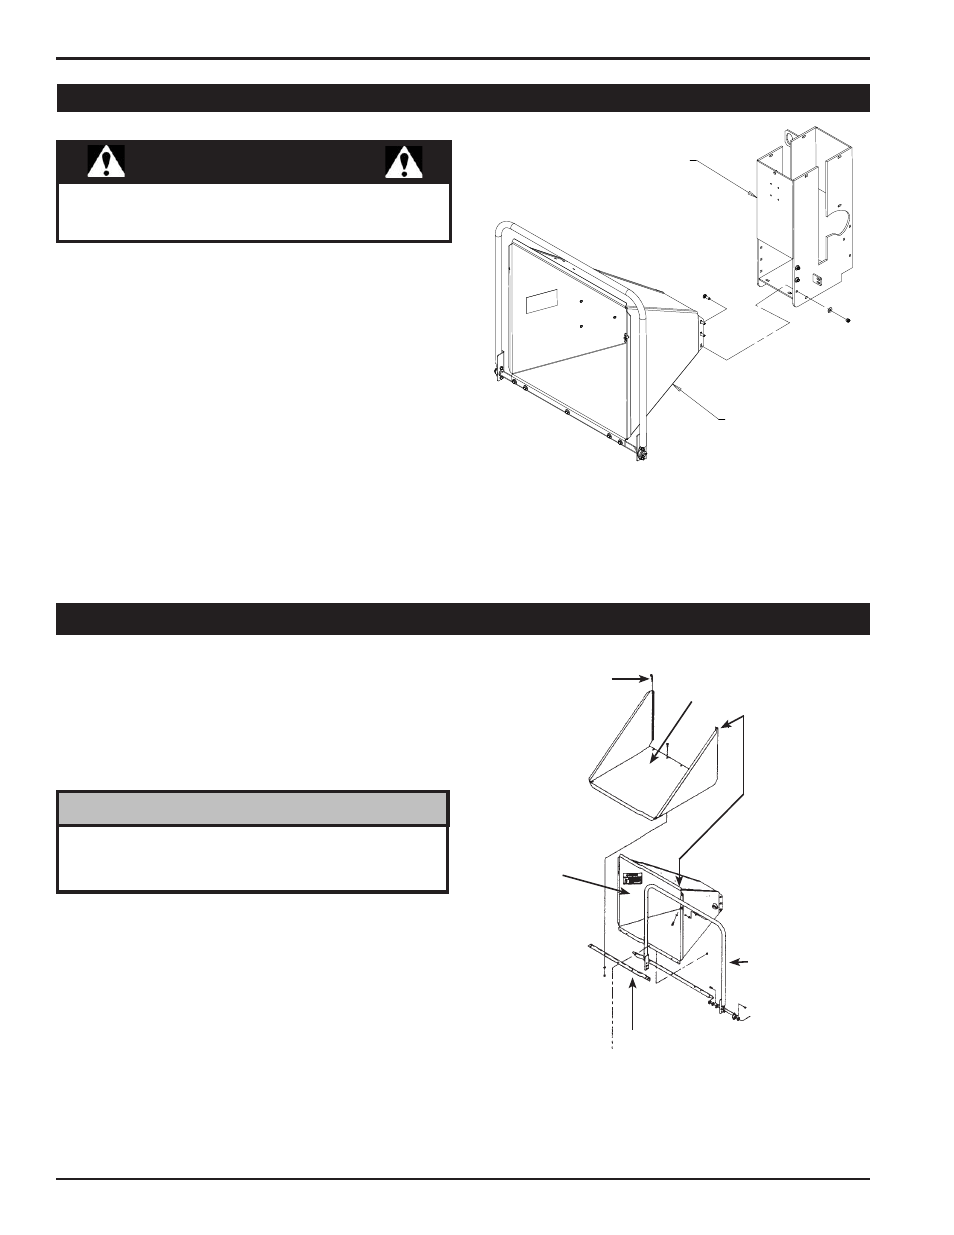
2.9 chuTE EXTENsIoN TRAY
The Chute Extension Tray is an optional item and purchased
separately for domestic models.
The Chute Extension Tray is standard on S & F models.
After mounting the chipper chute to the chipper housing,
slide the chute extension tray over the chipper chute as
shown in Figure 2.2.
Align the five bolt holes in the chute extension tray with the
bolt holes in the extension hinge.
Insert a 3/8" x 1" carriage bolt (included in owner's kit) through
the two outside holes on the extension tray and the extension
hinge. Secure the bolts with washers and nuts.
Insert one 3/8" x 1" carriage bolt through the end of the chute
support and middle holes on the extension hinge and exten-
sion tray. Secure the bolts with washer and nuts. Secure
1.
2.
3.
4.
Figure 2.2 - Chute Extension Tray Assembly.
hairpin Clip
Feed Control
Lever
C h i p p e r
Chute
E x t e n s i o n
hinge
E x t e n s i o n
Tray
Position this lip
behind the lip
on the chipper
chute
shown
below. hold the
extension tray
directly above
the
chipper
chute and slide
it downward.
2.8 chIppER chuTE
Mount the chipper chute to the chipper housing using eight 3/8"
x 1" bolts and locknuts. use three bolts on each side and two on
the bottom (Figure 2.1).
To insert the top bolts, rotate the feed roller until the notches
(one on each side) on the feed roller are aligned with the top
bolt holes.
Do not operate this unit without the chipper chute correctly
installed. Rotating cutting blades can cause serious person-
al injury.
WARNINg
Figure 2.1 - Chipper Chute Assembly
CHIPPER CHUTE
HYDRAULIC FEED
Make sure that you position the lip on the extension tray be-
hind the lip on the chipper chute. This provides a flatter sur-
face and prevents obstructions while feeding the machine.
NoTE